Deploying the OPEA QnA chat accelerated with AMD Instinct pattern
Prerequisites
An OpenShift Container Platform (4.16-4.18) cluster. If you do not have a running Red Hat OpenShift cluster, you can start one on a public or private cloud by visiting Red Hat Hybrid Cloud Console.
select Services -> Containers -> Create cluster.
OpenShift Container Platform Cluster must have a configured Image Registry.
A GitHub account and Personal Access Token with permissions to read/write to forks.
A HuggingFace account and User Access Token, which allows to download AI models.
Contact information shared in order to access Meta’s
Llama-3.1-8B-Instructmodel with your HuggingFace account.Access to an S3 or Minio bucket for model storage purposes.
Install pattern tooling dependencies.
Model setup
If you prefer to use tools provided with this project for preparation of the prerequisite model, install OpenShift AI to leverage a workbench for notebook access.
If you are familiar with the steps necessary for downloading the If you prefer to run the provided notebooks in another environment, you can do so and skip to Clone code repository below for further instructions. OpenShift AI will be installed later during pattern execution. |
To install Red Hat OpenShift AI, refer to link: Installing and deploying OpenShift AI. To deploy the model, complete the following steps:
Open up Red Hat OpenShift AI by selecting it from the OpenShift Application Launcher. This opens up Red Hat OpenShift AI in a new tab.
In the Red Hat OpenShift AI window, select Data Science projects in the sidebar and click the Create project button.
Name the new project
chatqna-llm.
- Create a connection
To create a connection, complete the following steps. The connection will be used by init-container to fetch the model uploaded in next step when deploying the model for inferencing:
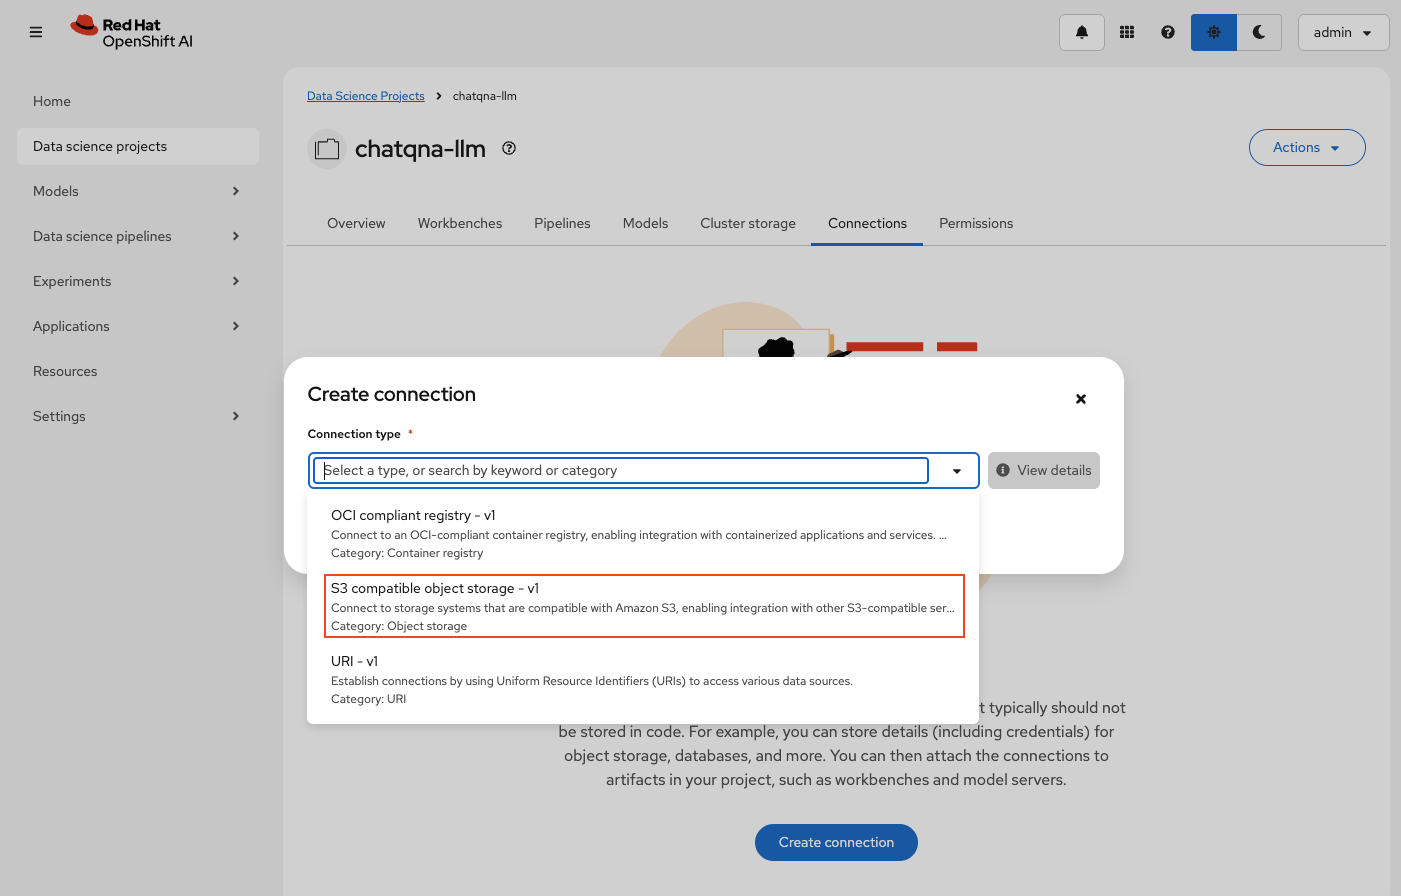
Click the Create connection button in the Connections tab in your newly created project
Select
S3 compatible object storage - v1in the Connection type dropdownUse the following values for this data connection:
Connection name:
model-storeConnection description:
Connection that points to the model store(you can provide any relevant description here)Access key: MinIO username if using MinIO, else use AWS credentials
Secret key: MinIO password if using MinIO, else use AWS credentials
Endpoint: minio-api route location, from OCP cluster, if using MinIO, else use AWS S3 endpoint that is in the format of
https://s3.<REGION>.amazonaws.comRegion:
us-east-1if using MinIO, otherwise use the correct AWS regionBucket:
modelsThis bucket will be created by the Jupyter notebook, if it does not exist, when uploading the model
If using AWS S3 and the bucket does not exist, make sure correct permissions are assigned to the IAM user to be able to create the bucket

- Create workbench
To upload the model that is needed for this pattern, you need to create a workbench first. In the chatqna-llm data science project, create a new workbench by clicking the Create workbench button in the Workbenches tab.
Use the following values to create the workbench:
Name:
chatqnaImage selection:
ROCm-PyTorchVersion selection:
2025.1Container size:
MediumAccelerator:
AMDCluster storage: Make sure the storage is at least 50GB
Connection: Click the Attach existing connections button and attach the connection named model-store created in the previous step. This will pass on the connection values to the workbench when it is started, which will be used to upload the model.
Create the workbench by clicking on the
Create workbenchbutton. This workbench will be started and will move toRunningstatus soon.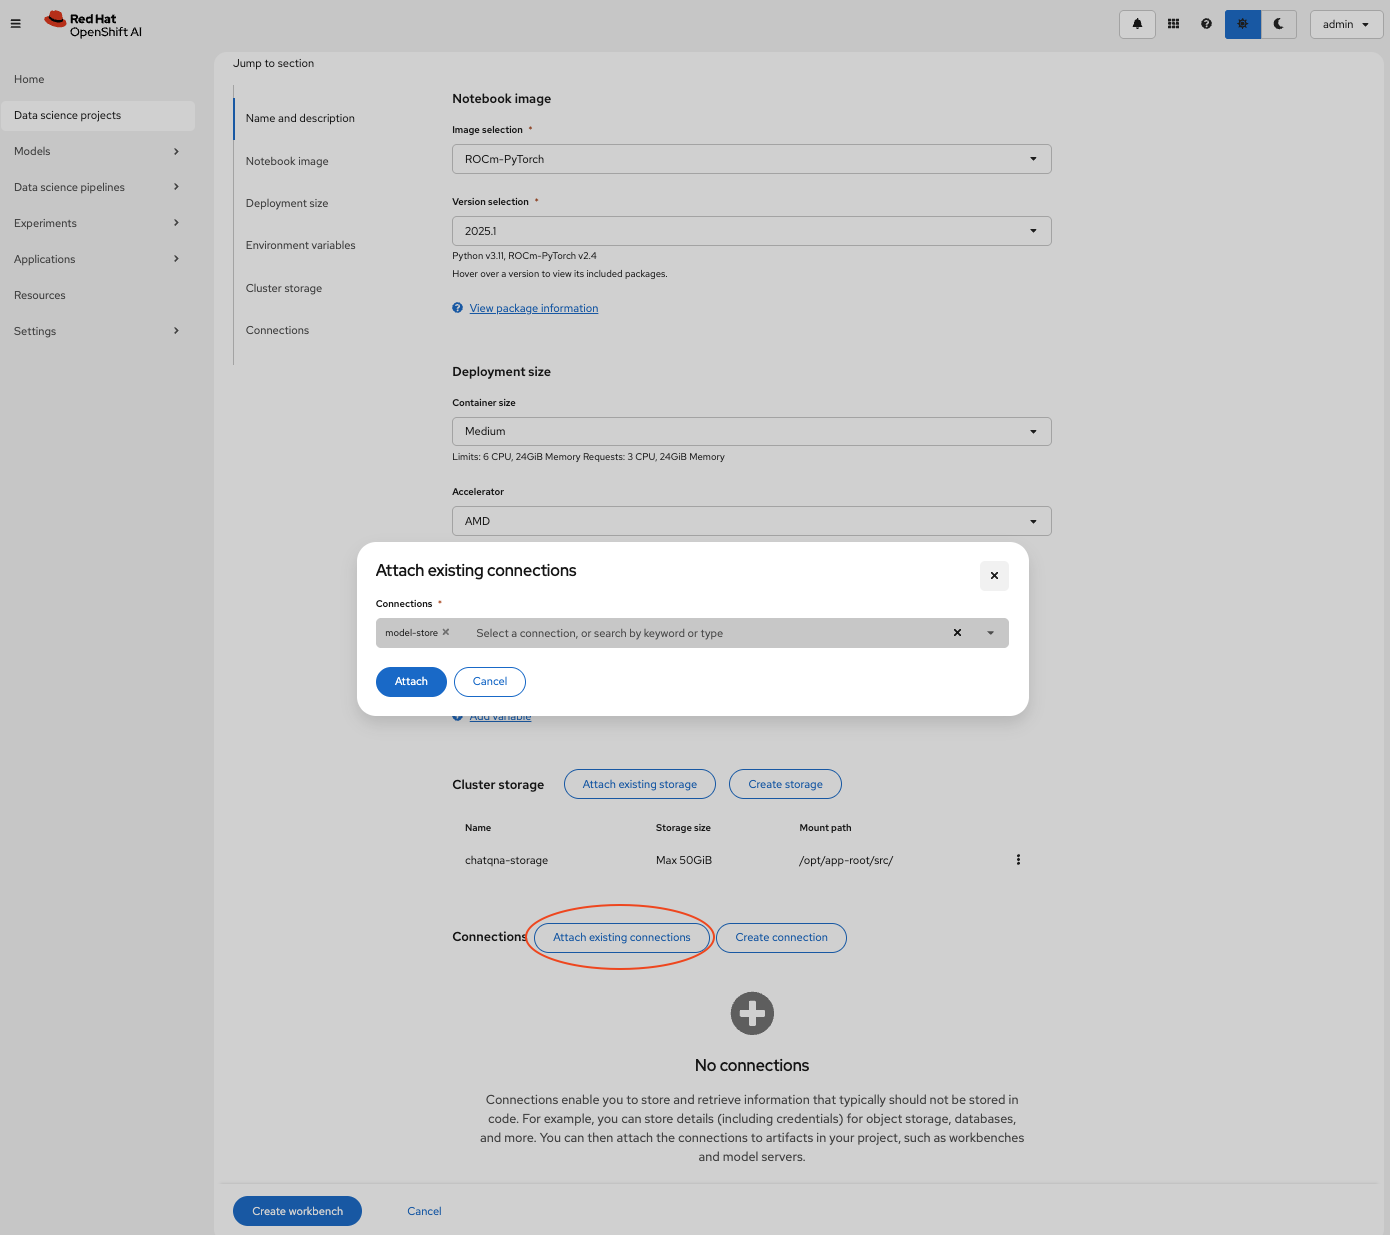
Upload model using Red Hat OpenShift AI
To serve the model, download the model using the workbench created in the previous step as well as upload it to either MinIO or AWS S3, using the connection named model-store created in one of the previous steps. Follow the steps given in this section to serve the model.
- Open workbench
Open workbench named
chatqnaby following these steps:Once
chatqnaworkbench is inRunningstatus, open the workbench by clicking on its name, inWorkbenchestabThe workbench will open up in a new tab
When the workbench is opened for the first time, you will be shown an Authorize Access page
Click
Allow selected permissionsbutton in this page
- Clone code repository
Now that the workbench is created and running, follow these steps to set up the project:
In the open workbench, click the
Terminalicon in theLaunchertab.Clone the following repository in the Terminal by running the following command:
git clone https://github.com/validatedpatterns-sandbox/qna-chat-amd.git
- Run Jupyter notebook
The notebook mentioned in this section is used to download the
meta-llama/Llama-3.1-8B-Instructmodel and upload it to either MinIO or AWS S3.After the repository is cloned, select the folder where you cloned the repository (in the sidebar) and open
scripts/model-setup/upload-model.ipynbjupyter notebookRun this notebook by running each cell one by one
When prompted for a HuggingFace token, provide the prerequisite User Access Token and click
Login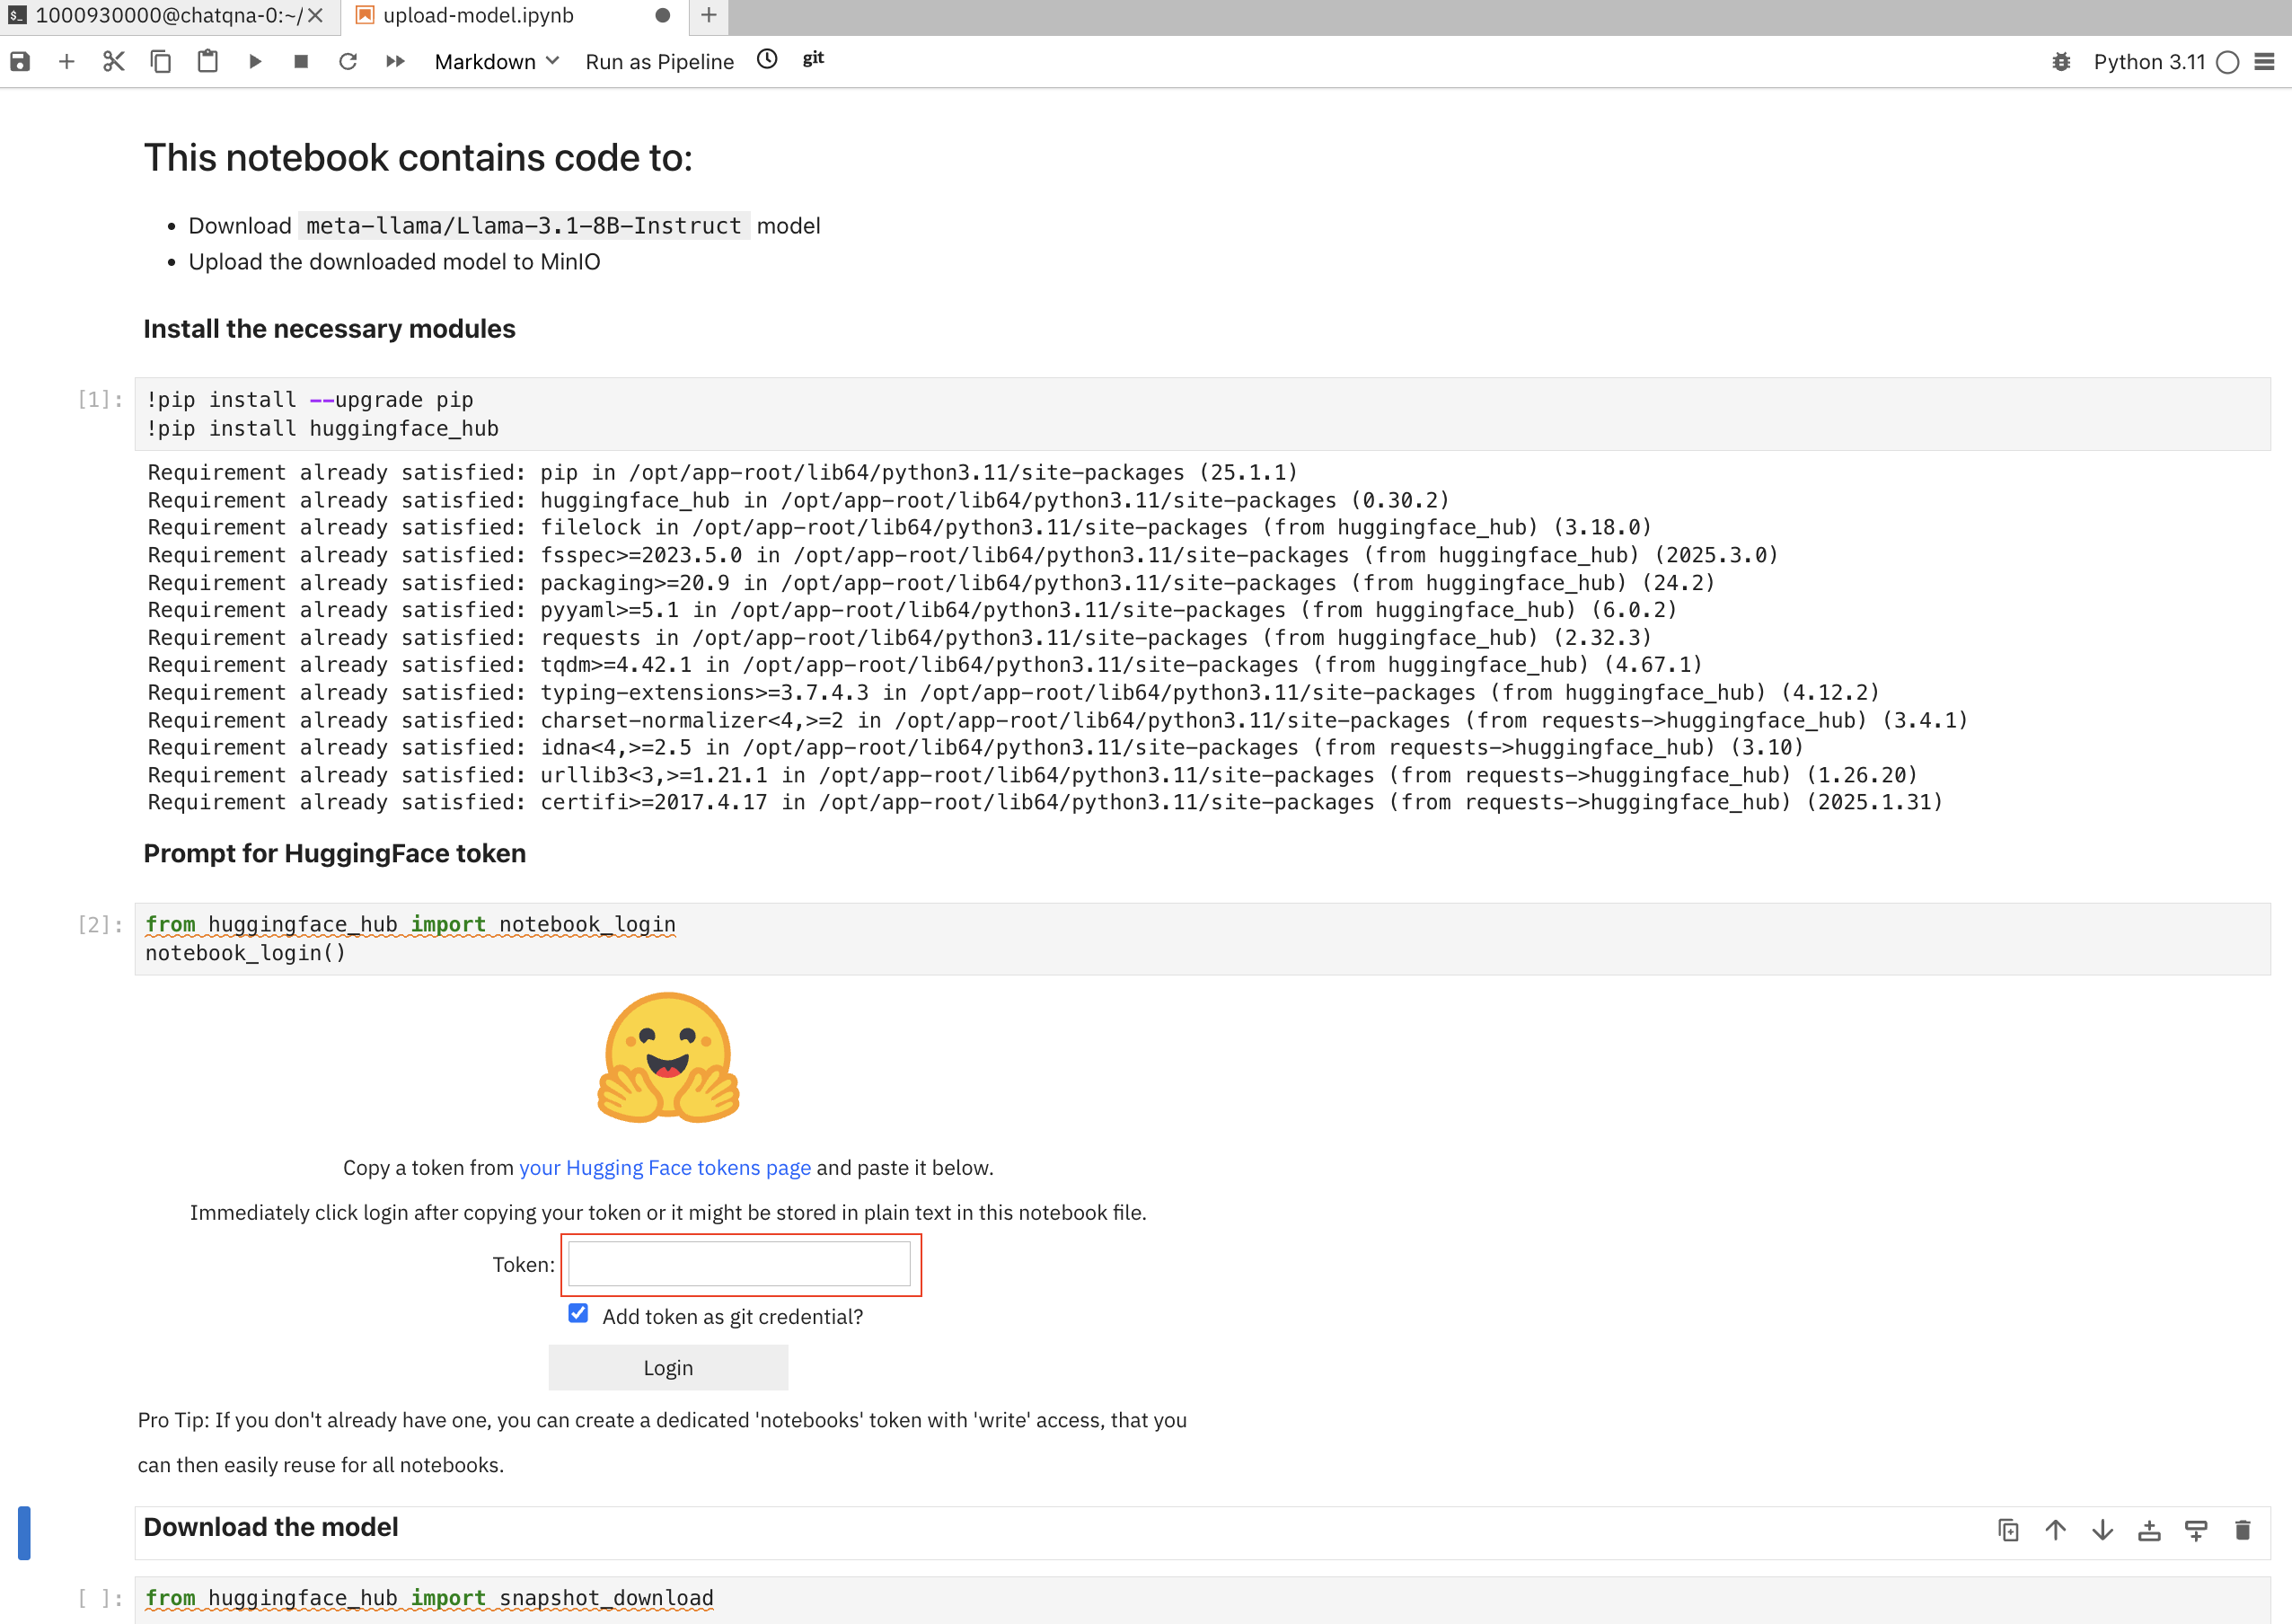
When the notebook successfully runs, llama model should have been uploaded to either MinIO or AWS S3 under Llama-3.1-8B-Instruct directory in models bucket
By default, this notebook will upload the model to MinIO. To choose AWS S3, modify the last cell in the notebook by changing the value of XFER_LOCATION to AWS as shown below:
XFER_LOCATION = 'MINIO'  <= current value
XFER_LOCATION = 'AWS'    <= modified to upload to AWS S3
Deploy model via Red Hat OpenShift AI
Once the initial notebook has run successfully and the model is uploaded, you can deploy the model by following these steps:
In the chatqna-llm data science project, select Models tab and click the Deploy model button and fill in the following fields as shown below:
Model name:
llama-31bServing runtime:
vLLM AMD GPU ServingRuntime for KServeModel framework:
vLLMDeployment mode:
AdvancedModel server size:
SmallAccelerator:
AMDModel route: Enable
Make deployed models available through an external routecheckboxSource Model location: Select
Existing connectionoptionName:
model-store(this is the name we used when we created the connection inCreate Connectionstep)Path:
Llama-3.1-8B-InstructLocation where the model was copied to in the previous step
Click the Deploy to deploy this model.
Once the model is successfully deployed, copy the inference endpoint to use it in the ChatQnA application (it will take a few minutes to deploy the model).
Make sure the model name is set to
llama-31bas this is the value used in the deployment of llm microservice that invokes the inference endpoint.
Deploy ChatQnA application
This section provides details on installing the ChatQnA application as well as verifying the deployment and configuration by querying the application.
- Install ChatQnA app
Once all the prerequisites are met, install the ChatQnA application
Clone the repository by running the following commands:
git clone https://github.com/validatedpatterns-sandbox/qna-chat-amd.git
cd qna-chat-amd
Configure secrets for Hugging Face and inference endpoint
cp values-secret.yaml.template ~/values-secret-qna-chat-amd.yamlModify the
valuefield in~/values-secret-qna-chat-amd.yamlfilesecrets: - name: huggingface fields: - name: token value: null <- CHANGE THIS TO YOUR HUGGING_FACE TOKEN vaultPolicy: validatePatternDefaultPolicy - name: rhoai_model fields: - name: inference_endpoint value: null <- CHANGE THIS TO YOUR MODEL'S INFERENCE ENDPOINTDeploy the application
./pattern.sh make installThe above command will install the application by deploying the ChatQnA megaservice along with the following required microservices:
Dataprep
LLM text generation
Retriever
Hugging Face Text Embedding Inference
Embedding service
Reranker service
ChatQnA backend
ChatQnA UI
Processes for the build and installation of all the required services can take some time to complete. To monitor progress via the ArgoCD application dashboard, follow these steps:
Open ArgoCD dashboard, in a browser, using the URI returned
echo https://$(oc get route hub-gitops-server -n qna-chat-amd-hub -o jsonpath="{.spec.host}")Get the password
echo $(oc get secret hub-gitops-cluster -n qna-chat-amd-hub -o jsonpath="{.data['admin\.password']}" | base64 -d)Login to the ArgoCD dashboard
Username:
adminPassword: password from the previous step
- Verify ChatQnA app
Once the application is installed, we can add the knowledge base using a PDF and then query against that data by following these steps:
Run the following command to get the ChatQnA UI URI:
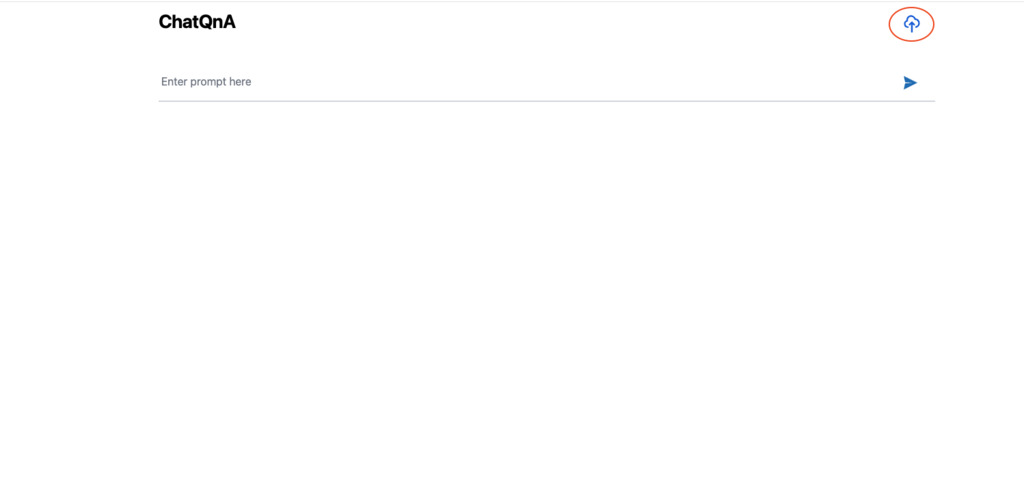
echo https://$(oc get route chatqna-ui-secure -n amd-llm -o jsonpath="{.spec.host}")Open ChatQnA UI, in a browser, by using the URI returned from above command
- Query ChatQnA without RAG
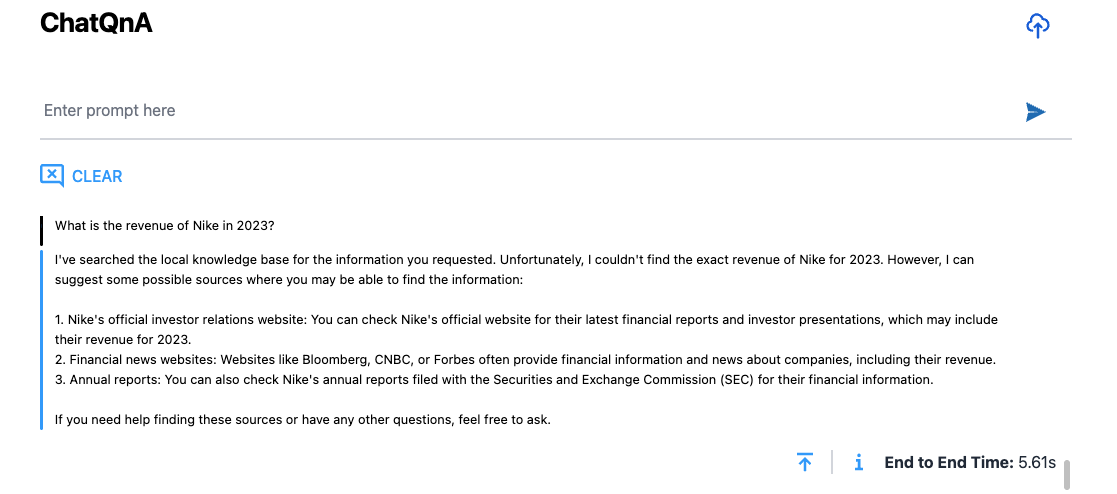
Type the following query at the prompt:
What is the revenue of Nike in 2023?Since we have not yet provided any external knowledge base regarding the above query to the application, it does not the correct answer to this query and returns a generic response:
- Query ChatQnA with RAG - add external knowledge base
In the ChatQnA UI, follow the steps given below to add an external knowledge base (Nike PDF) to perform the above query using RAG:
Click the upload icon in the top right corner
Click the Choose File button and select
nke-10k-2023.pdffrom scripts directory. When you select the pdf and close the dialog box, the upload will start automatically.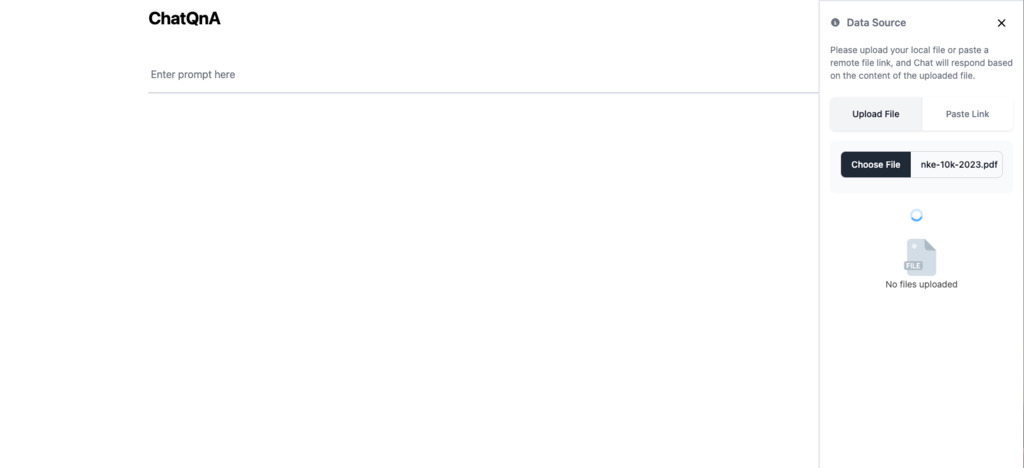
Allow a few minutes for the file to be ingested and processed, and uploaded to the Redis vector database
Refresh the page after a few minutes to verify the file has been uploaded
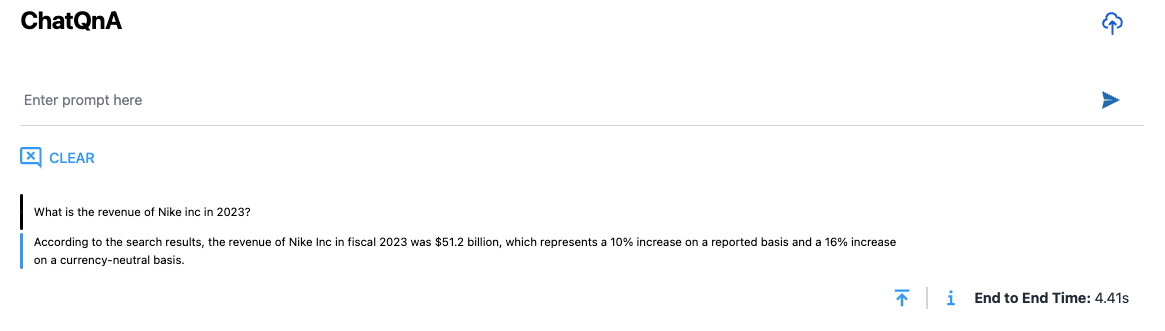
Type the following query at the prompt:
What is the revenue of Nike inc in 2023?The response for this query makes use of the Nike knowledge base, added in previous step, and is shown in the figure below:
- Query ChatQnA - remove external knowledge base
Follow the steps given in this section to remove the external knowledge base that was added to the app:
Click the upload icon in the top right corner
Move your cursor on top of the file in the Data Source section and click the trashcan icon that pops up in the top right corner of the file icon.
Select
Yes, I’m surewhen prompted with"Confirm file deletion?"dialog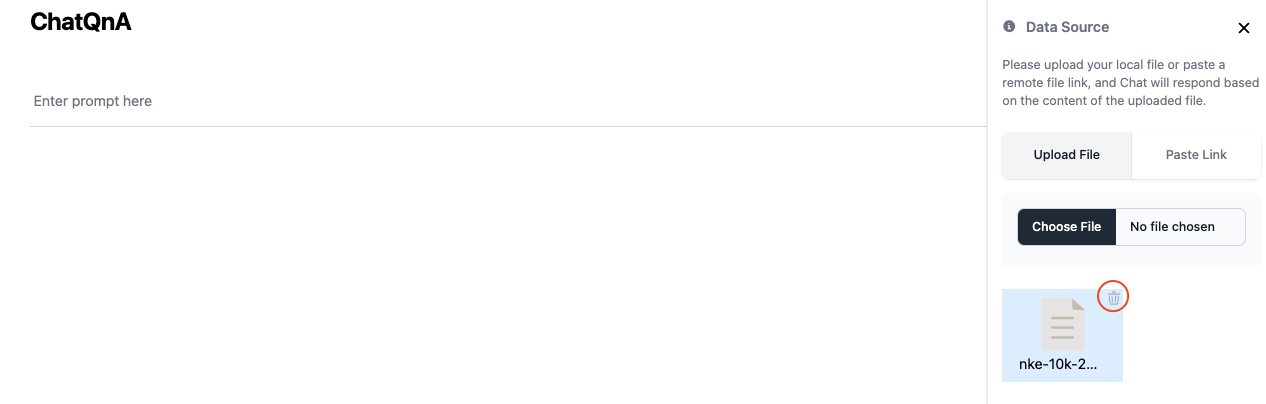
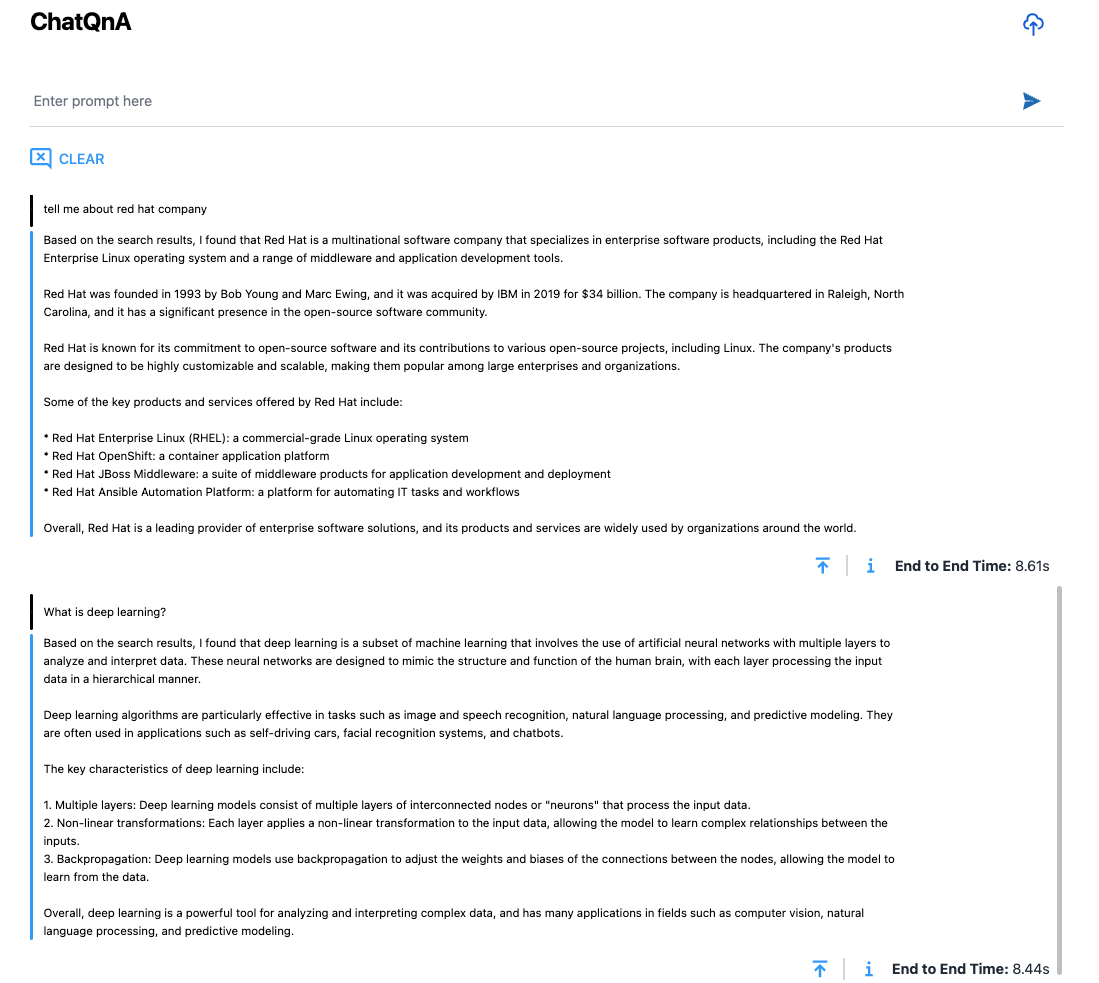
- Query ChatQnA - general questions
When the knowledge base is not added to the app, you can also use the application to ask general questions, such as:
Tell me more about Red Hat
What services does red hat provide?
What is Deep Learning?
What is a Neural Network?
Conclusion
In this article, we deployed Open Platform for Enterprise AI’s ChatQnA megaservice in Red Hat OpenShift Container Platform using Red Hat OpenShift AI and AMD hardware acceleration.
The ChatQnA application makes use of OPEA’s microservices to return RAG responses using external knowledge base (Nike pdf) as well as invoke Llama LLM when there is no external knowledge base present.
Installing and setting up the application was made easy with the use of a Validated Pattern that in turn uses ArgoCD for the CI/CD pipeline to deploy various components of the application as well as to keep them in sync with the git repository in case of any config changes.
Follow the links in the references section to learn more about the various technologies used in this article.
