Veeam Kasten
Veeam Kasten provides data protection and mobility for applications running on Red Hat OpenShift and offers many benefits:
- Kubernetes-native - Veeam Kasten is GitOps-ready and not dependent on external, legacy backup infrastructure
- Easy of Use - Full user interface and enterprise support
- Immutable Backups - Supported with AWS S3, Azure Blob, Google Cloud Storage, and S3-compliant solutions supporting Object Lock
- Blueprints - Orchestration framework for producing data consistent backups
- Transforms - Enabling mobility across clusters by allowing transformation of manifest details during restore operations
- Velocity - Bi-weekly releases of Veeam Kasten enable rapid support of new versions of OpenShift, security patches, and continuous innovation
Veeam Kasten also features robust support for OpenShift Virtualization workloads, including the ability to perform export incremental backups of raw block mode PVCs. Block mode PVCs are common for OpenShift Virtualization deployments as they provide the best performance with least overhead for VMs, and more importantly can be configured in ReadWriteMany (RWX) access mode on many SAN platforms. ReadWriteMany access mode is required for VMs to enable live migration between nodes, a must-have capability for any production environment.
Getting Started
If you are unfamiliar with Veeam Kasten, follow the steps below to access and explore the Dashboard user interface.
Logging In
In the OpenShift Console, open Networking > Routes.
Under
All Projectsorkasten-io, open the URL fork10-routein a separate browser tab.If prompted, click Allow Selected Permissions to authorize Kasten to read account details from the OpenShift OAuth server.
You will be logged in to the Kasten Dashboard as the currently authenticated OpenShift console user.
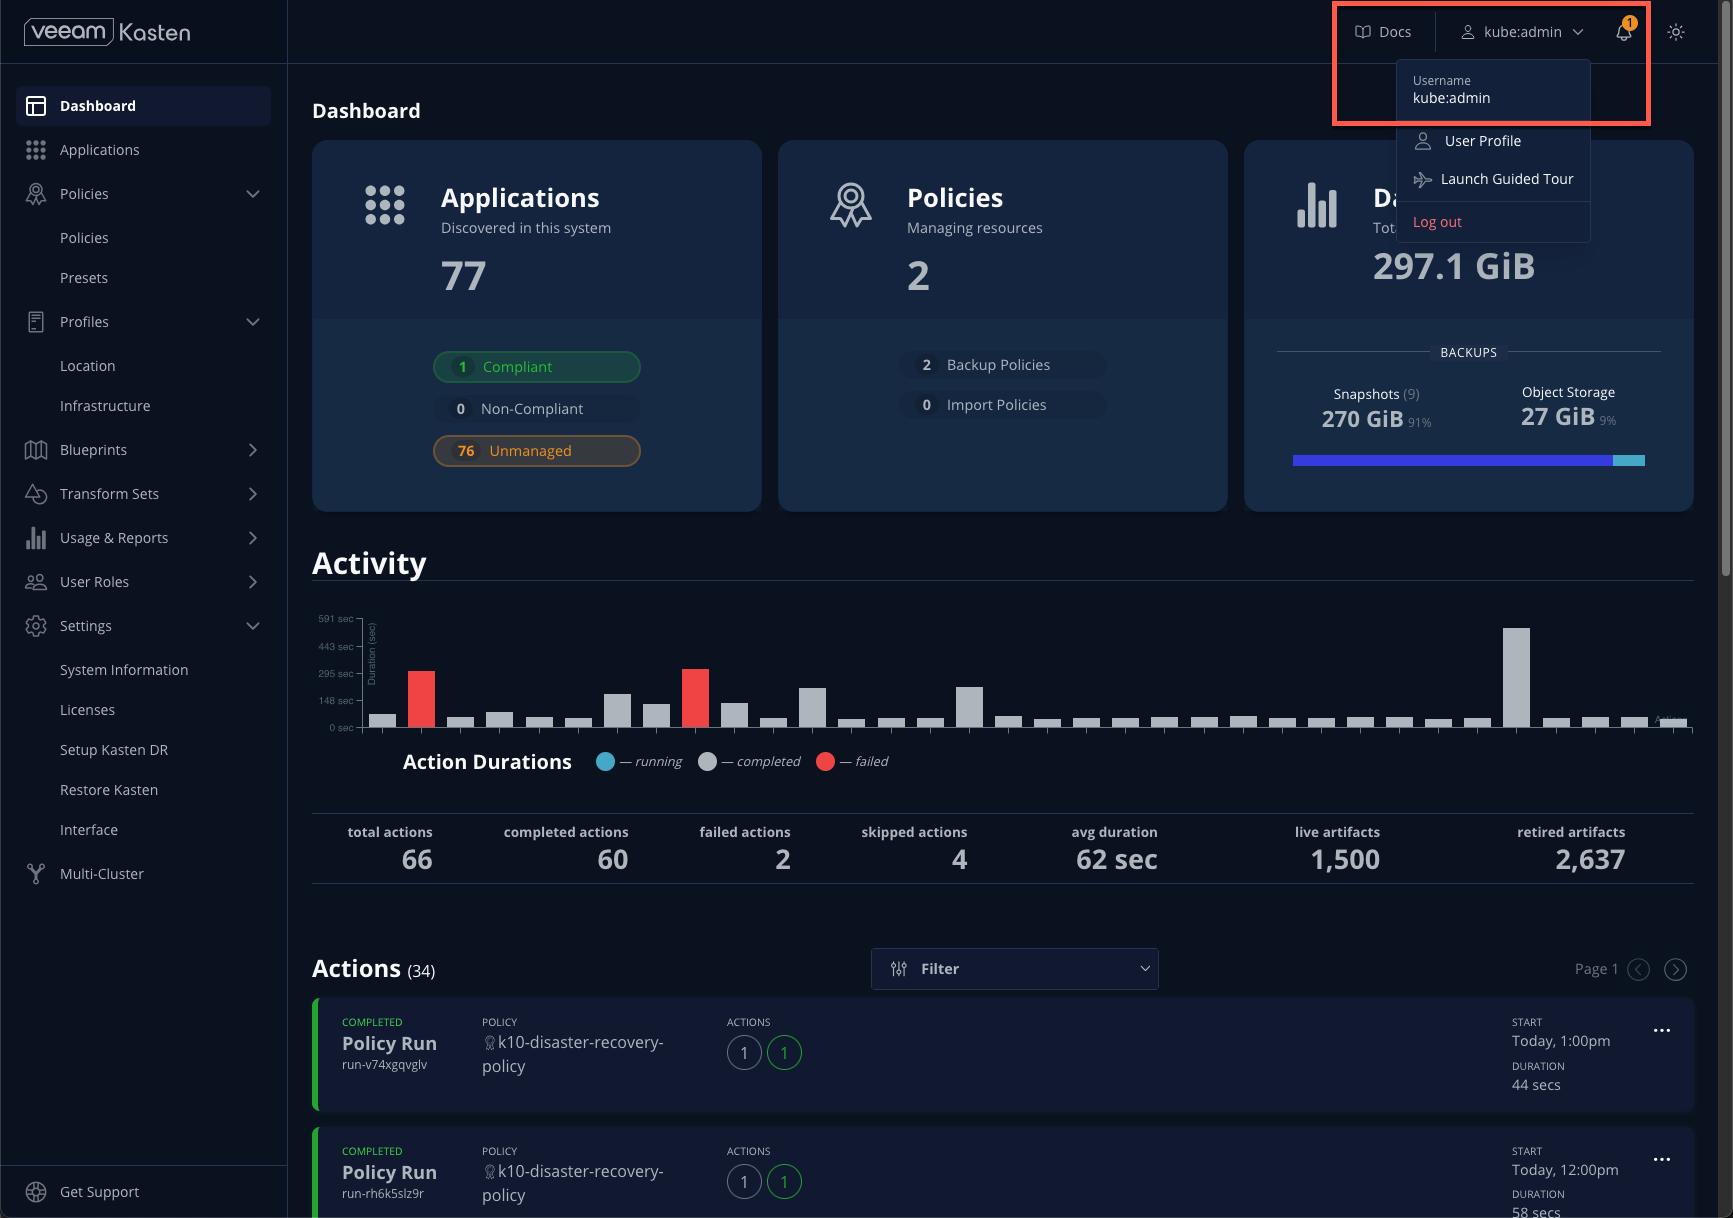
NOTE: Unless the current user account has cluster-admin privileges, additional privileges are required. The example below can be used to add an IDP user group to the existing kasten-io-k10-k10-admin and kasten-io-k10-k10-ns-admin bindings. See Kasten documentation for complete details.
oc patch clusterrolebinding kasten-io-k10-k10-admin \
  --type='json' \
  --patch='[{"op": "add", "path": "/subjects/1", "value": {"kind": "Group", "name": "admin-security-group-name"} }]'

oc patch rolebinding kasten-io-k10-k10-ns-admin \
  --namespace kasten-io \
  --type='json' \
  --patch='[{"op": "add", "path": "/subjects/1", "value": {"kind": "Group", "name": "admin-security-group-name"} }]'
Tour
Dashboard
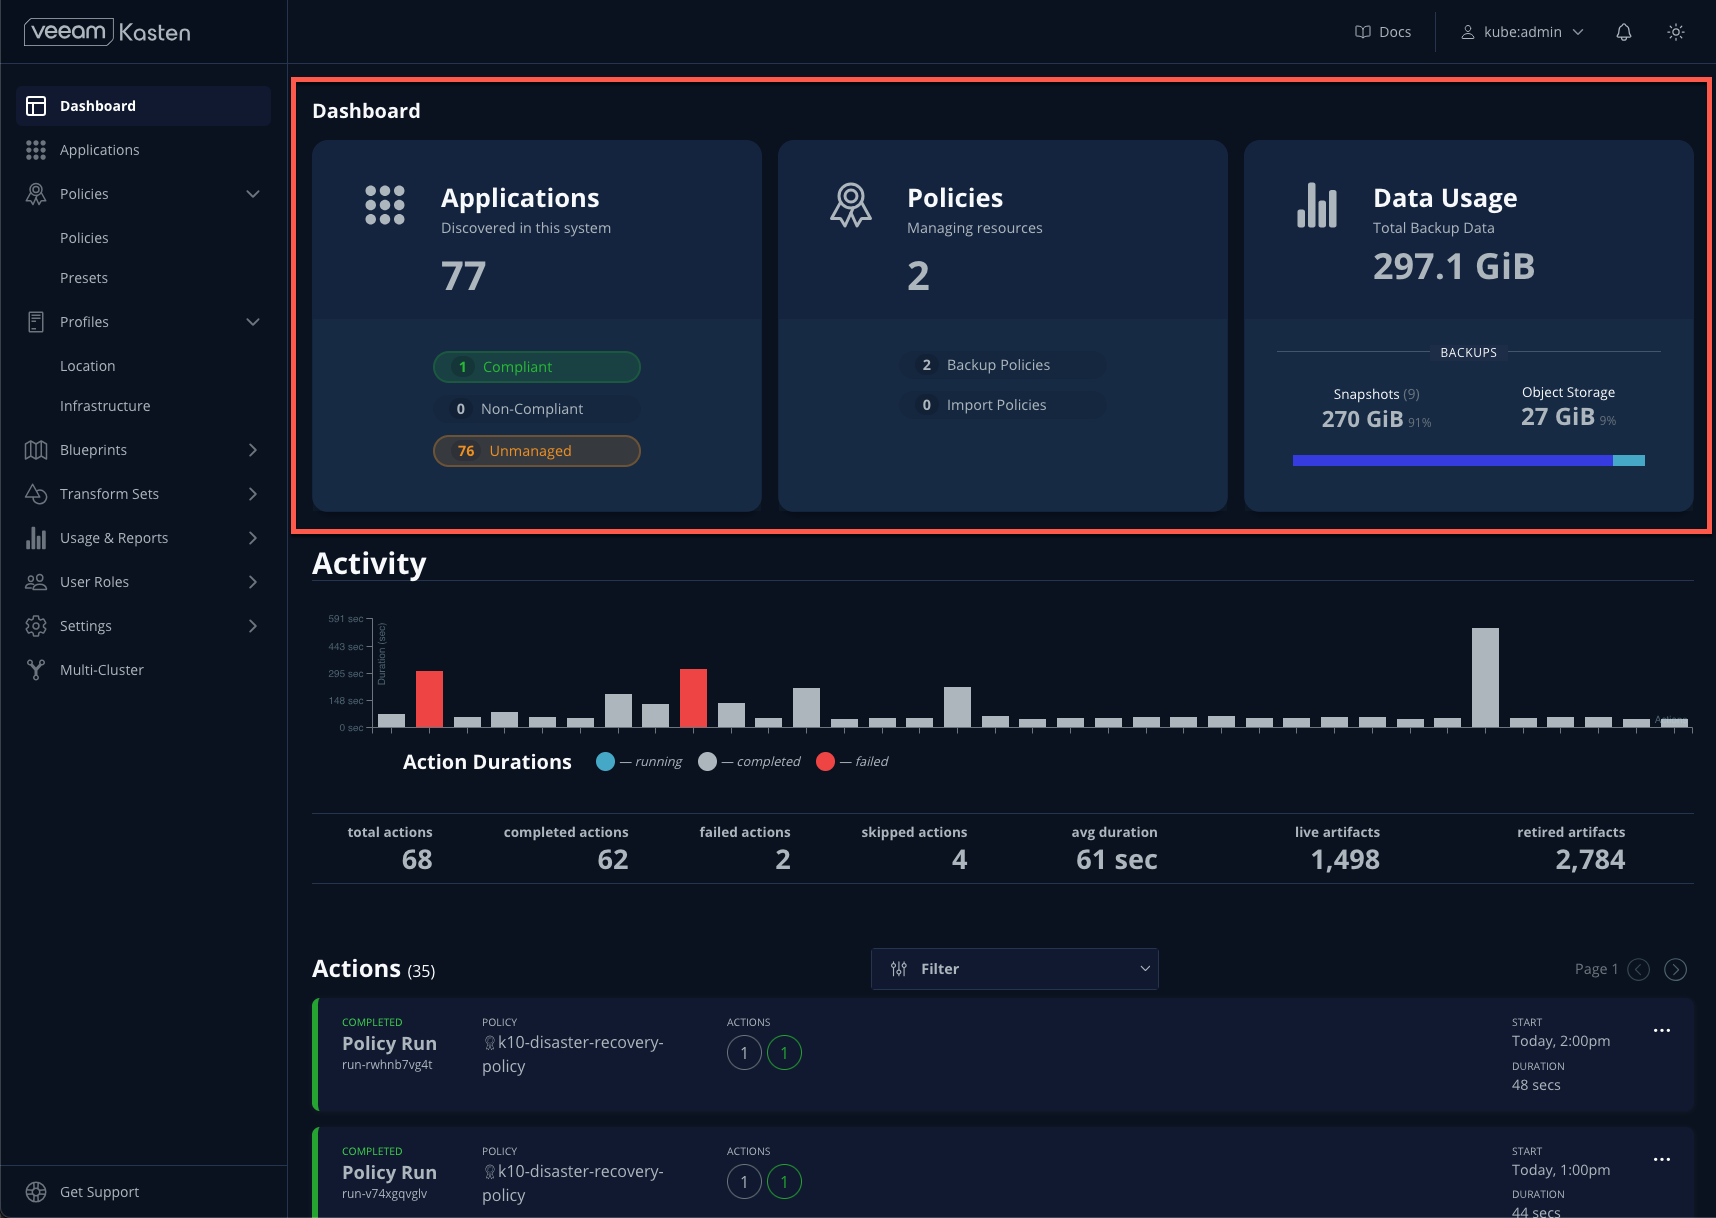
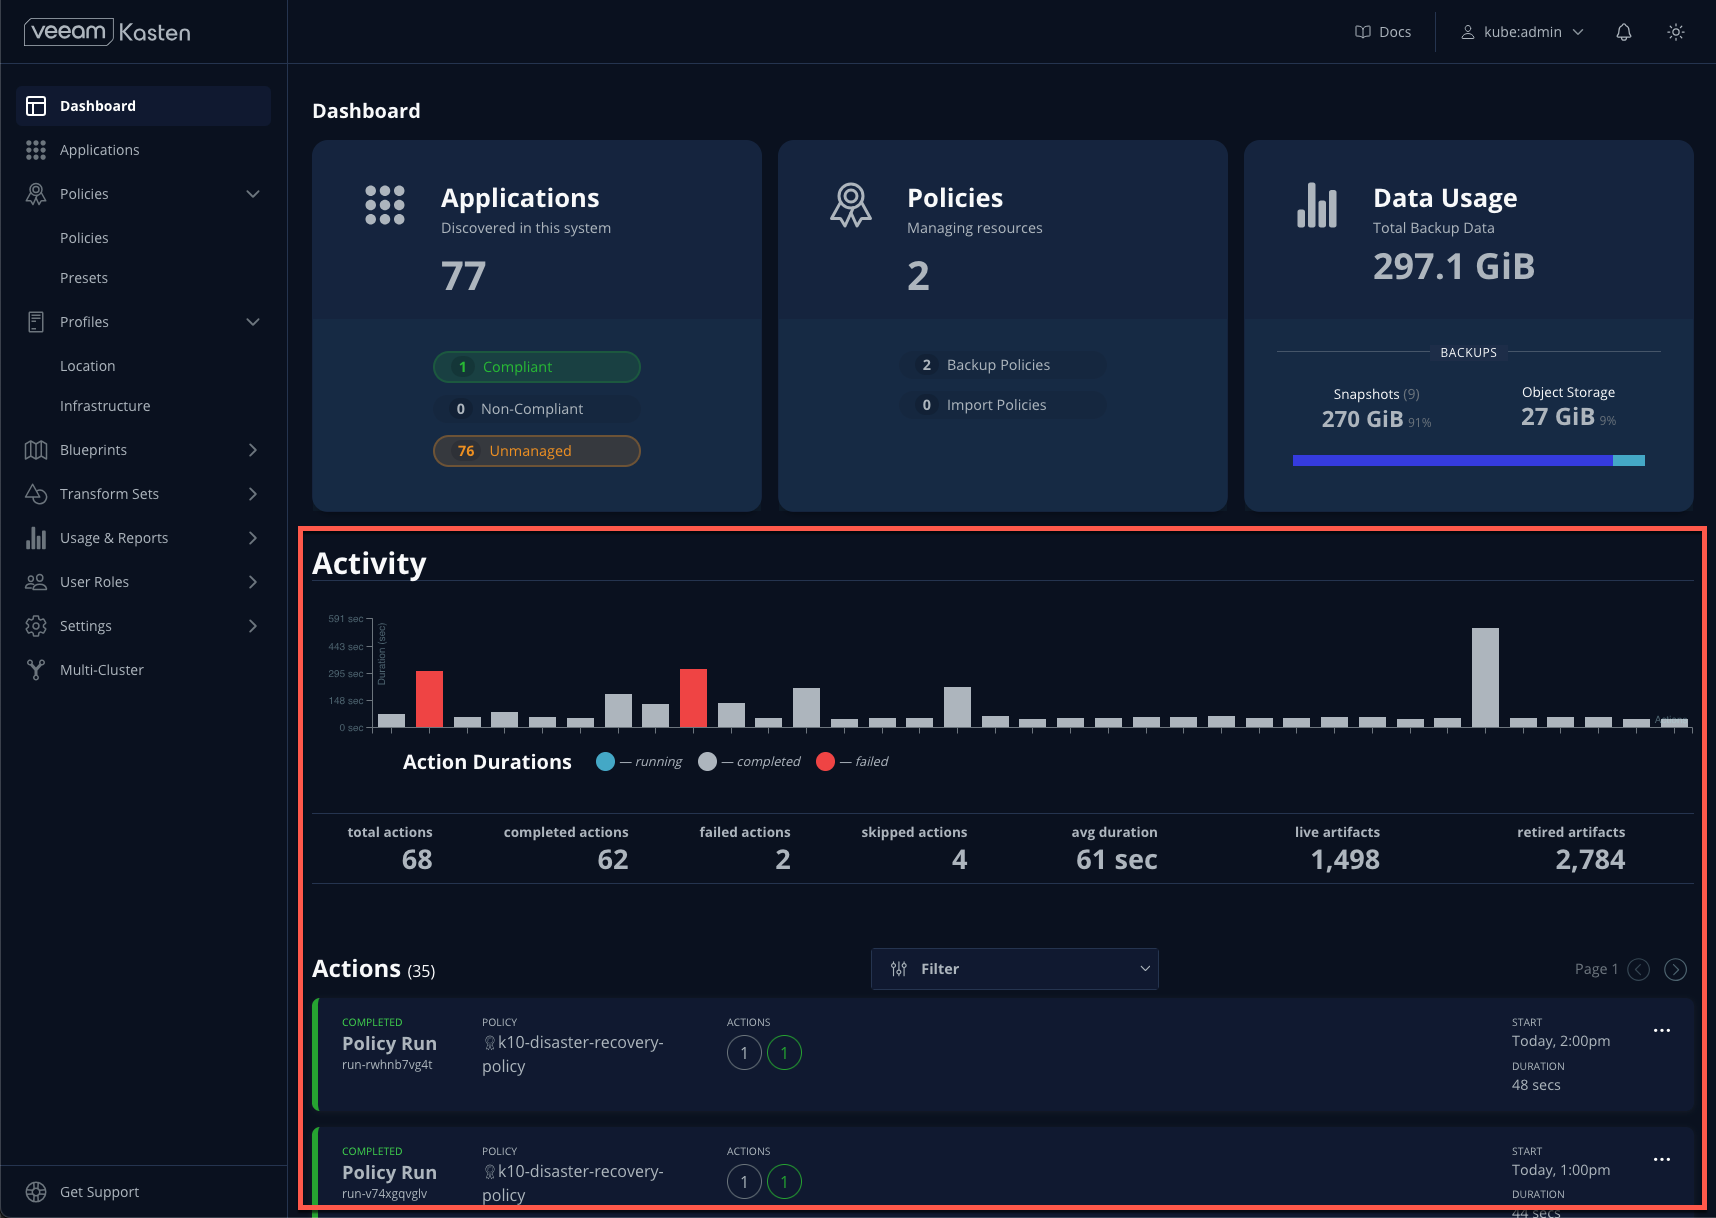
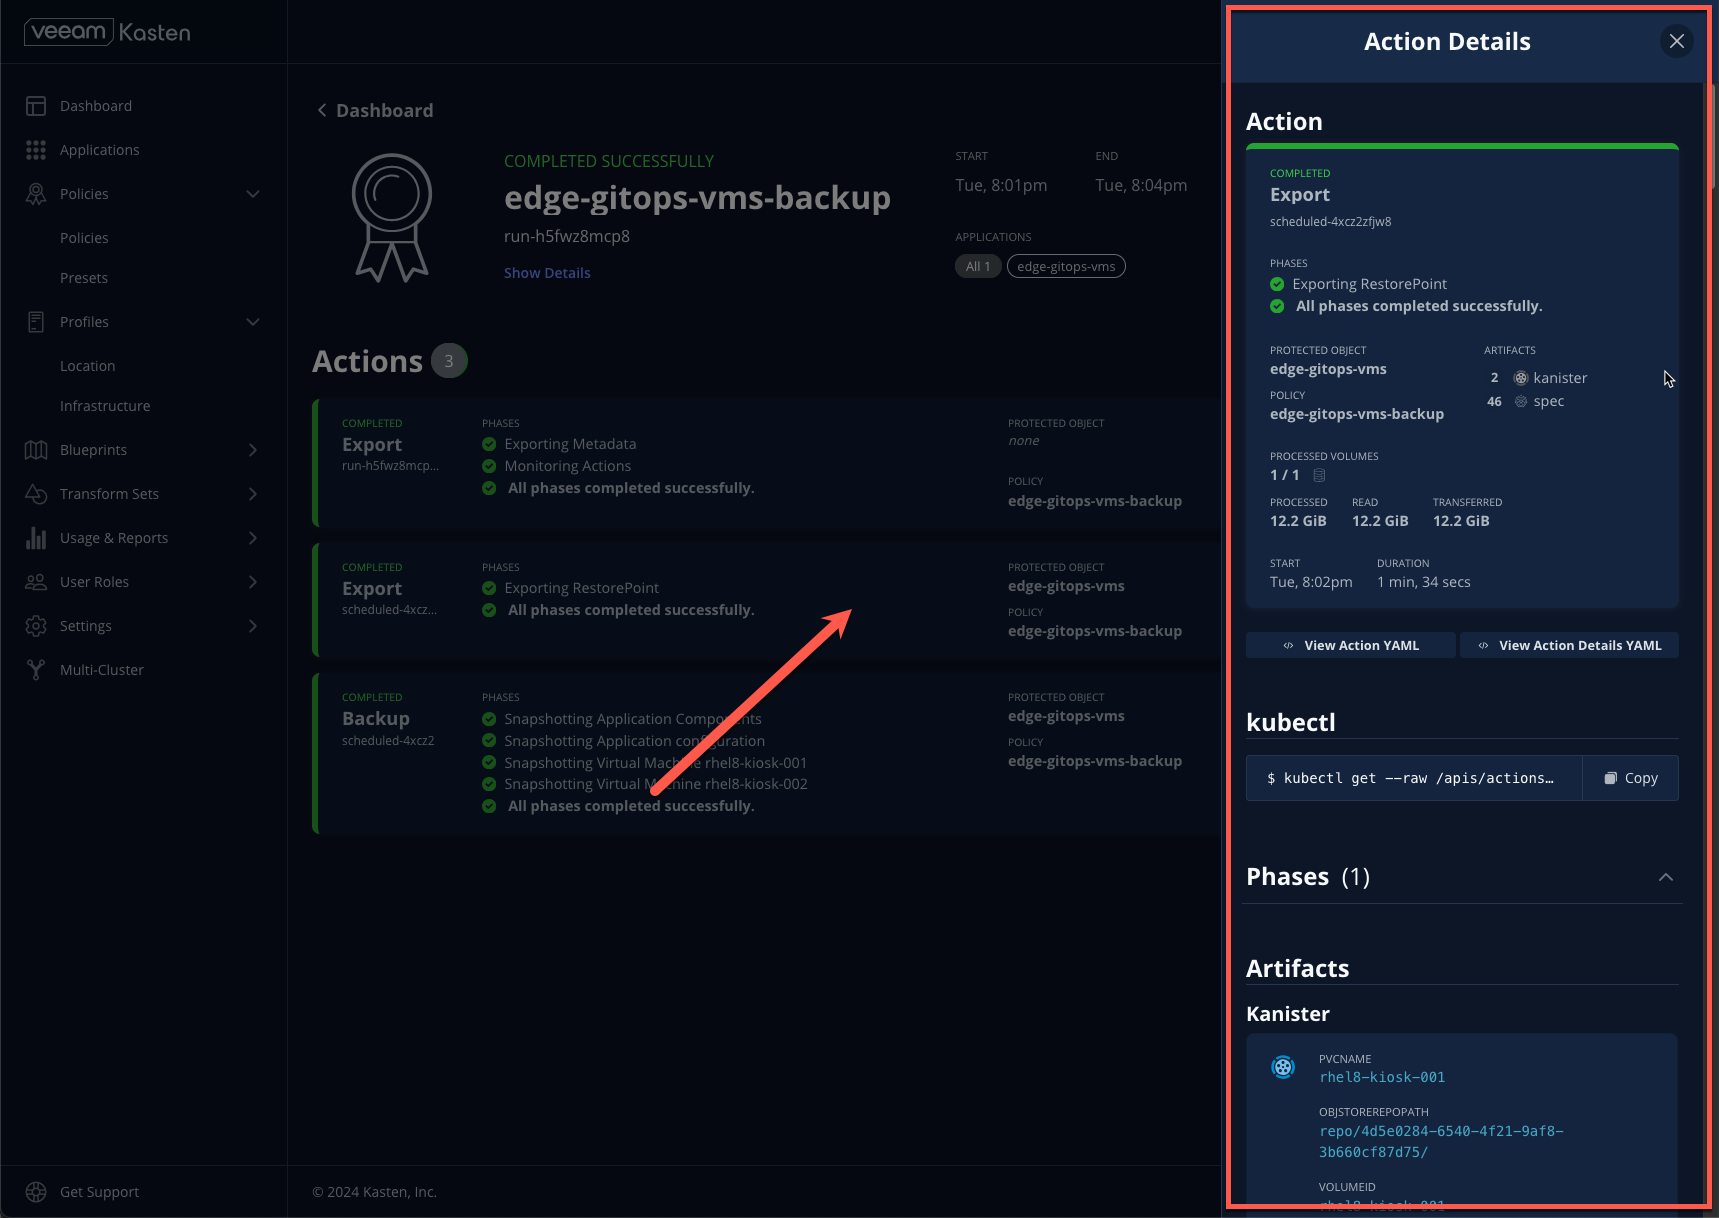
The Dashboard landing page provides high level visibility into Veeam Kasten operations for the cluster. The Applications card indicates which applications (aka Kubernetes namespaces) are compliant or non-compliant with any configured policies, making it simple to identify if there are any lapses in protection. The Activity section provides a real time view of on-going or completed operations such as a policy runs or restores, and each can be selected to display additional levels of operational detail.
Applications
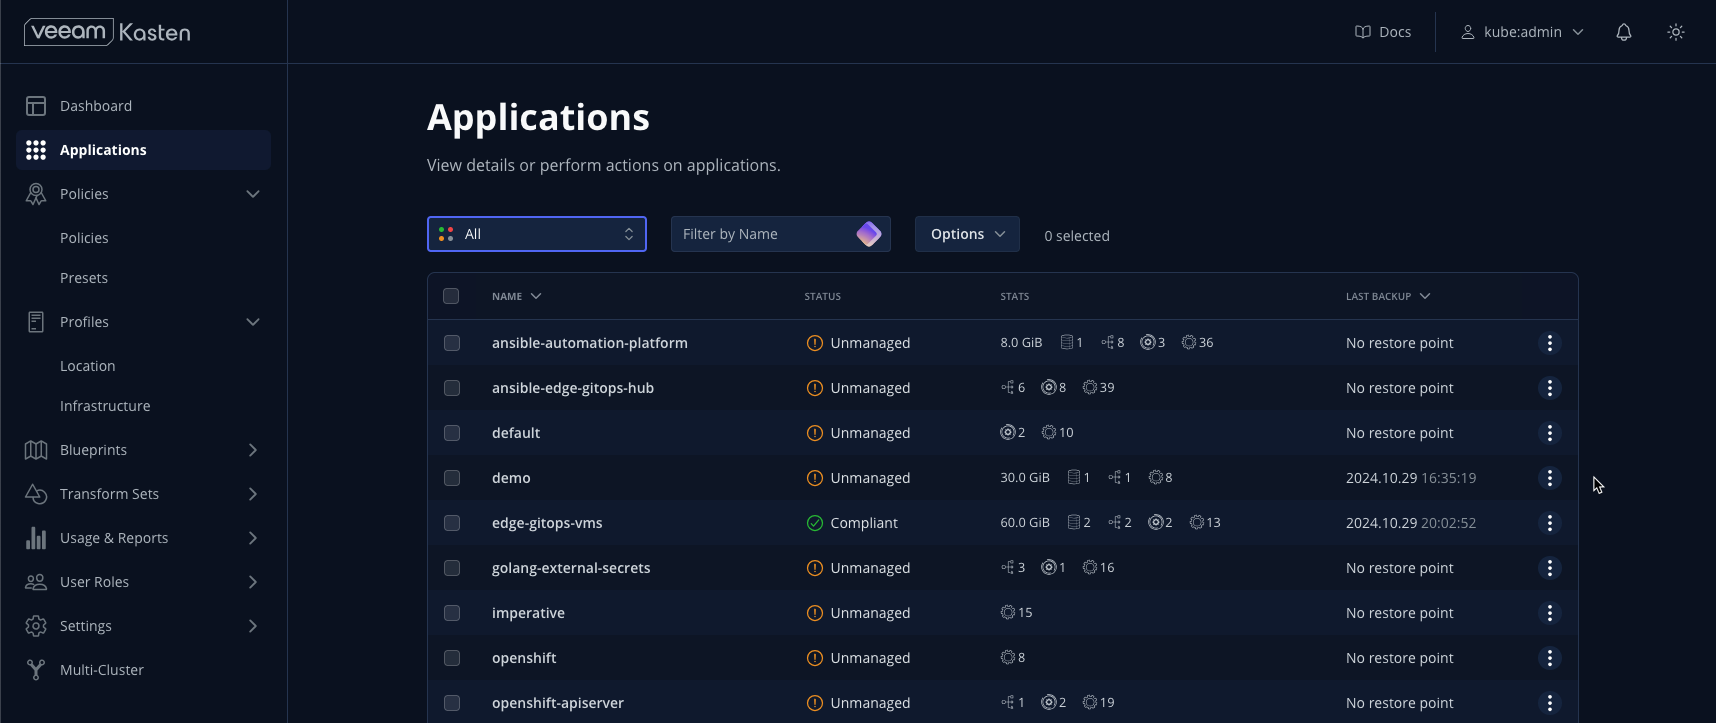
Selecting Applications either from the Dashboard card or from the sidebar will load a table representing the namespaces available on the cluster. This view provides visibility into data protection compliance, as well as the ability to perform actions relevant to a namespace, including ad-hoc backup, export, and restore operations, or creating a new policy.
Location Profiles
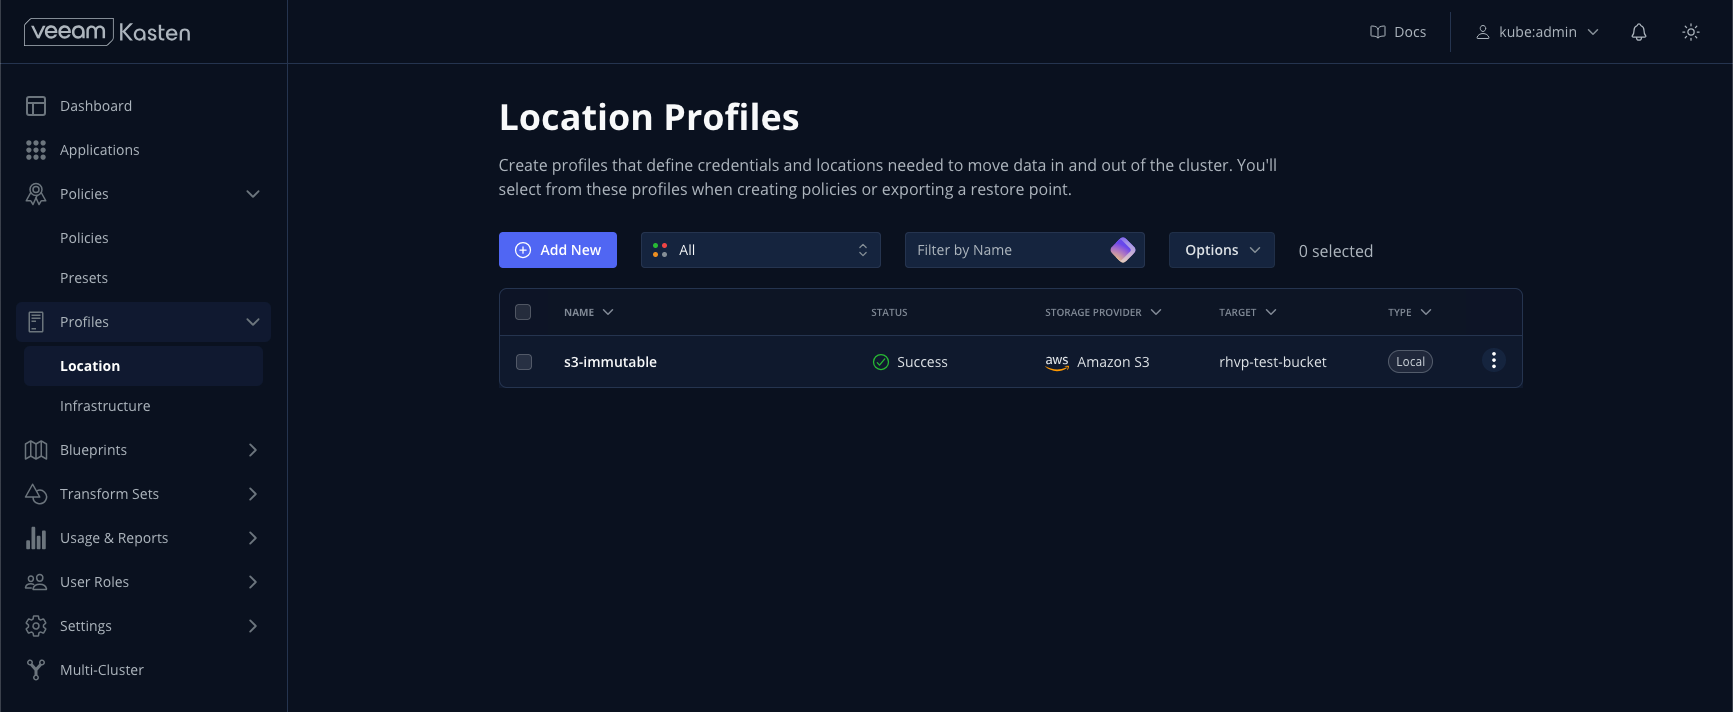
Select Location > Profiles from the sidebar. Location Profiles define external storage targets for exporting backup data. Veeam Kasten can support exporting to multiple types of storage, including AWS S3, S3-compliant, Azure Blob, Google Cloud Storage, and NFS.
Policies
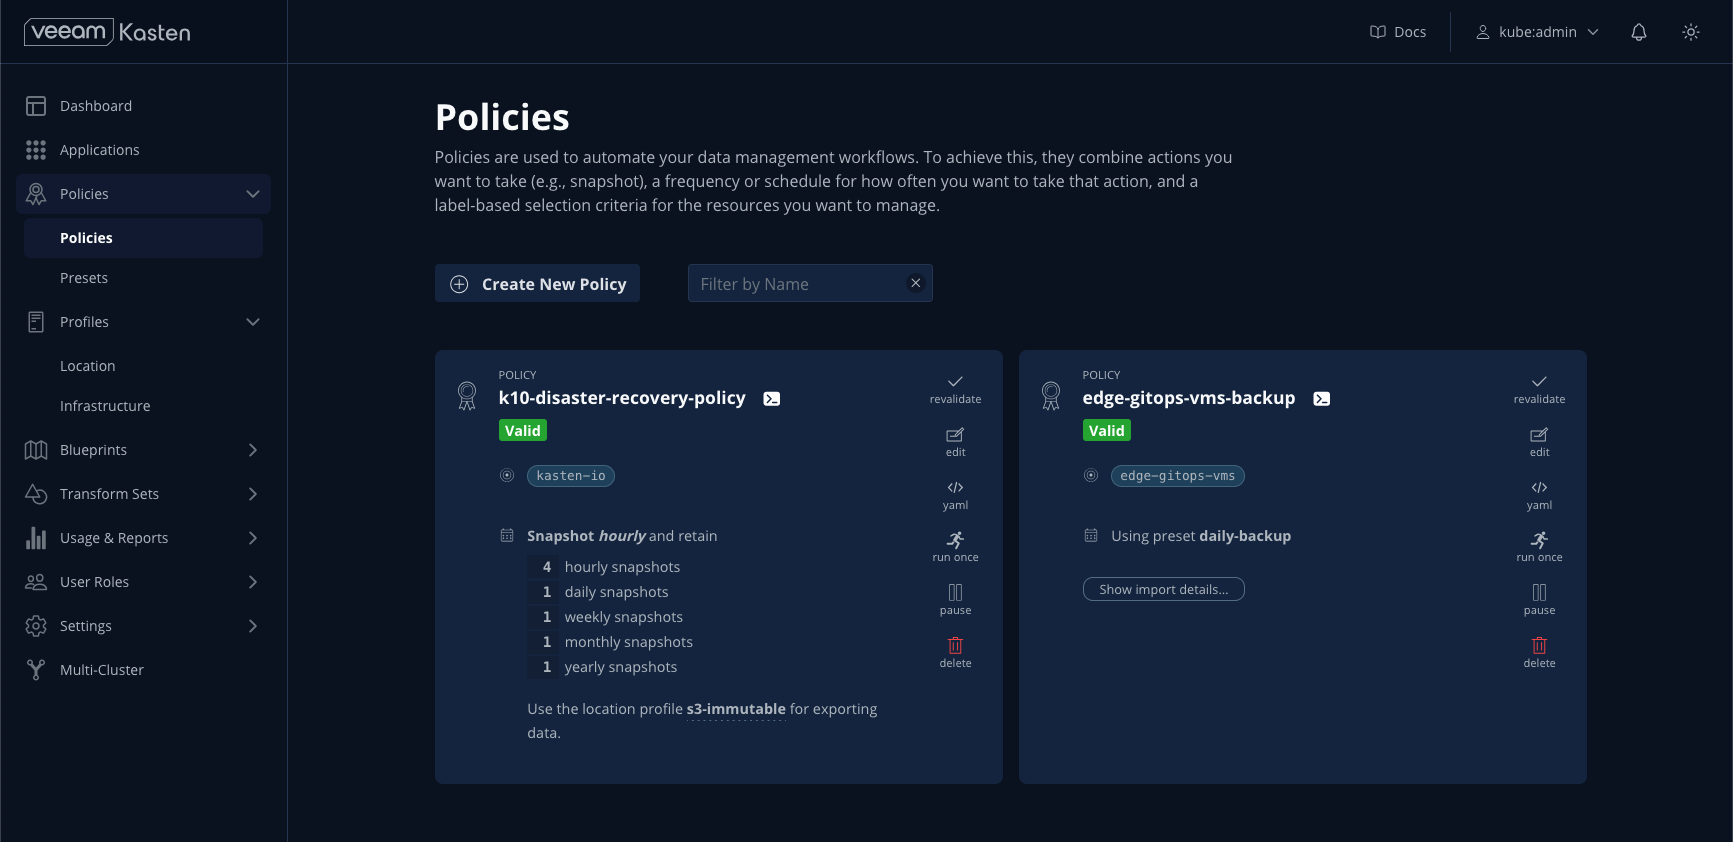
Select Policies > Policies from the sidebar. Policies primarily define which resources to protect, frequency, retention, and which Location Profile to use for exporting data. Policies can also be used to automate importing and restoring backups from another cluster (i.e. for DR or testing).
Operations Demos
Below are supplemental demos that can be followed to become familiar with basic Veeam Kasten operations, including restoring VMs and manually creating additional policies.
Manual Policy Run
The Kasten policy applied to the edge-gitops-vms namespace by the pattern is configured to perform daily backups within a specified time window. As such, a run of this policy may not have be completed immediately following pattern deployment.
From the Kasten Dashboard, select Policies > Policies from the sidebar.
Under the
edge-gitops-vms-backupPolicy, click Run Once > Yes, Continue to initiate a manual run of the policy.
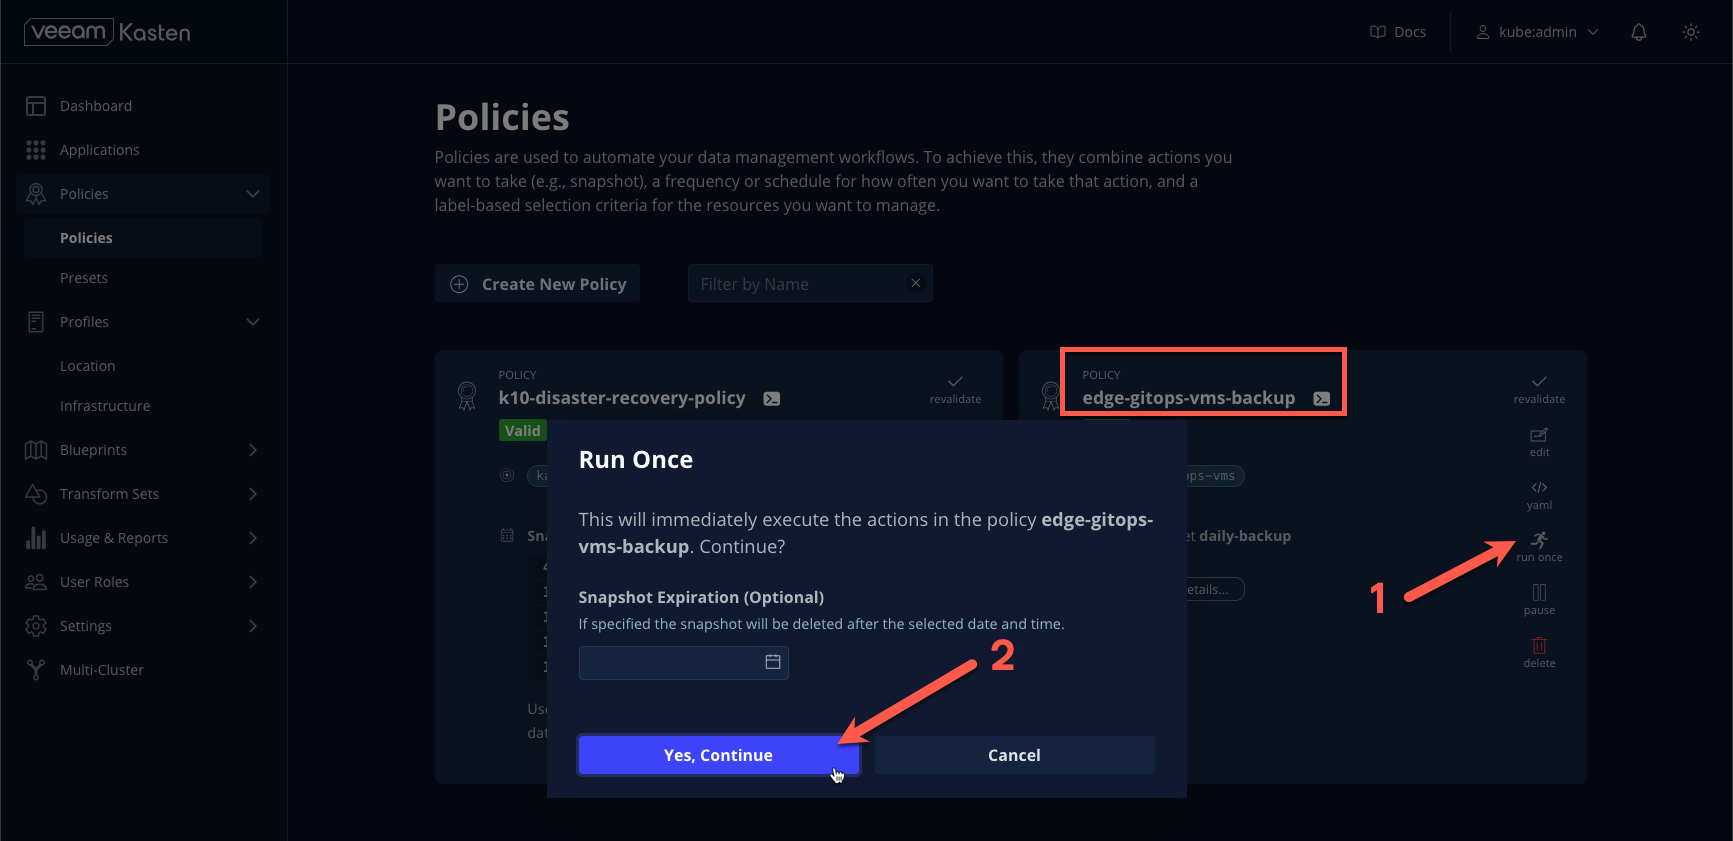
It’s recommended to specify an expiration date for manual runs as these backups are not subject to the retention configuration defined in the policy.
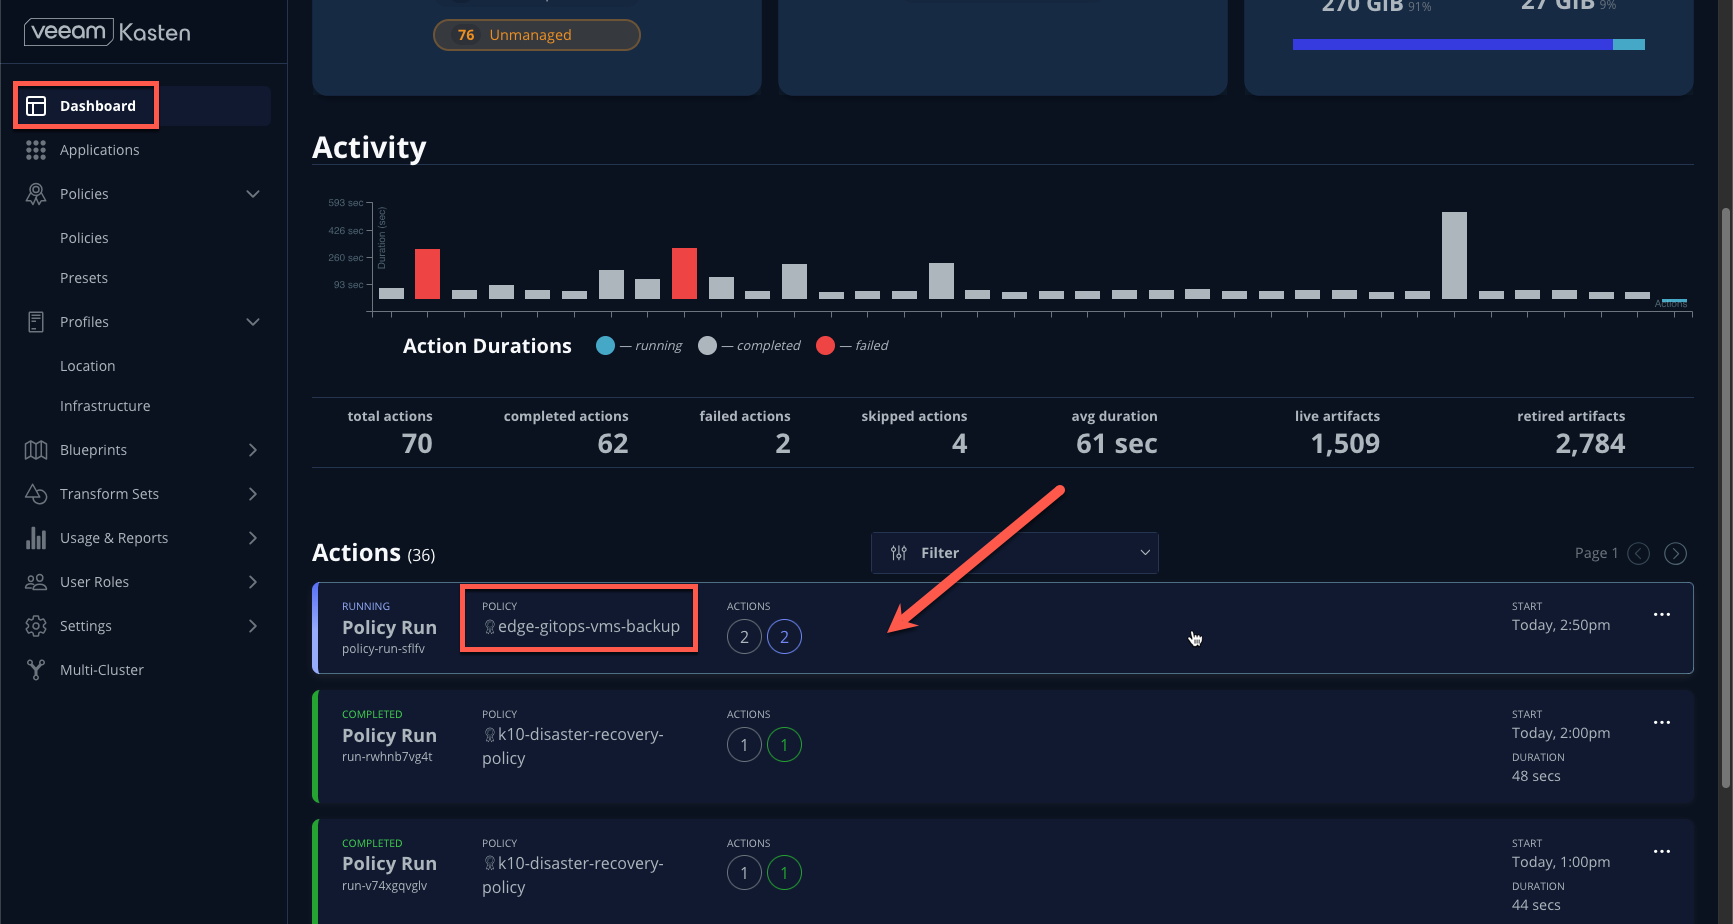
- Return to the Dashboard and click the policy run under Actions to monitor progress.
Restoring VMs
Once the edge-gitops-vms-backup has been completed at least once successfully, follow the steps below to test restoring an individual VM.
- From a terminal, force stop and delete the
rhel8-kiosk-001VM:
oc patch virtualmachine -n edge-gitops-vms rhel8-kiosk-001 --type merge -p '{"spec":{"running": false}}'
oc delete virtualmachine -n edge-gitops-vms rhel8-kiosk-001
NOTE: Veeam Kasten will terminate the existing workload during a restore operation, however the base image used for the rhel8-kiosk-... VMs does not include qemu tools, which will stall terminating the resource while it waits for a graceful VM shutdown.
- From the OpenShift Console, under Virtualization > VirtualMachines, validate that
rhel8-kiosk-001no longer appears in theedge-gitops-vmnamespace.

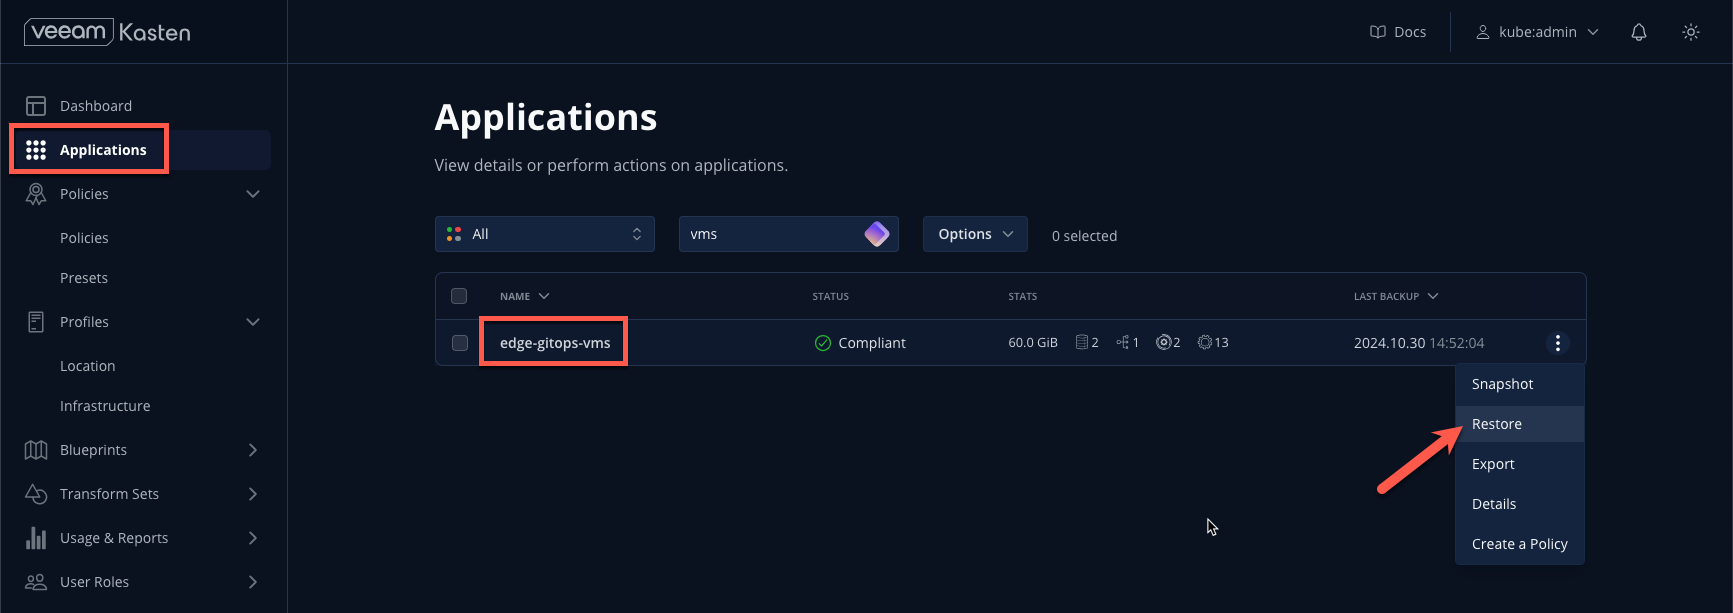
From the Kasten Dashboard, select Applications from the sidebar.
Under the
edge-gitops-vmsnamespace, select Restore.
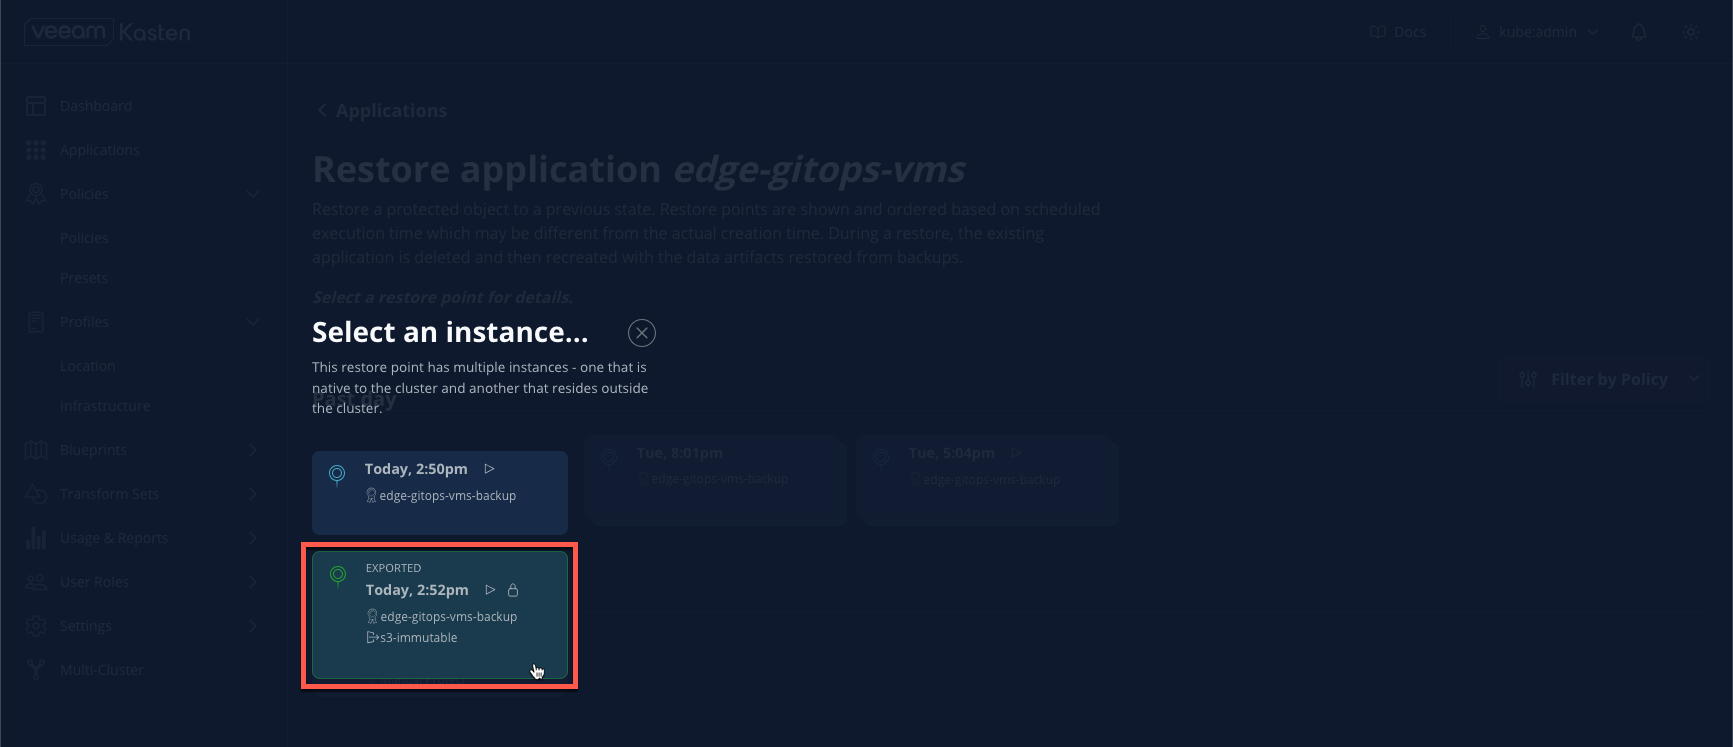
- Expand the most recent available restore point and select the EXPORTED option to restore from S3.
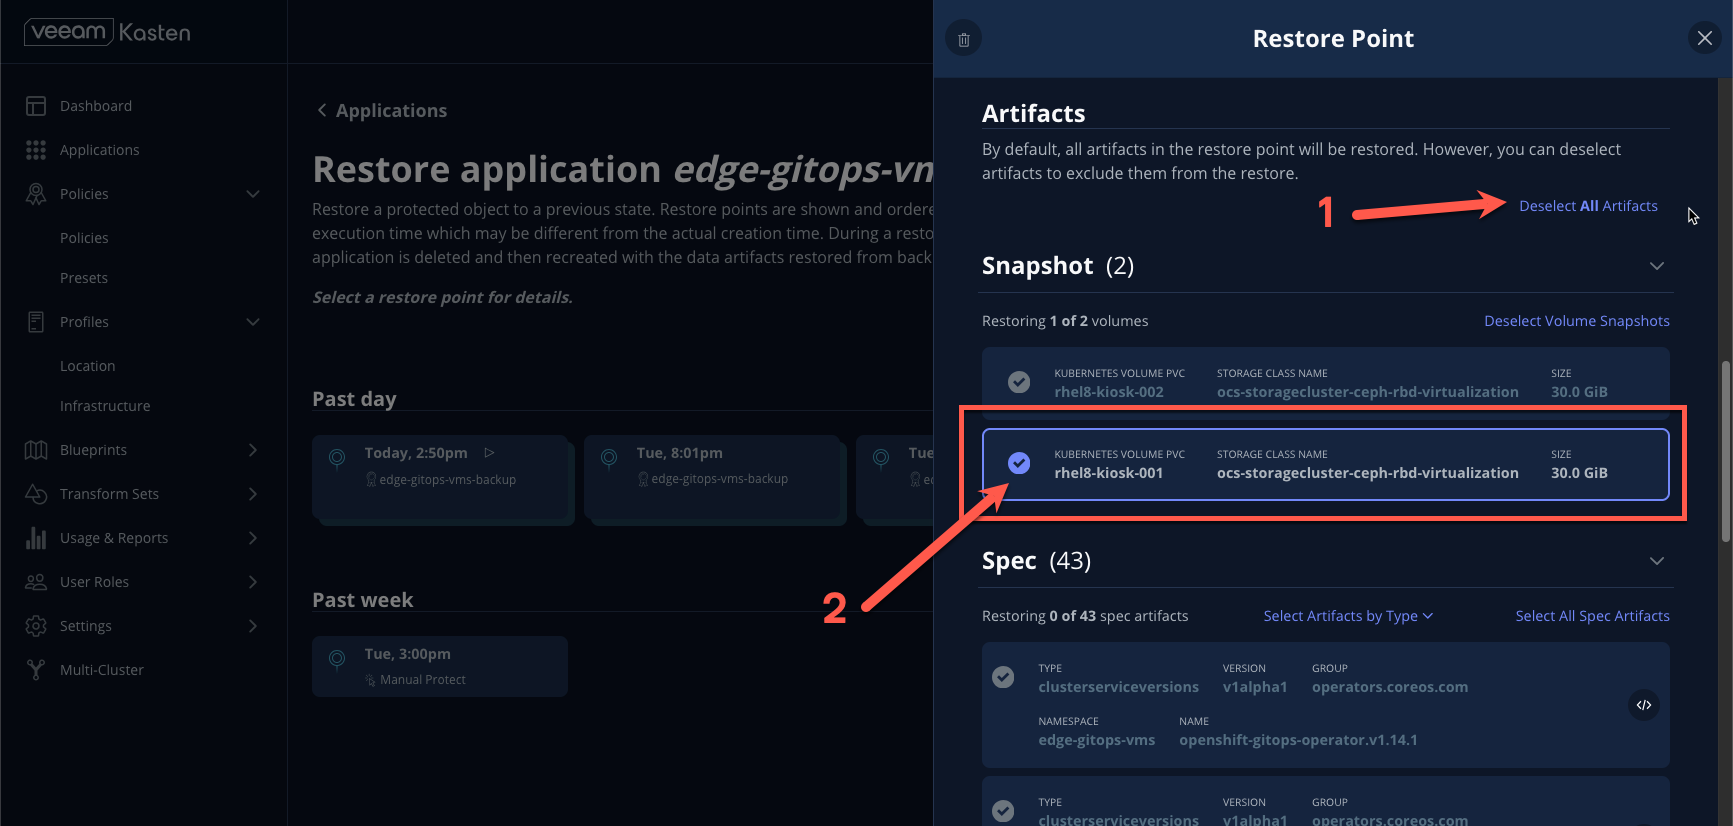
- Under Artifacts, click Deselect All Artifacts and, under Snapshot, select the
rhel8-kiosk-001PVC as shown.
- Under Spec, scroll down and select the
rhel8-kiosk-001VirtualMachine manifest and click Restore > Restore.
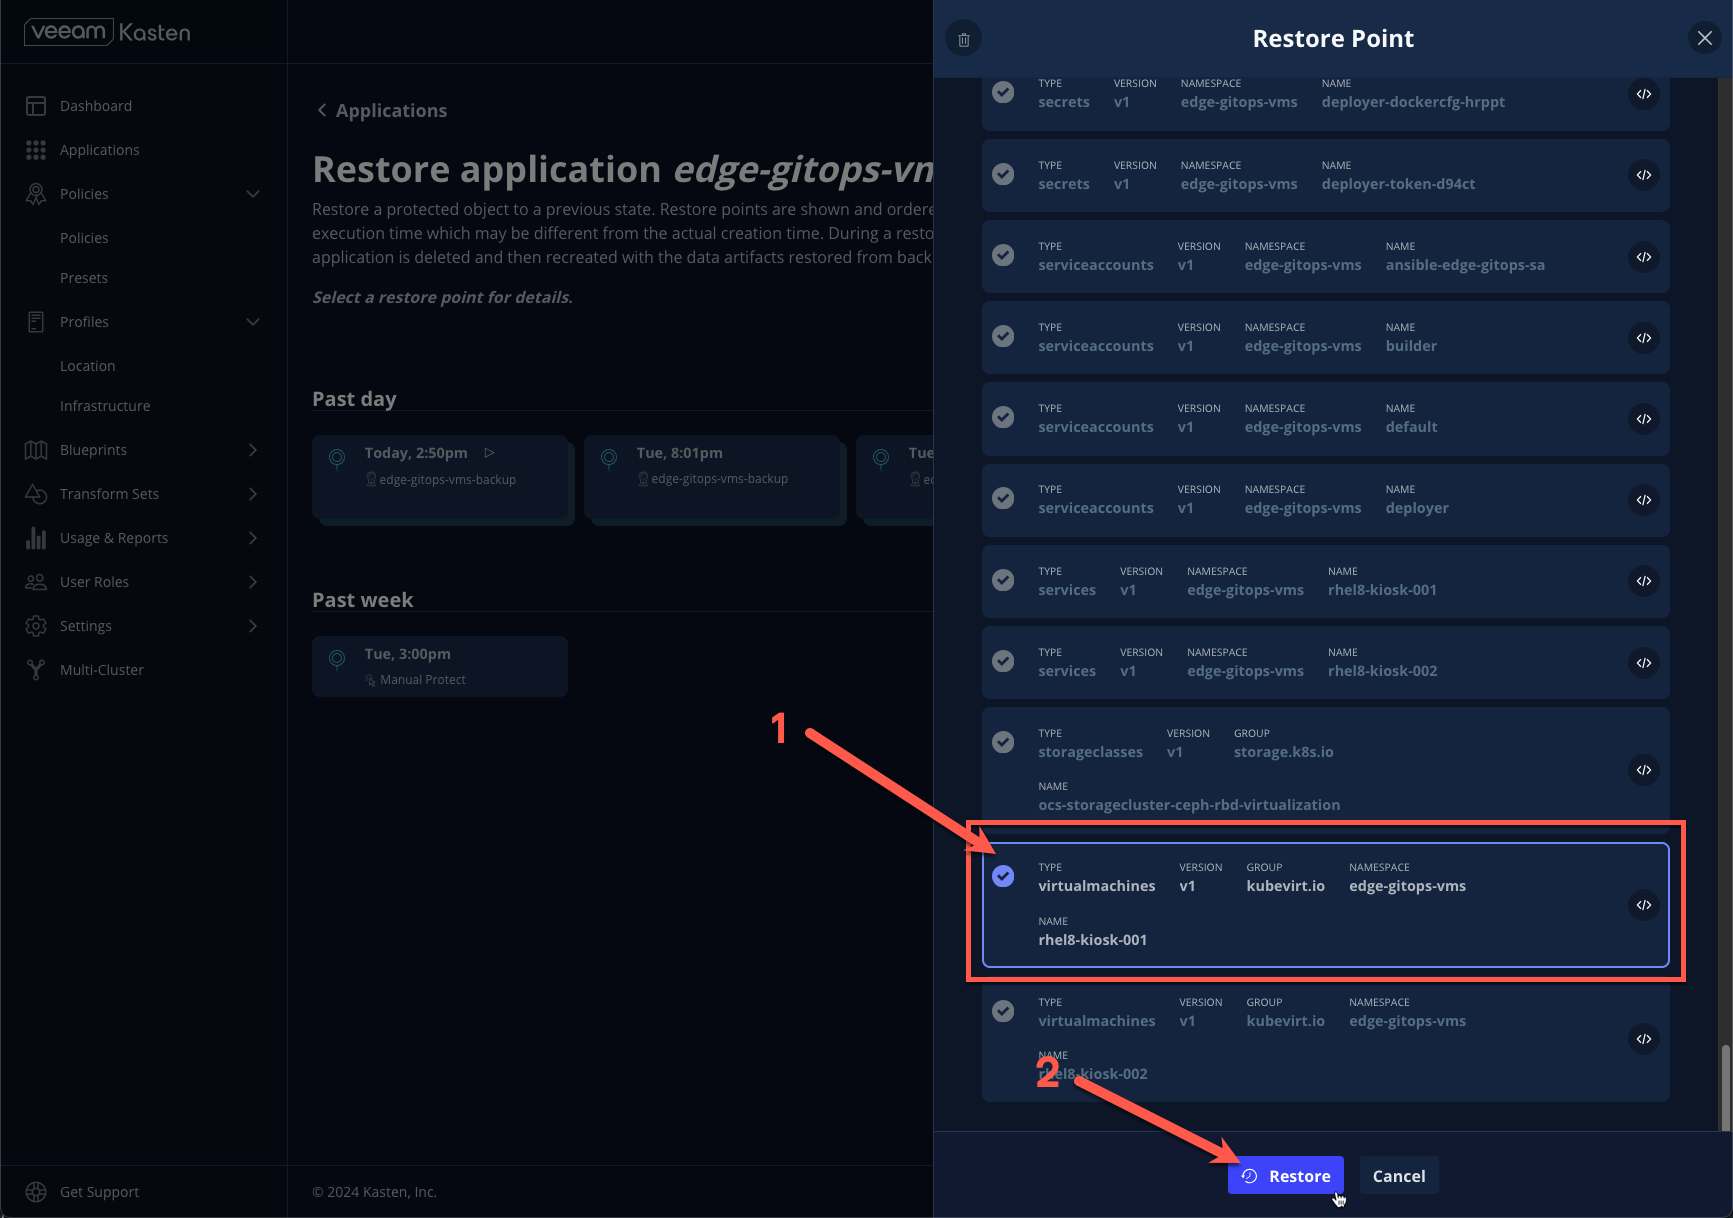
- Return to the Dashboard and select the restore under Actions to monitor progress.
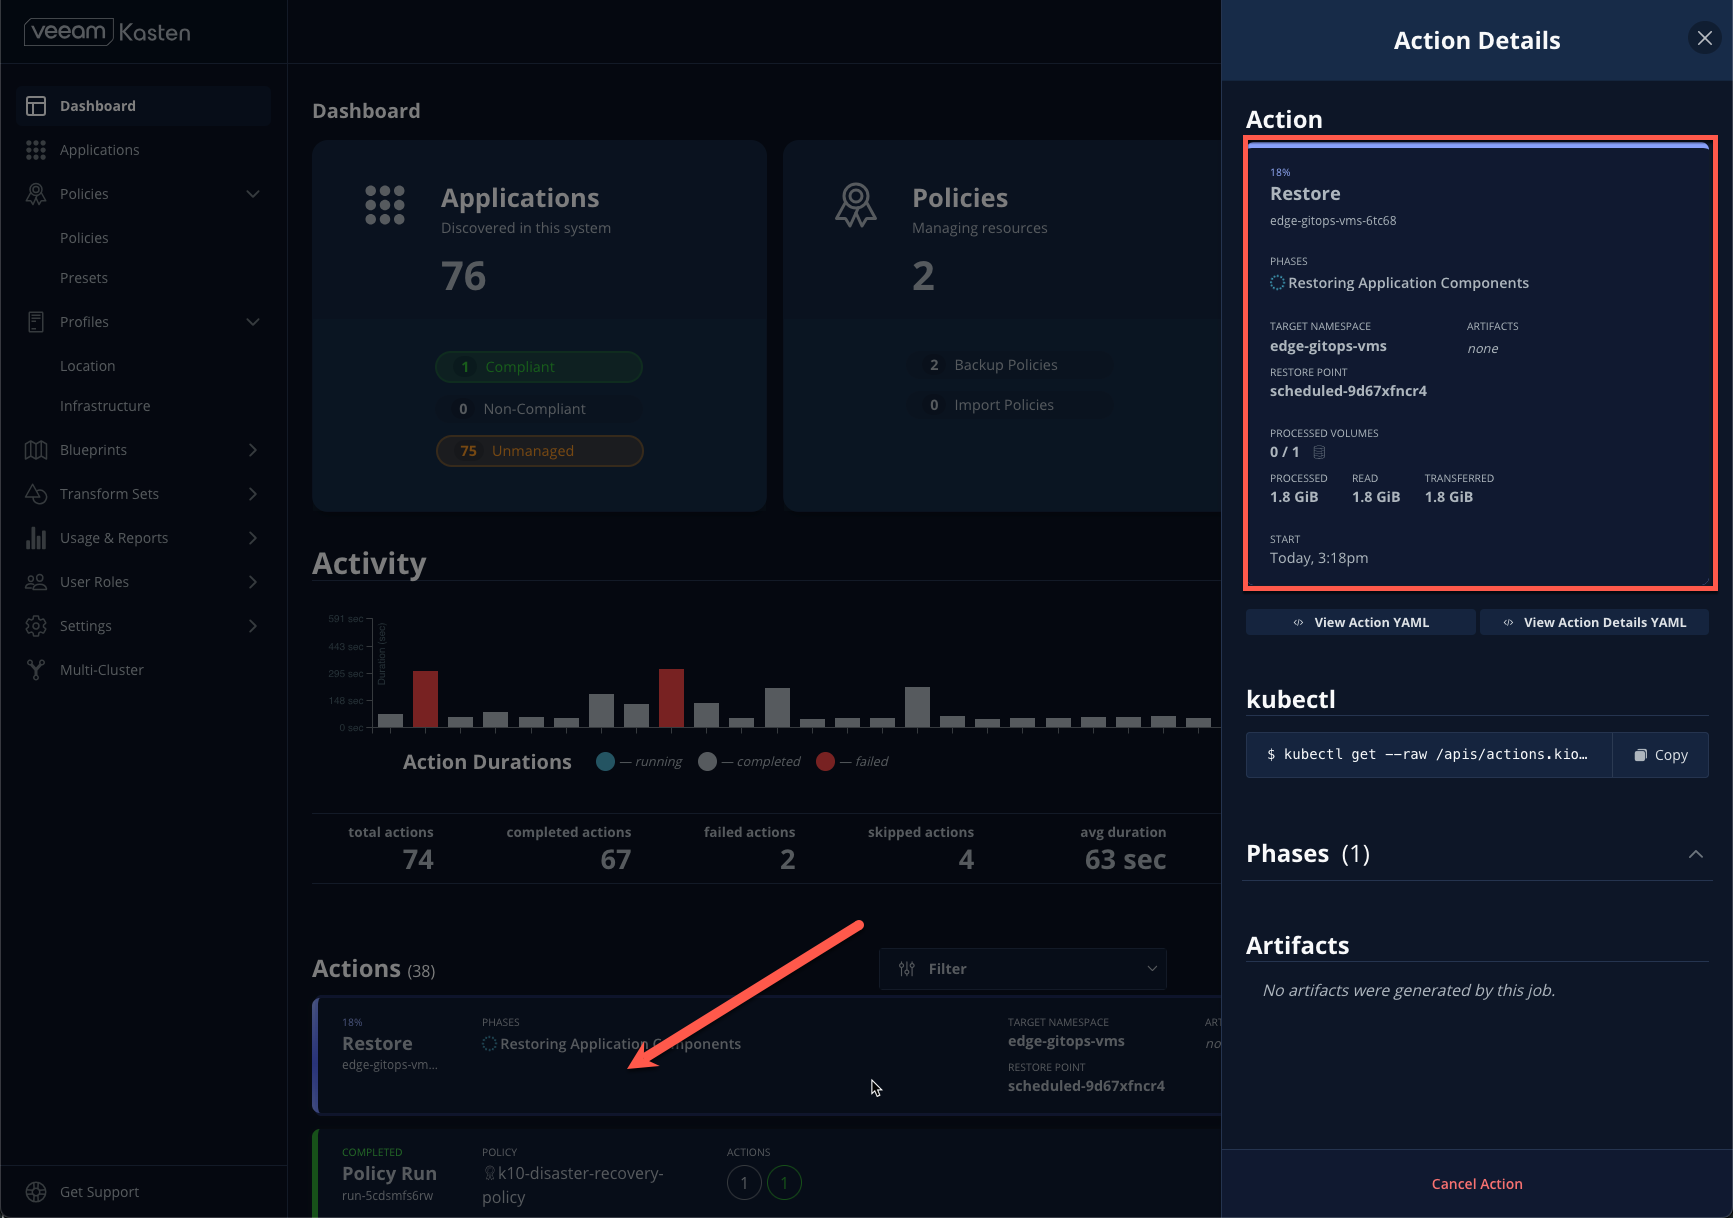
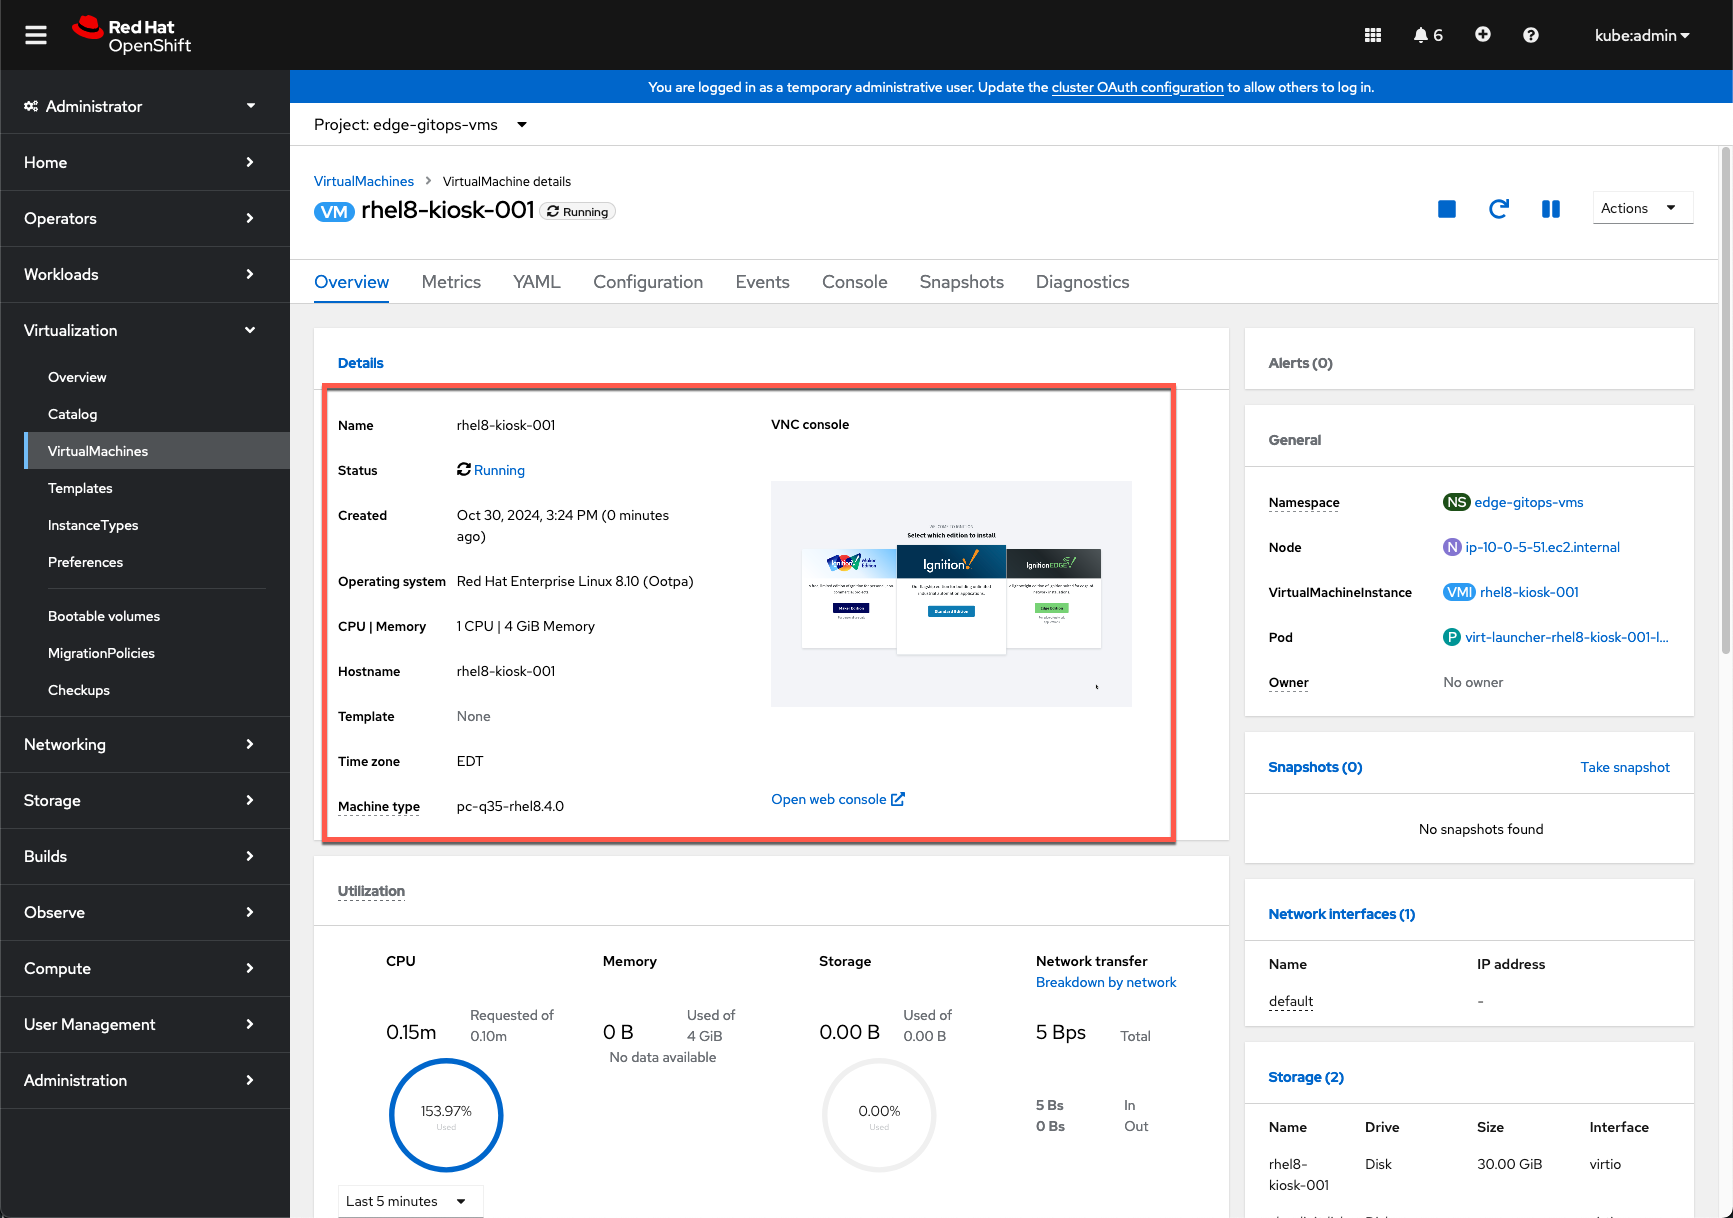
- Once the operation completes, return to the OpenShift Console and validate the
rhel8-kiosk-001VM is running.
Creating Policies
While a Validated Pattern user isn’t likely to create or manage policies via the UI - it may be beneficial to mock up policies in the UI to extract the generated YAML manifest to adapt for GitOps-driven management.
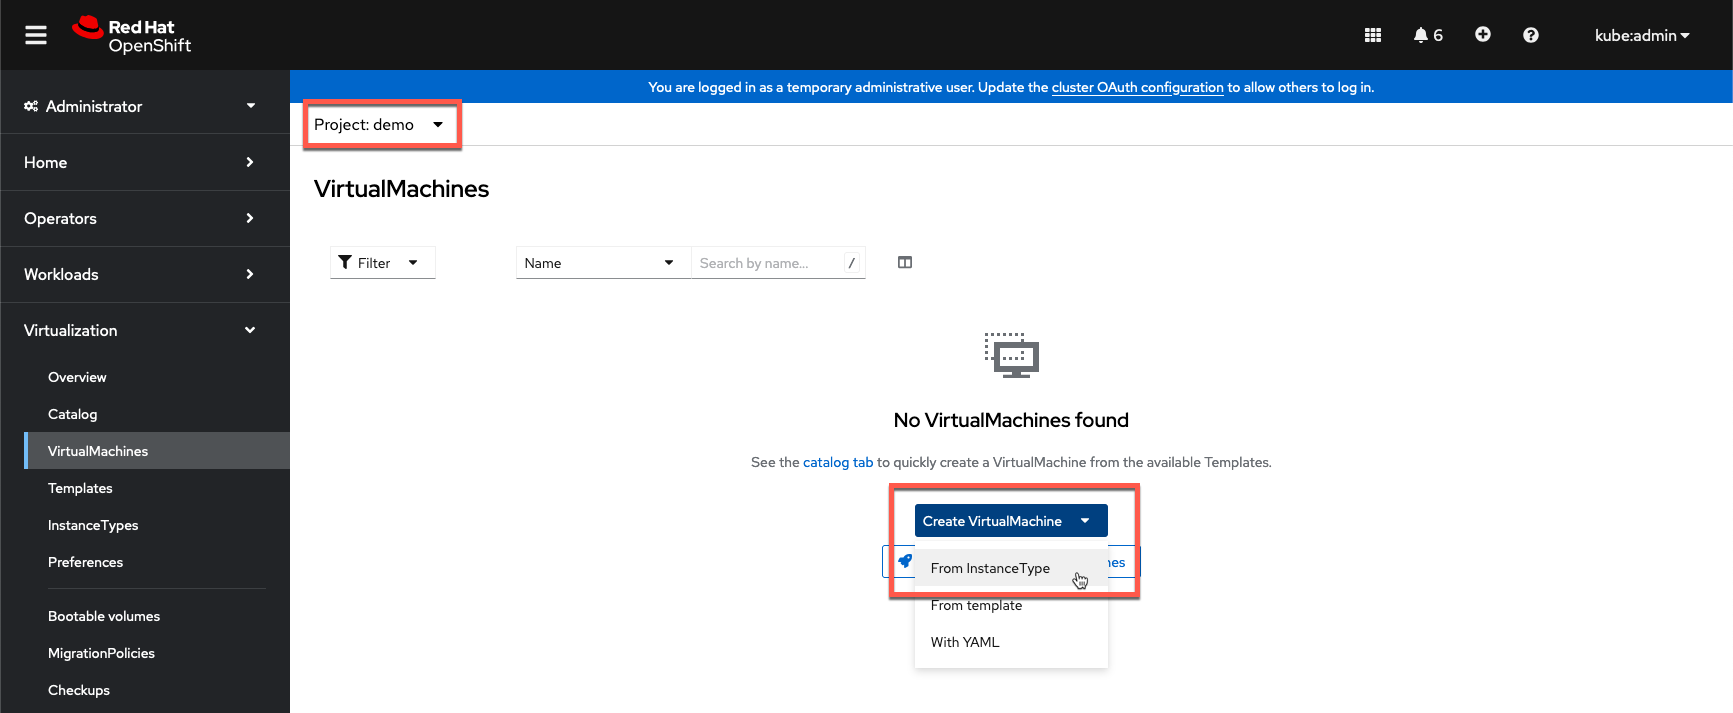
Create a new namespace,
demo, from the terminal or OpenShift Console.From the OpenShift Console, under Virtualization > VirtualMachines, select the
demoProject and click Create VirtualMachine > From InstanceType.
- Select the
centos-stream9boot volume and keep the remaining default settings, click Create VirtualMachine.
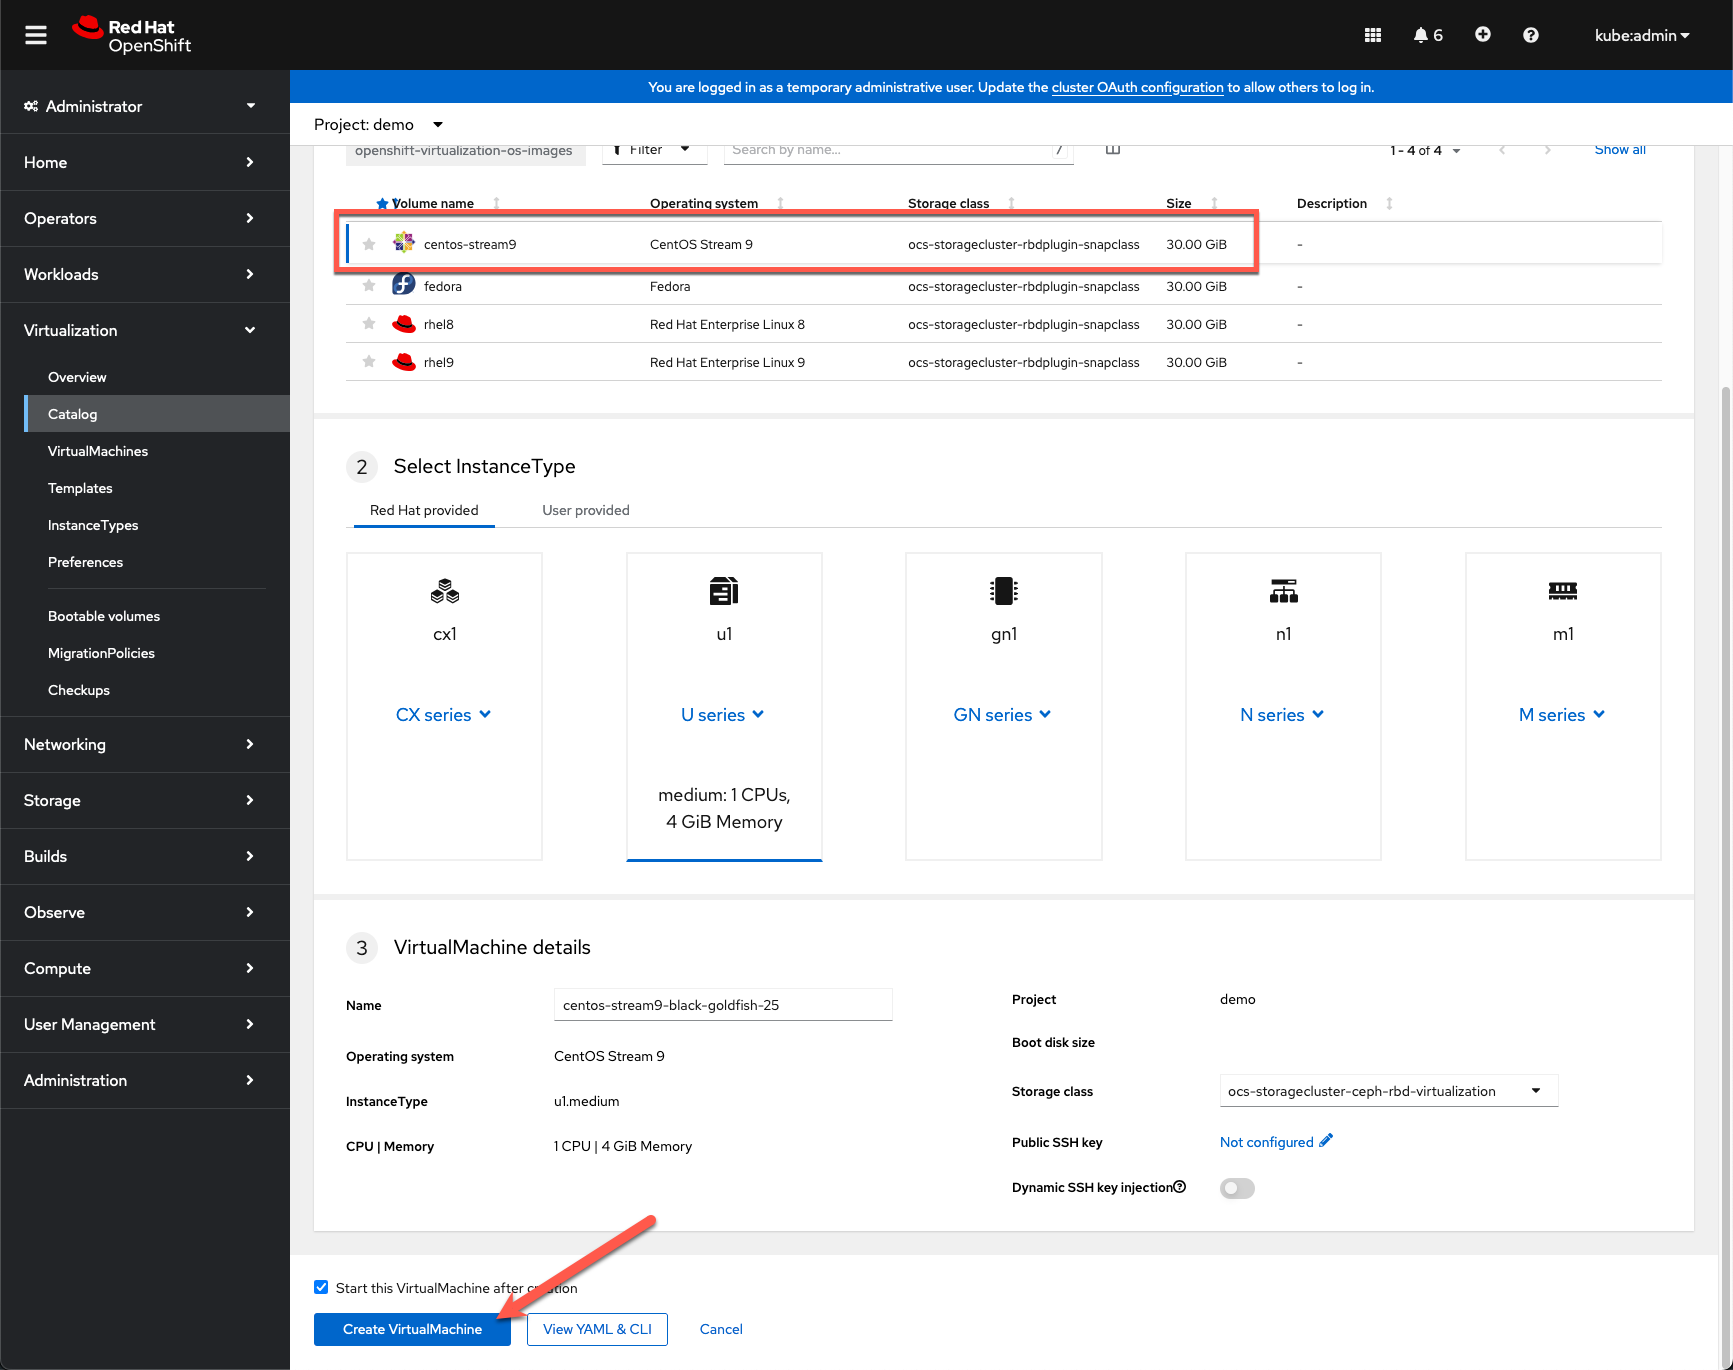
Wait for the VM to reach a Running state.
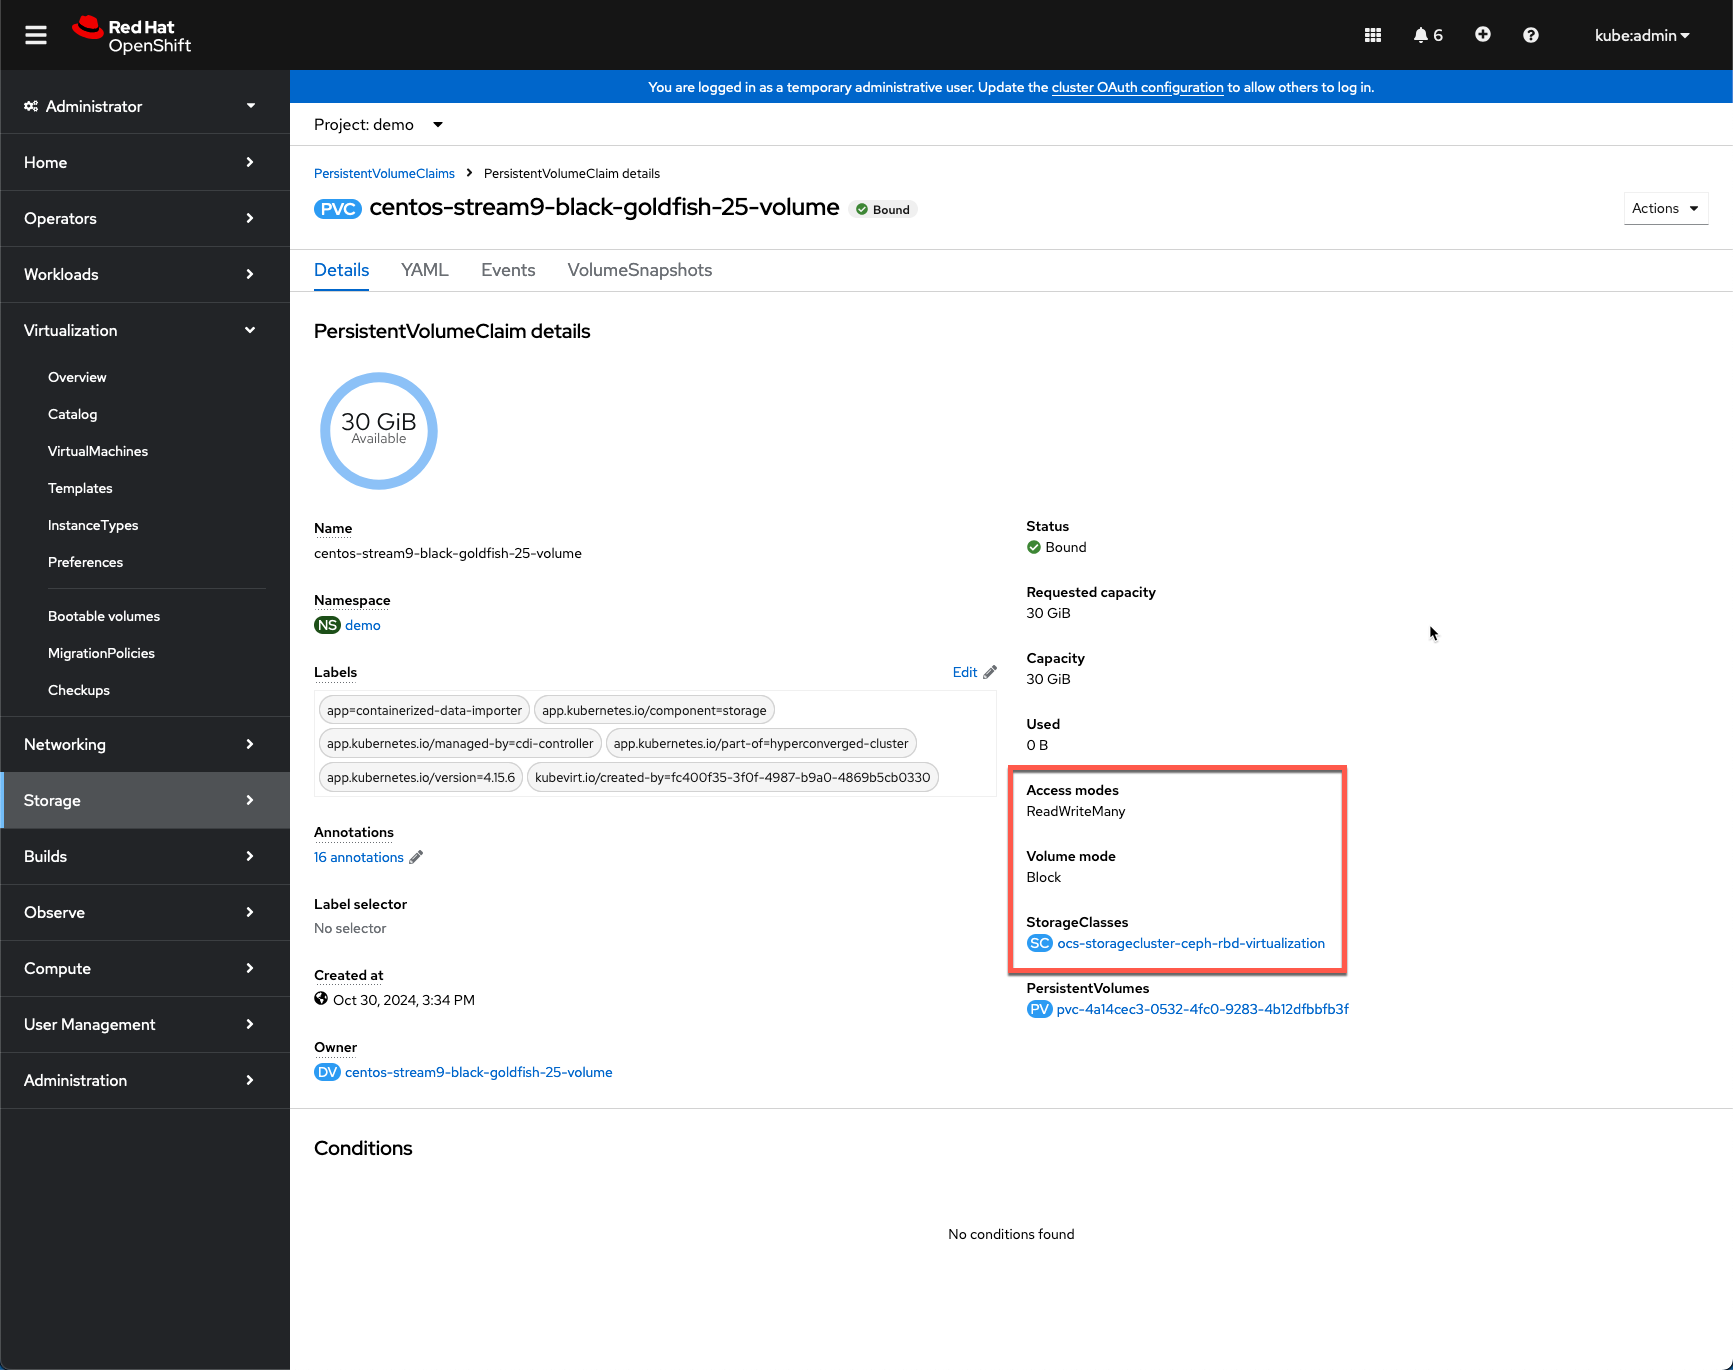
- Note the PVC used by the VM is using Block volume mode to enable ReadWriteMany access to the volume, which in turn enables Live Migration of VMs between nodes. However Live Migration will not be available in the test environment if only a single baremetal node is available.
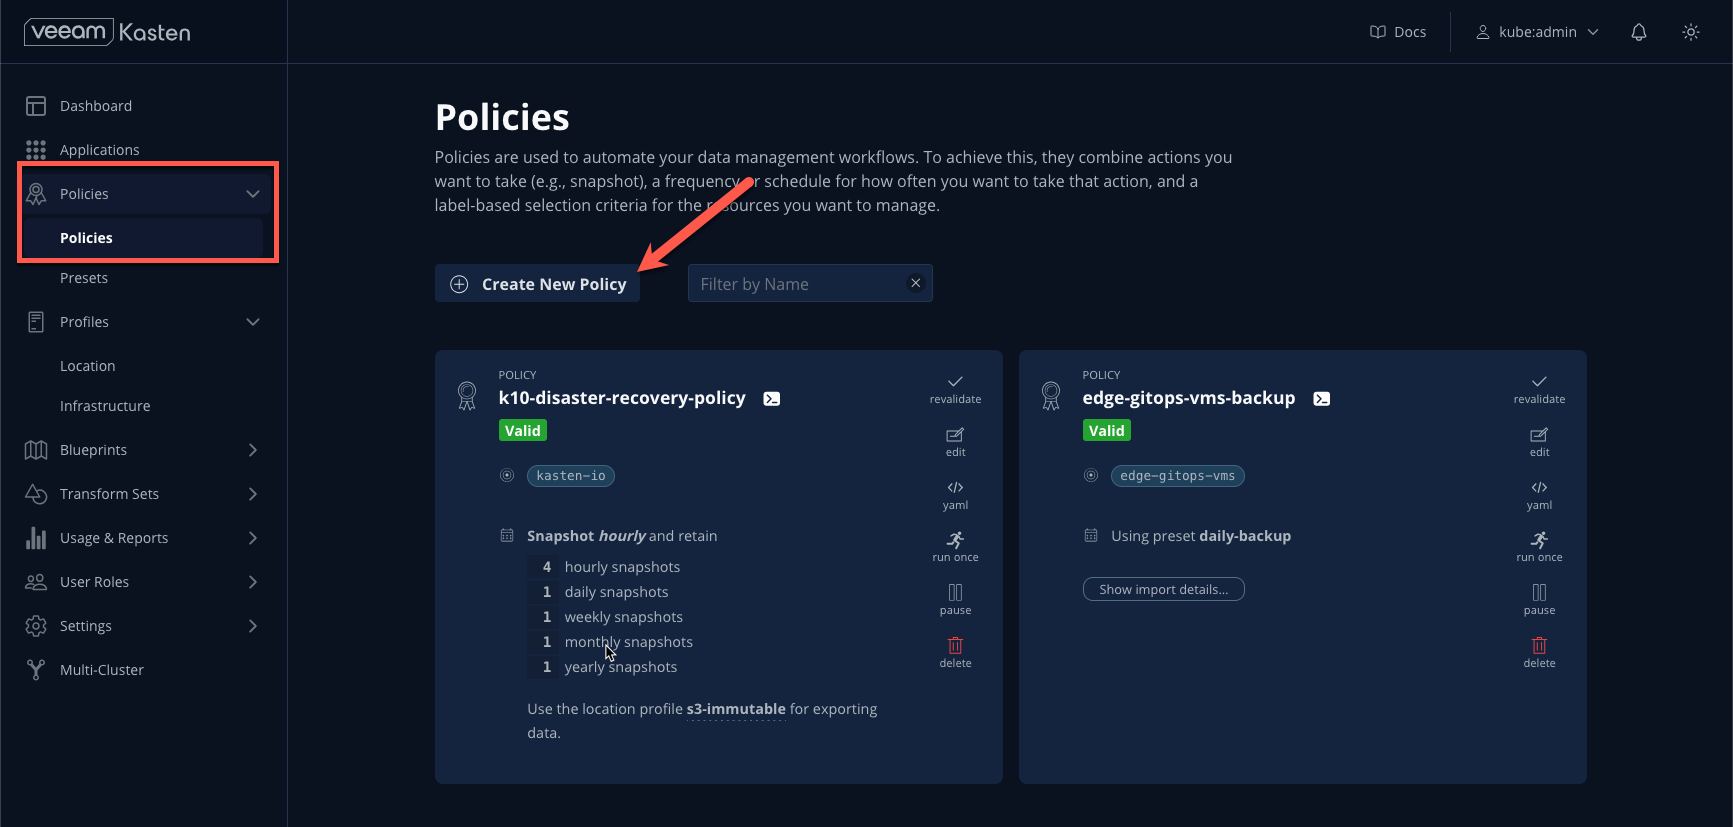
- From the Kasten Dashboard, under Policies > Policies, click Create New Policy.
Provide a Name (ex.
demo-backup).Select the desired Backup Frequency.
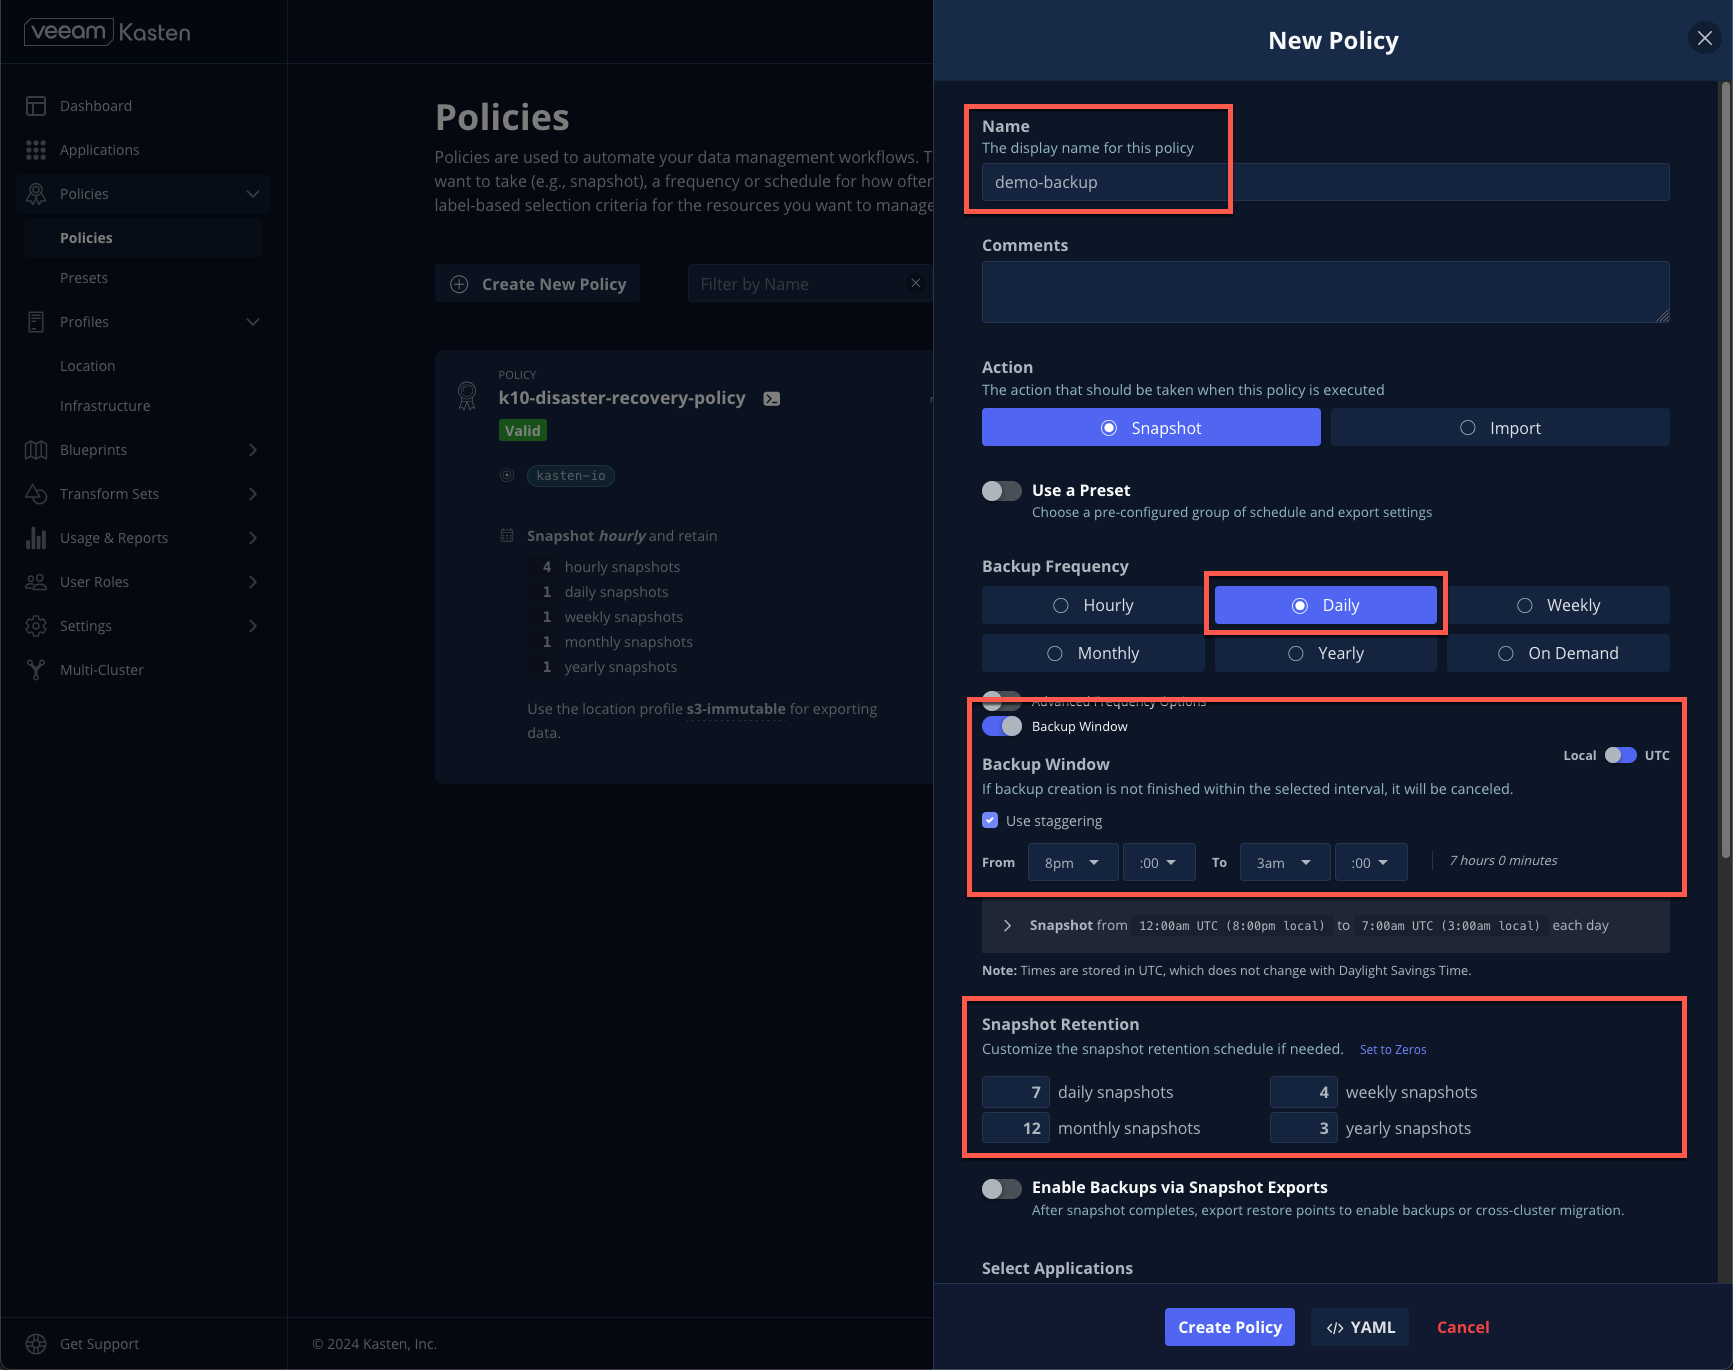
If desired, explore the Advanced Frequency and Backup Window options. Advanced Frequency settings allow the specification of exactly when a policy should run, and which backups should be promoted for retention (i.e. Keeping the Sunday daily backup as the Weekly for a given week). Backup Window ensures that data protection operations can only be performed during the specified window, and also allows for automated staggering of policy run start times to minimize impact on compute and storage resources.
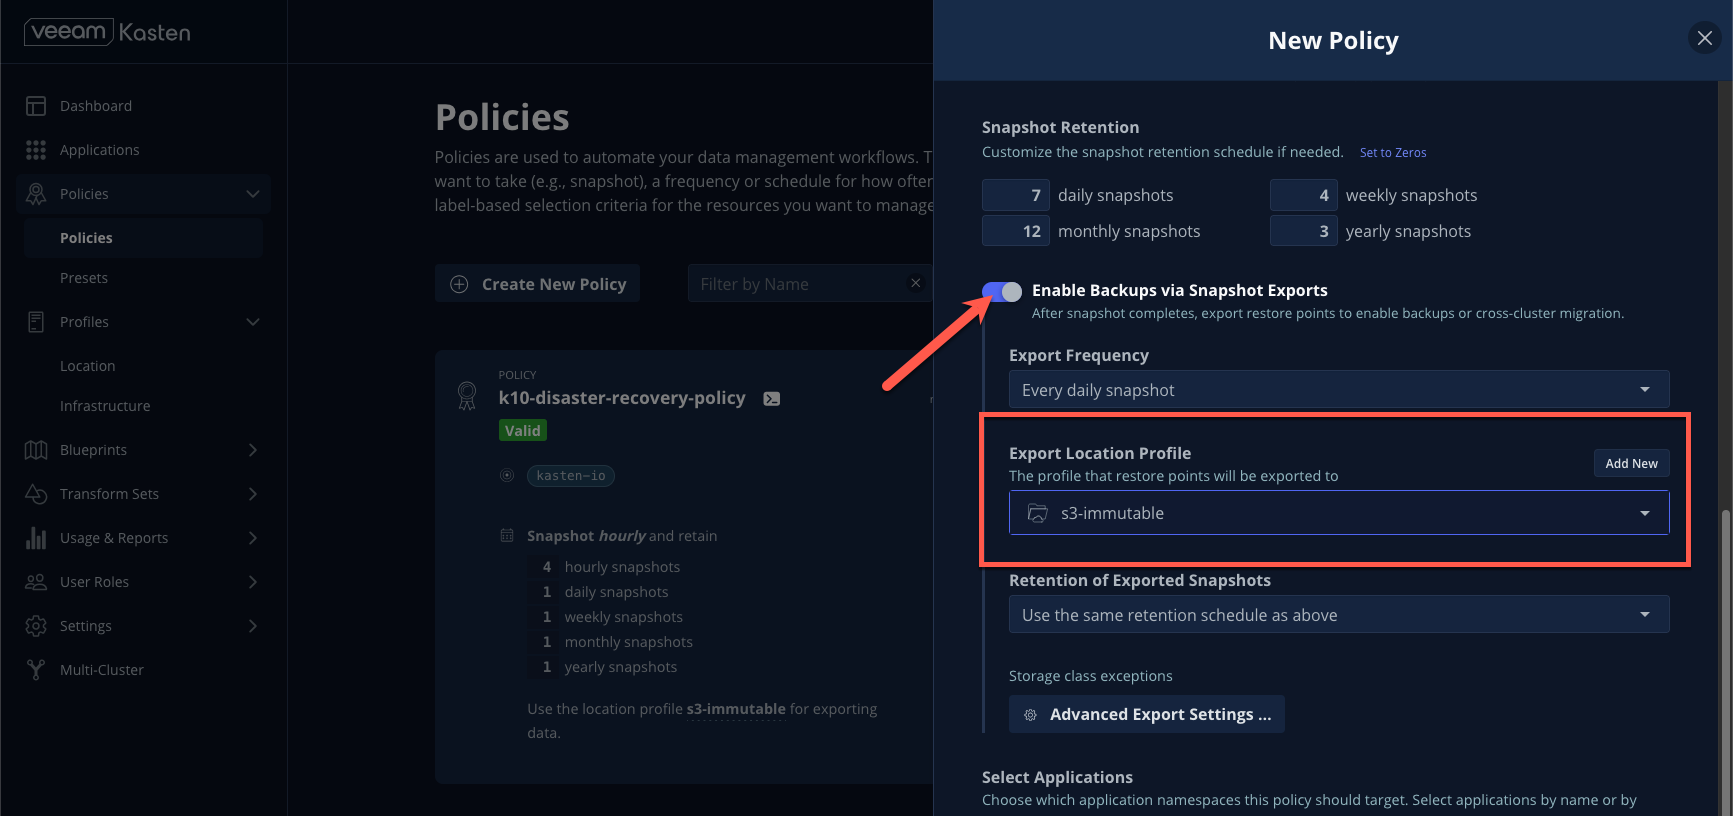
- Toggle Enable Backups via Snapshot Exports and select your
default-location-profileas the Export Location Profile.
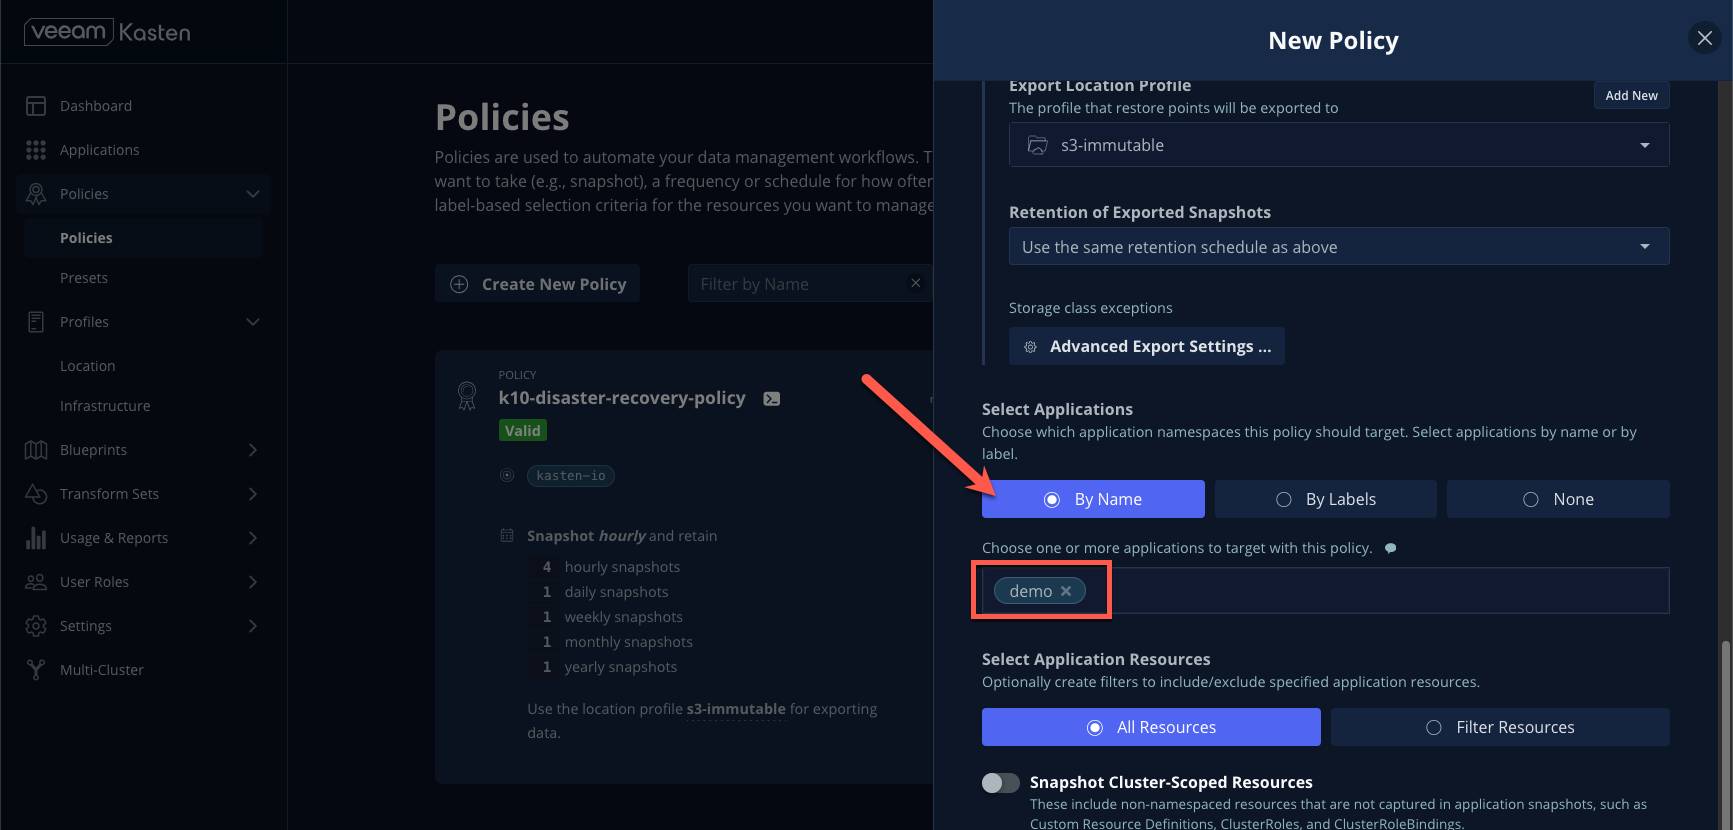
- Under Select Applications, click By Name and specify the
demonamespace as shown.
Click Create Policy.
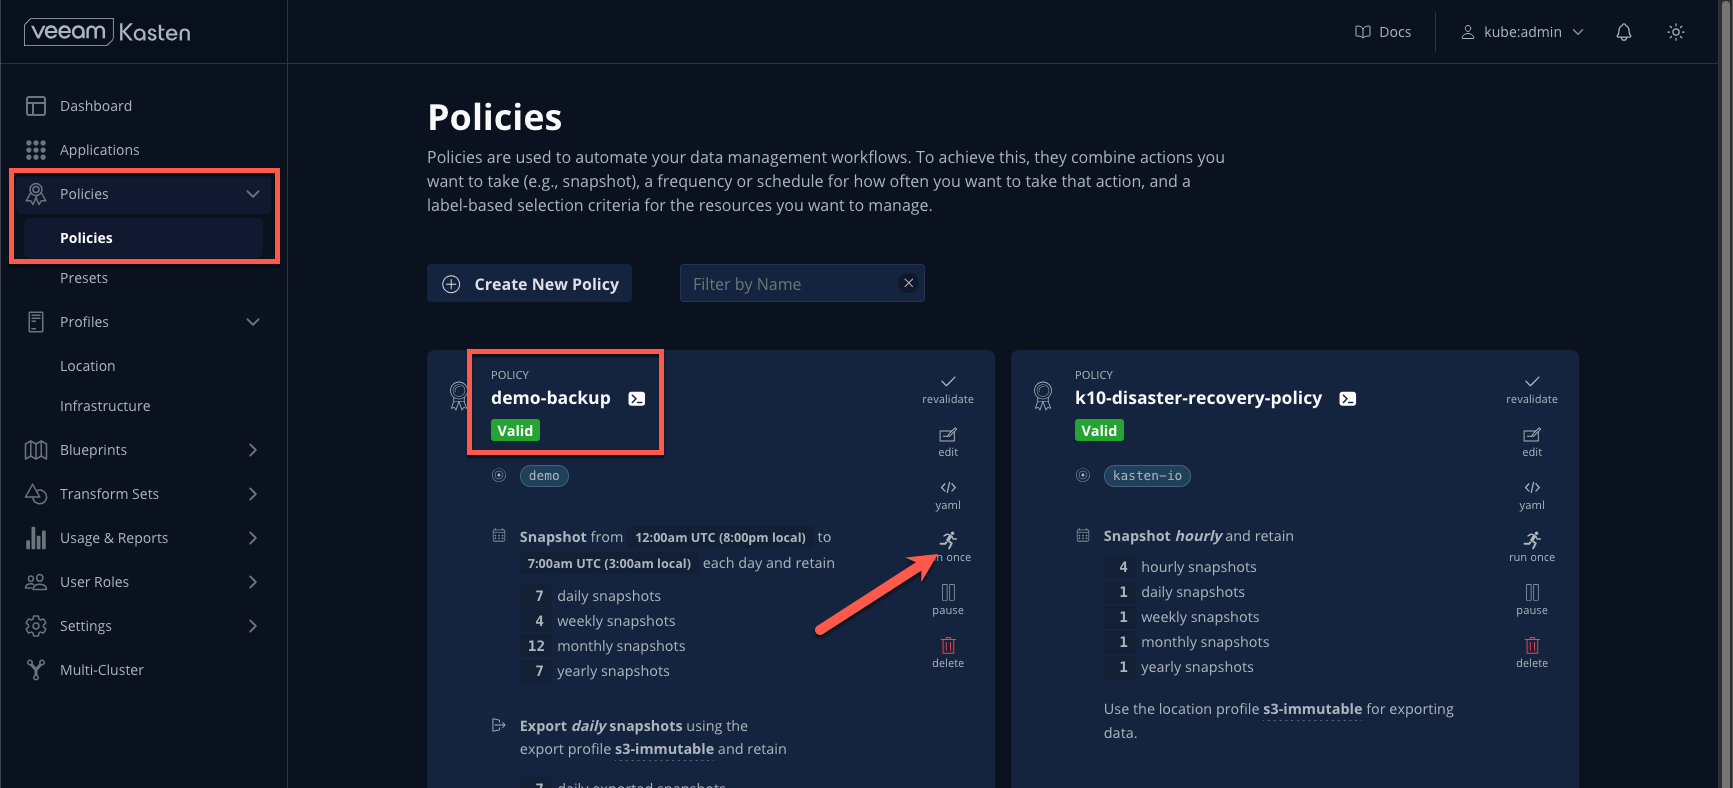
Click Run Once > Yes, Continue for the new policy.
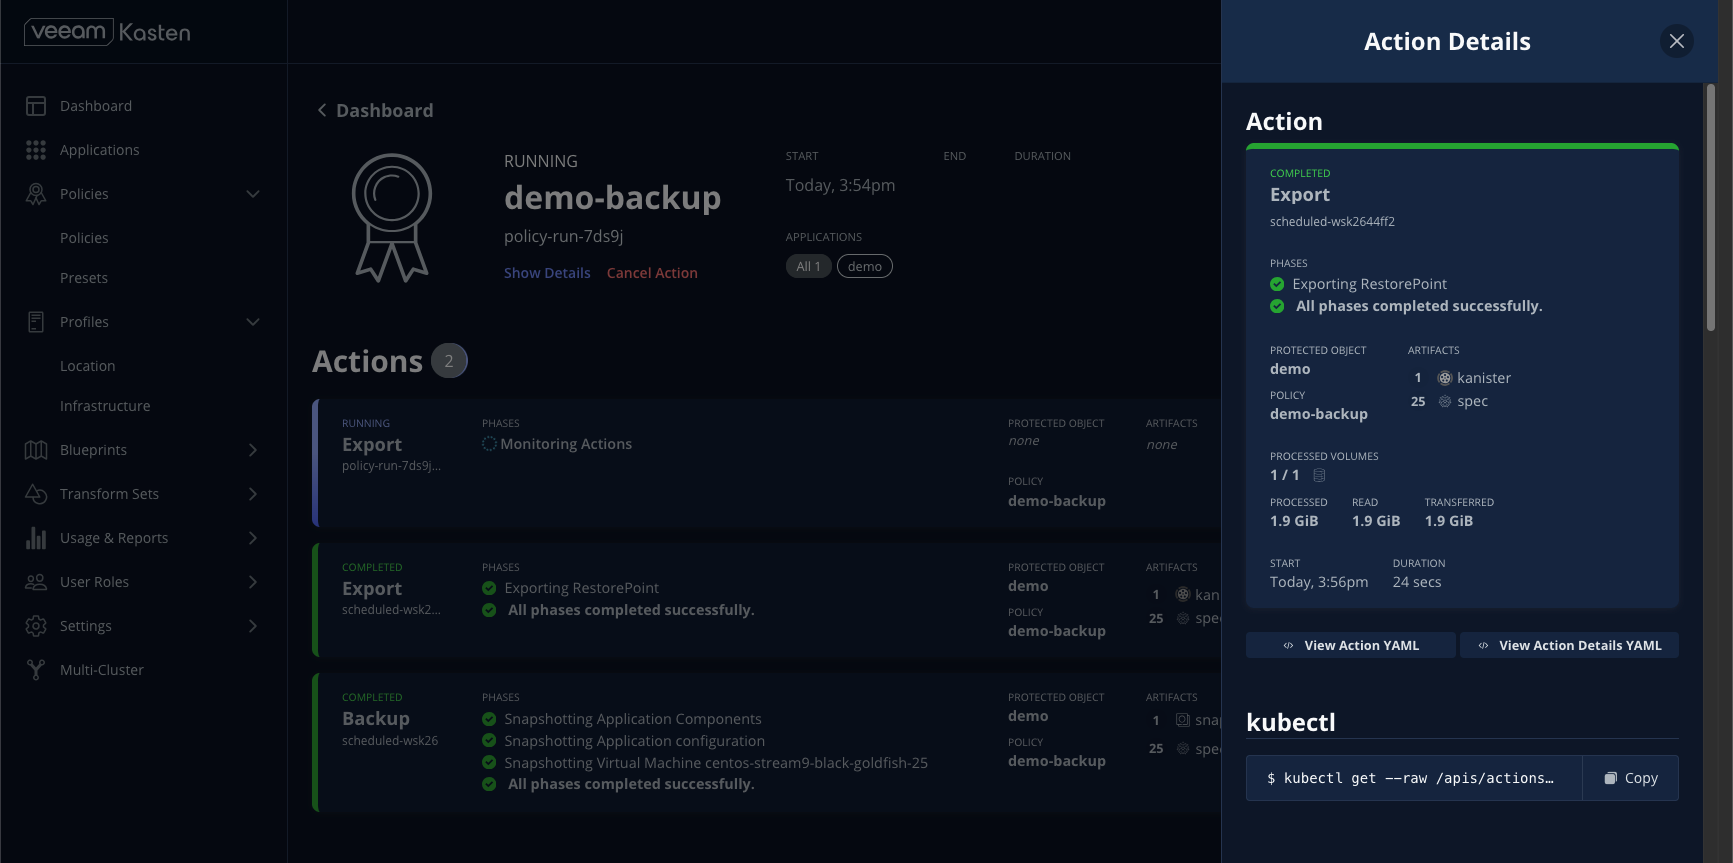
- Return to the Dashboard and select the policy run under Actions to monitor progress.
- Once complete, the
demoapplication will appear as Compliant as it currently fulfills the SLA defined in its policy.

Next Steps
- See Ideas for Customization for information on how this pattern can be further extended.
