$ git clone git@github.com:validatedpatterns-sandbox/hypershift.gitDeploying the hosted control plane (HyperShift) pattern
Prerequisites
An OpenShift cluster
To create an OpenShift cluster, go to the Red Hat Hybrid Cloud console.
Select OpenShift -> Red Hat OpenShift Container Platform -> Create cluster.
A GitHub account.
Additional installation tool dependencies. For details, see Patterns quick start.
AWS account with permissions to create S3 buckets.
You must have a public s3 bucket for OIDC discovery. If you do not have one, set
global.hypershift.createBuckettotruein thevalues-hypershift.yamlfile to create one during the deployment.You can also run
./pattern.sh make create-bucket BUCKET_NAME=<bucket-name> REGION=<region>to create the bucket before running./pattern.sh make install.
Preparing for deployment
Procedure
Fork the hypershift repository on GitHub. You must fork the repository because your fork is updated as part of the GitOps and DevOps processes.
Clone the forked copy of this repository.
Go to your repository: Ensure you are in the root directory of your Git repository by using:
$ cd /path/to/your/repositoryRun the following command to set the upstream repository:
$ git remote add -f upstream git@github.com:validatedpatterns-sandbox/hypershift.gitVerify the setup of your remote repositories by running the following command:
$ git remote -vExample outputorigin git@github.com:kquinn1204/hypershift.git (fetch) origin git@github.com:kquinn1204/hypershift.git (push) upstream git@github.com:validatedpatterns/hyperShift.git (fetch) upstream git@github.com:validatedpatterns/hypershift.git (push)Make a local copy of secrets template outside of your repository to hold credentials for the pattern.
Do not add, commit, or push this file to your repository. Doing so may expose personal credentials to GitHub.
Run the following commands:
$ cp values-secret.yaml.template ~/values-secret-hypershift.yamlPopulate this file with your secrets, the defaults for AWS credentials is
~/.aws/credentials. The GitHuboauthcredentials can remain commented out:$ vi ~/values-secret-hypershift.yamlCreate and switch to a new branch named
my-branch, by running the following command:$ git checkout -b my-branchEdit the
values-hypershift.yamlfile to provide your s3 bucket information.$ vi values-hypershift.yamlExample# Override values for HyperShift # Define the s3 bucket information global: hypershift: # Set createBucket to true to create a new S3 bucket for hosting hosted control plane assets createBucket: true oidc: # OIDC bucket information: provide region and bucketName region: '' bucketName: '' # Define the oauth provider for the management cluster # register a GitHub oAuth application: https://github.com/settings/applications/new # configure oauth provider: https://docs.openshift.com/container-platform/4.15/authentication/understanding-identity-provider.html # # The default configuration uses github as the provider oauth: type: GitHub secretName: ocp-github-oauth github: clientID: #clientID of the registered GitHub oAuth Application orgs: - name: #list of github authorized organizations # Set rbac.create to false if you want to skip creation of role/rolebinding. rbac: create: false # Provide a list of users to add to the clusterrolebinding users: []
A clusterrole is provided that grants the necessary permissions to the users specified in the |
+ . Add the changes to the staging area by running the following command:
+
$ git add -uCommit the changes by running the following command:
$ git commit -m "updates to hypershift pattern"Push the changes to your forked repository:
$ git push origin my-branch
The preferred way to install this pattern is by using the ./pattern.sh script.
Deploying the pattern by using the pattern.sh file
To deploy the pattern by using pattern.sh, complete the following steps:
Log in to your cluster by following this procedure:
Obtain an API token by visiting https://oauth-openshift.apps.<your-cluster>.<domain>/oauth/token/request.
Log in to the cluster by running the following command:
$ oc login --token=<retrieved-token> --server=https://api.<your-cluster>.<domain>:6443Or log in by running the following command:
$ export KUBECONFIG=~/<path_to_kubeconfig>
Deploy the pattern to your cluster. Run the following command:
$ ./pattern.sh make install
Verification
Verify that the Operators have been installed. Navigate to Operators → Installed Operators page in the OpenShift Container Platform web console,
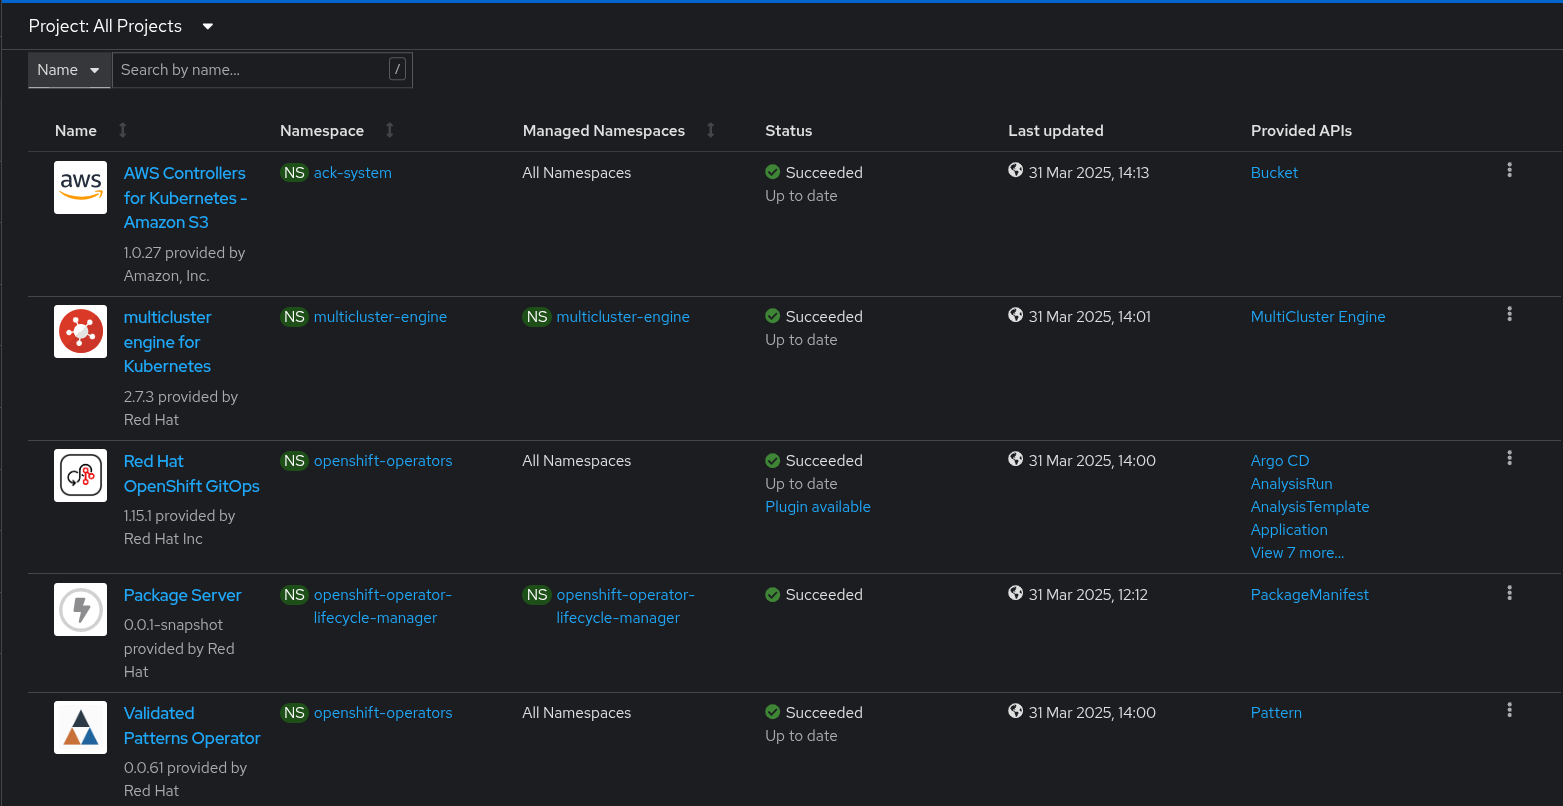 Figure 1. Hosted control plane Operators
Wait some time for everything to deploy. You can track the progress through the
Hub ArgoCDUI from the nines menu.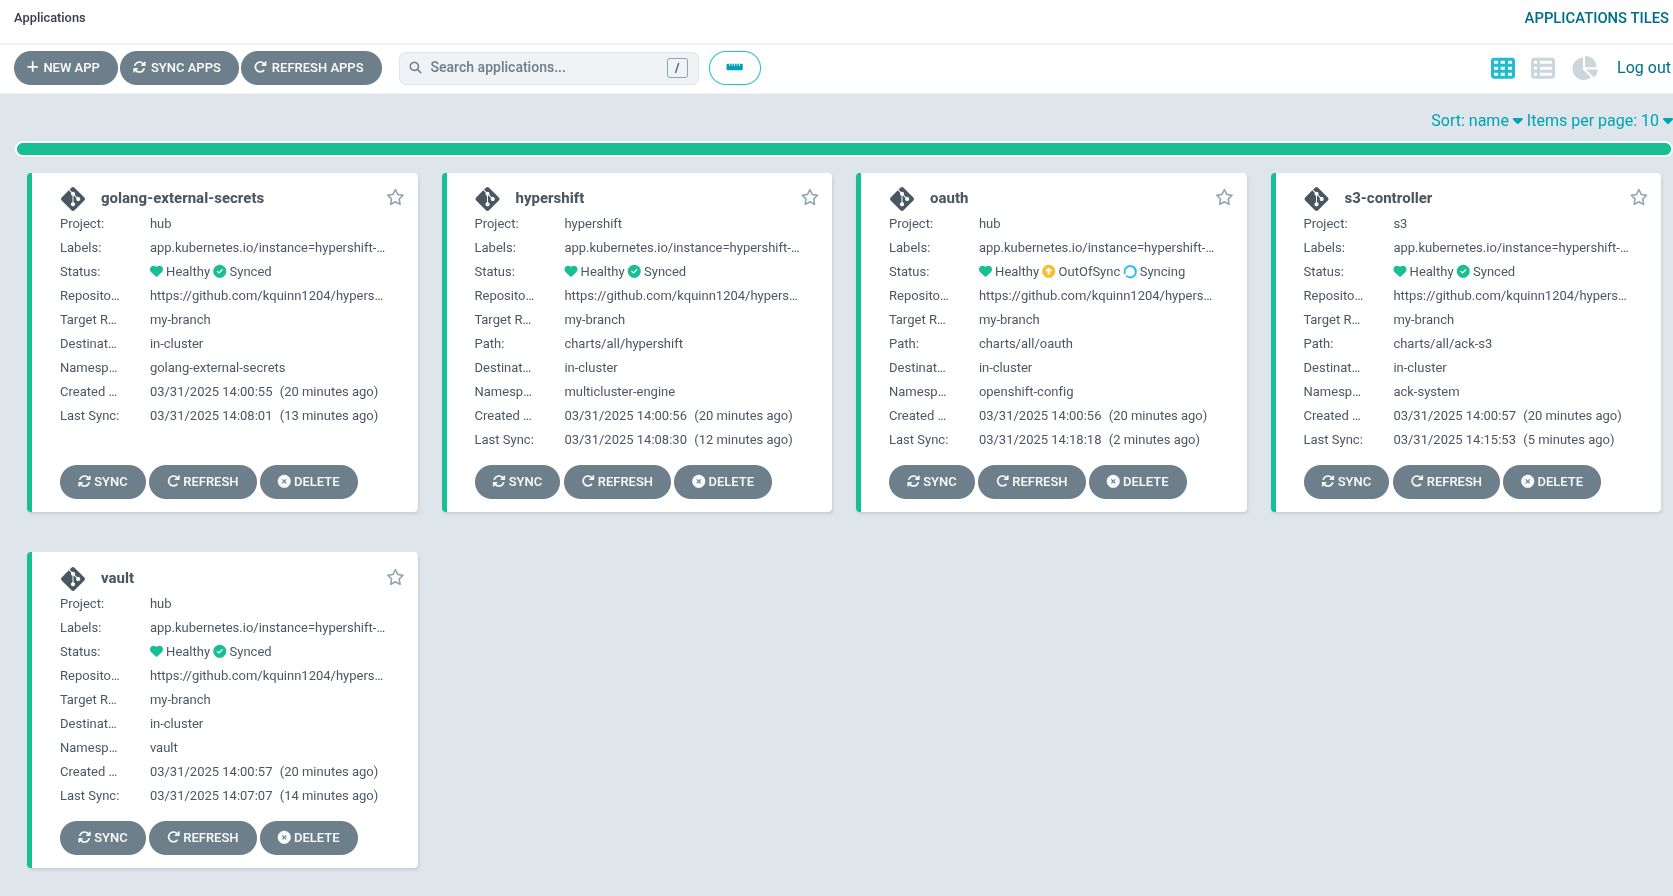 Figure 2. A Hosted control plane applications
As part of installing by using the script pattern.sh pattern, HashiCorp Vault is installed. Running ./pattern.sh make install also calls the load-secrets makefile target. This load-secrets target looks for a YAML file describing the secrets to be loaded into vault and in case it cannot find one it will use the values-secret.yaml.template file in the git repository to try to generate random secrets.
For more information, see section on Vault.
At this point, a management cluster is deployed and the pattern is ready to be used to create control planes as pods on a management cluster. For more information, see Hosted control planes.
