Deploying the Layered Zero Trust pattern
Follow these instructions to configure and deploy the Layered Zero Trust pattern.
Prerequisites
An OpenShift Container Platform 4.20, 4.21, or 4.22 cluster with a default
StorageClasswhich provides dynamicPersistentVolumestorage.Fulfill the general prerequisites for Validated Patterns.
Depending on the deployed pattern components, you might need additional hardware resources.
For the exact component versions validated on each OCP release, see the Support Matrix.
The Layered Zero Trust pattern’s default deployment assumes that none of its components have been installed previously. Verify that your OpenShift Container Platform environment does not already contain any of the listed components before proceeding. |
Quick install via OpenShift Console
The fastest way to deploy the pattern is through the OpenShift Console. This GUI-based deployment covers the "batteries included" baseline configuration. For advanced feature sets, customization, or using your own fork, see the Advanced Installation (CLI) section below.
Step 1: Install the Validated Patterns Operator
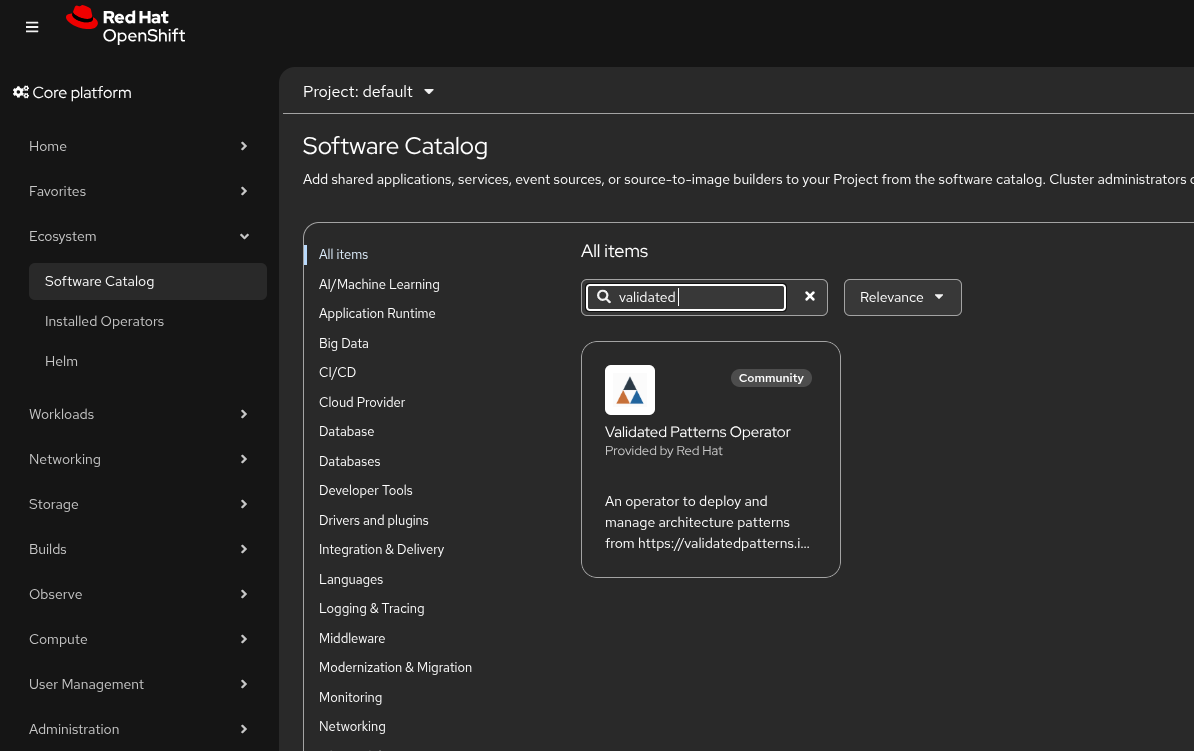
First, install the Validated Patterns Operator from the Software Catalog: navigate to Ecosystem > Software Catalog in the OpenShift Console, search for "validated", and select the Validated Patterns Operator.
Step 2: Review operator details
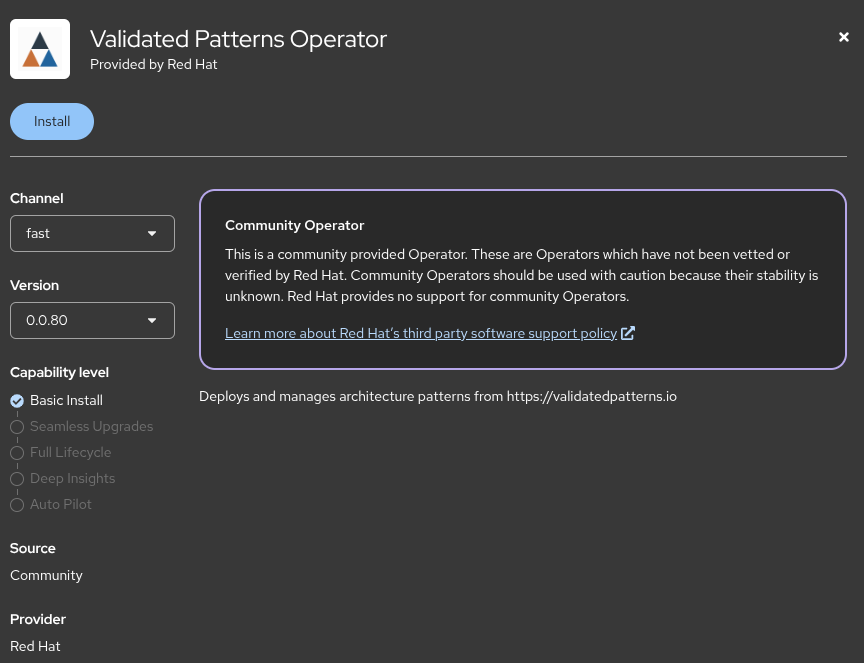
The operator detail page shows the channel (fast), version (latest), capability level (Basic Install), and provider (Red Hat).
Step 3: Configure and install the operator
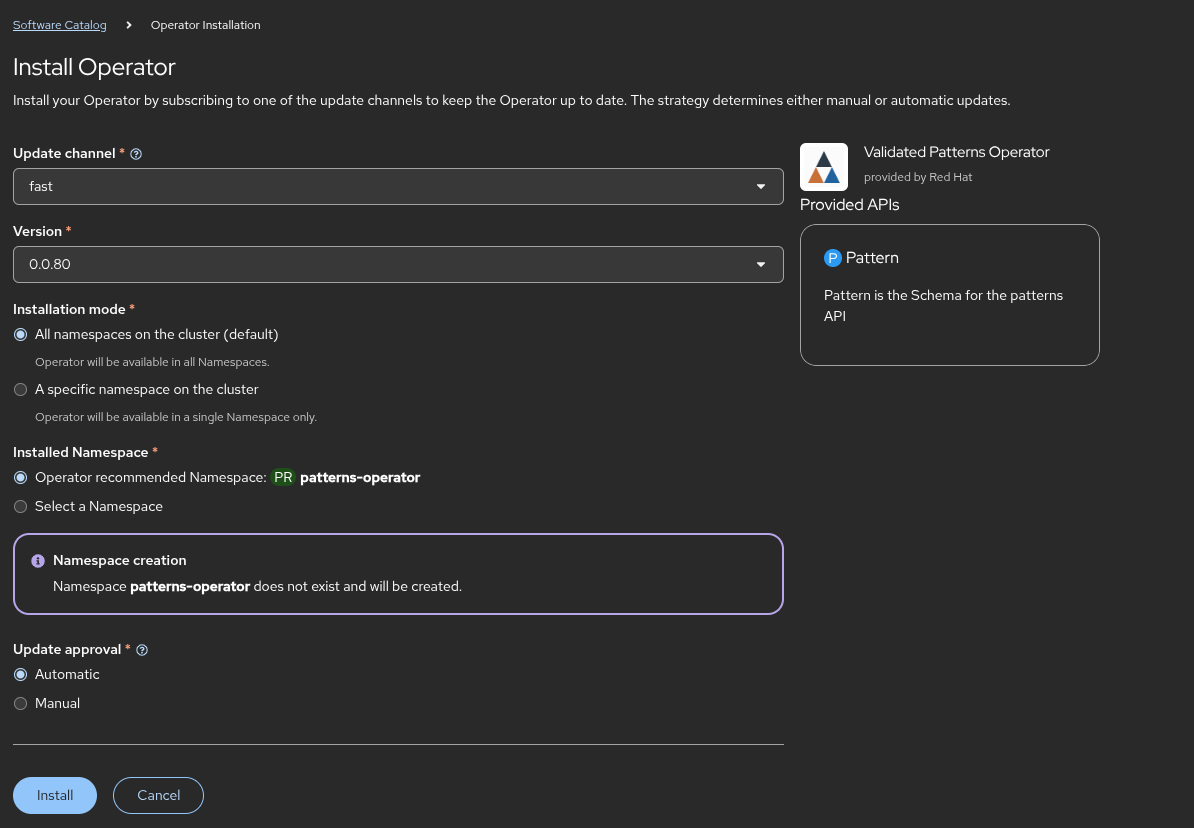
Accept the defaults: All namespaces, patterns-operator namespace (auto-created), Automatic updates. Click Install.
Step 5: Install the Layered Zero Trust pattern
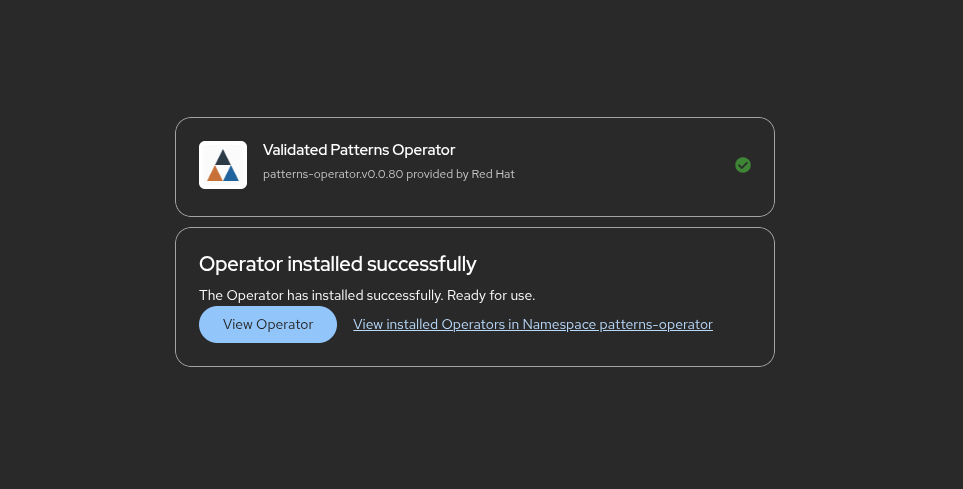
Once the operator is installed, the OpenShift Console will reload and a new Patterns entry will appear in the left-hand navigation menu. Navigate to Patterns > Catalog. By default, only maintained patterns are shown. Check the Tested checkbox to also display patterns with the tested tier, such as Layered Zero Trust.
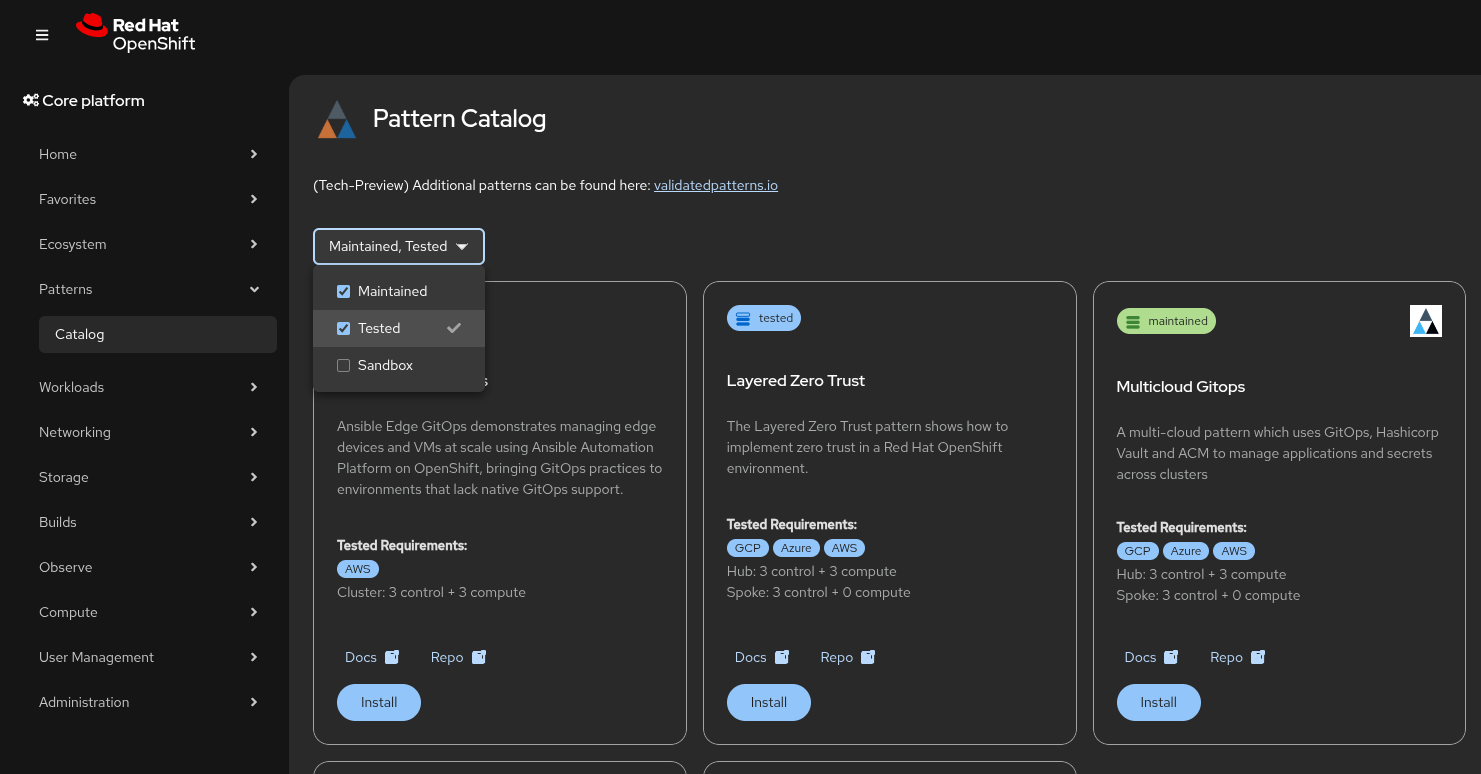
Click Install on the Layered Zero Trust card and configure:
Name:
layered-zero-trust(pre-filled)Target Repo:
https://github.com/validatedpatterns/layered-zero-trust.git(or your fork — check "I want to use my own fork")Target Revision:
main(or your branch)Secrets Configuration: Expand each section to configure secrets (config-demo, qtodo-db, qtodo-truststore, acs-central, keycloak, rhtpa-db, rhtpa-oidc-cli, keycloak-users, quay-users). Secrets marked "Auto-generate this value" will be created automatically by Vault.
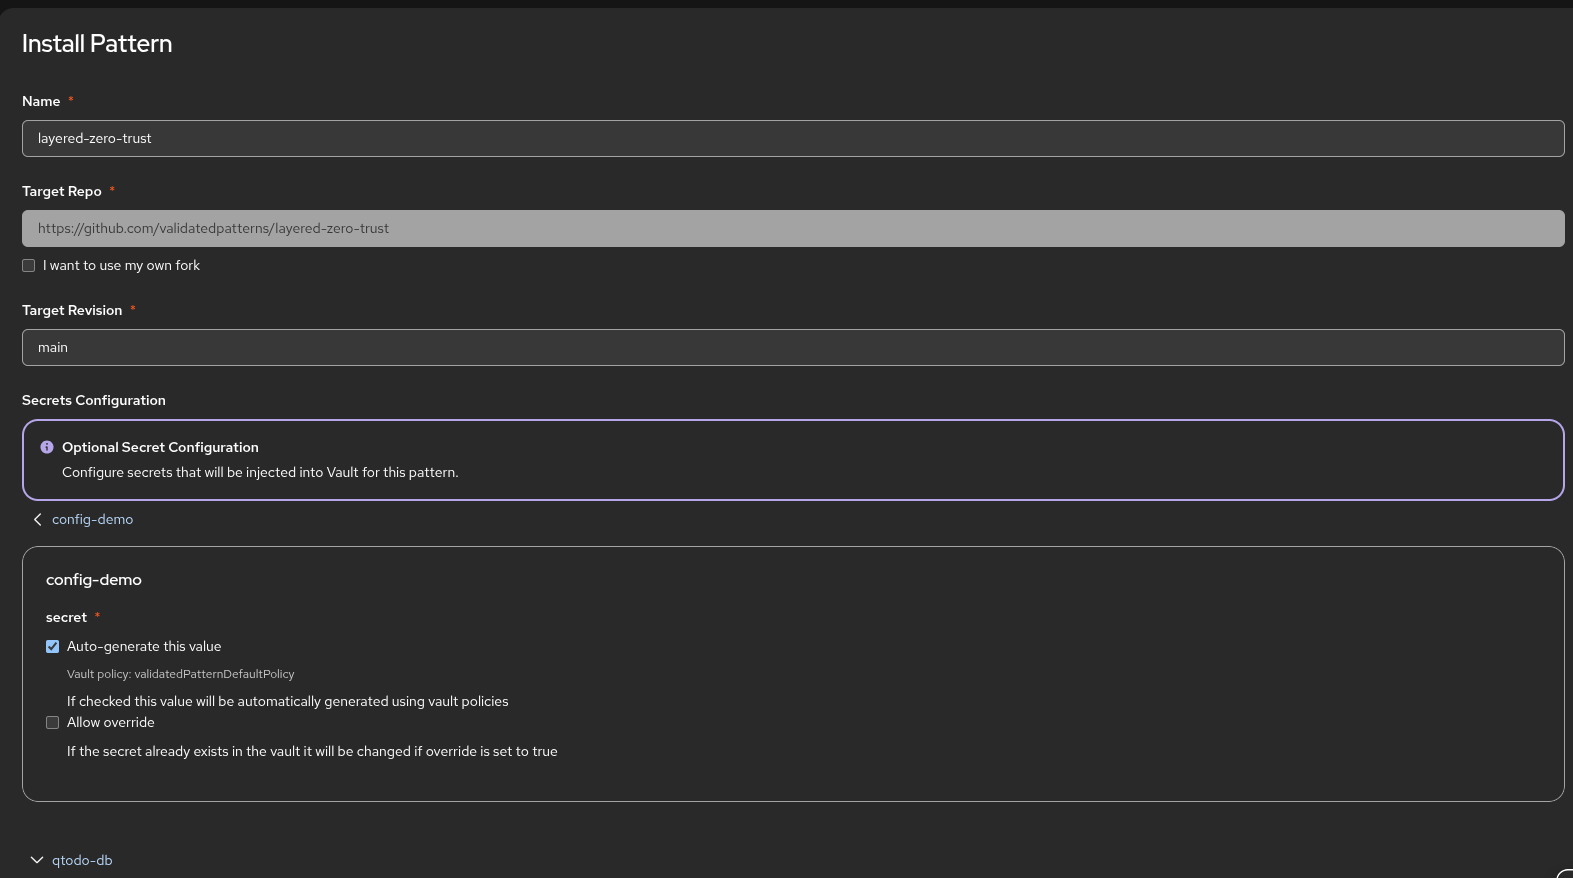
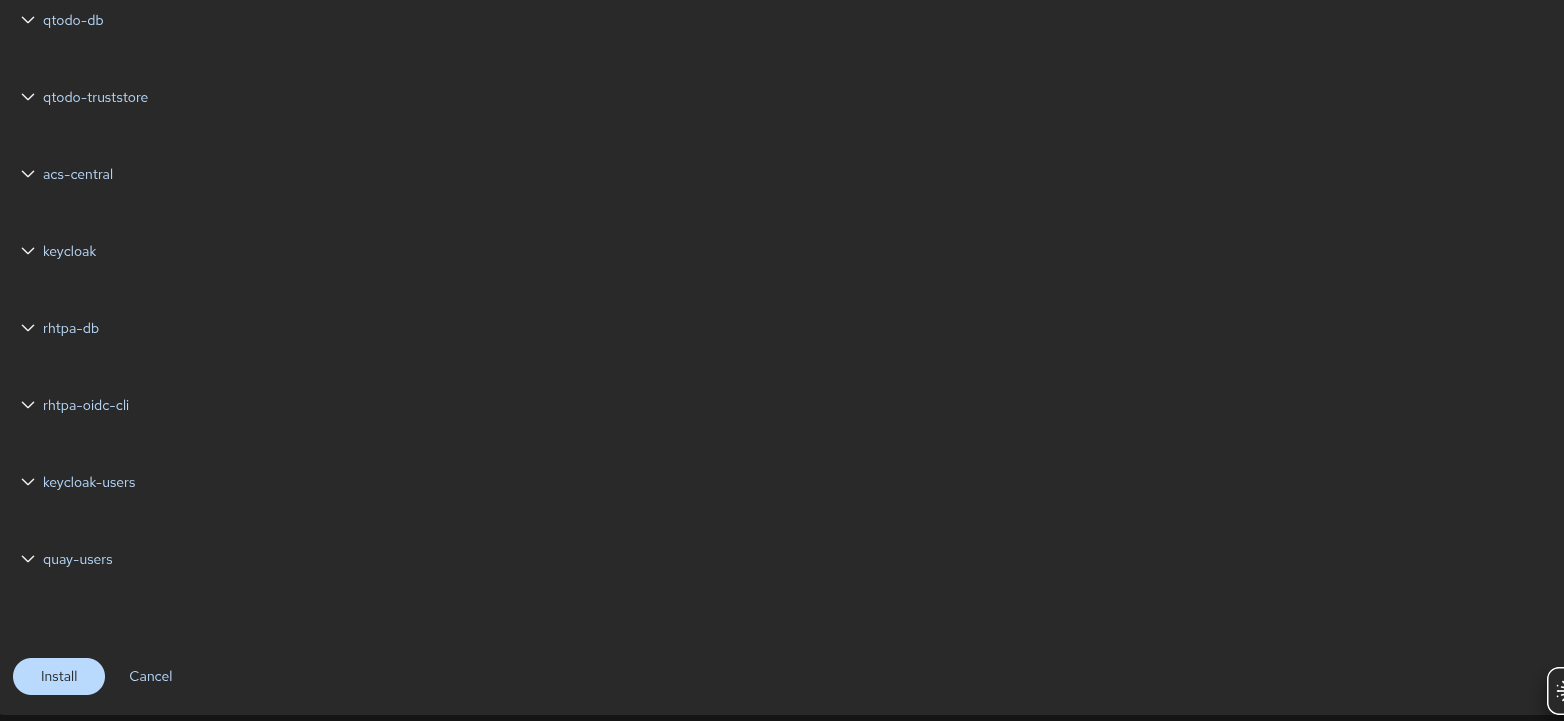
Click Install to deploy the pattern.
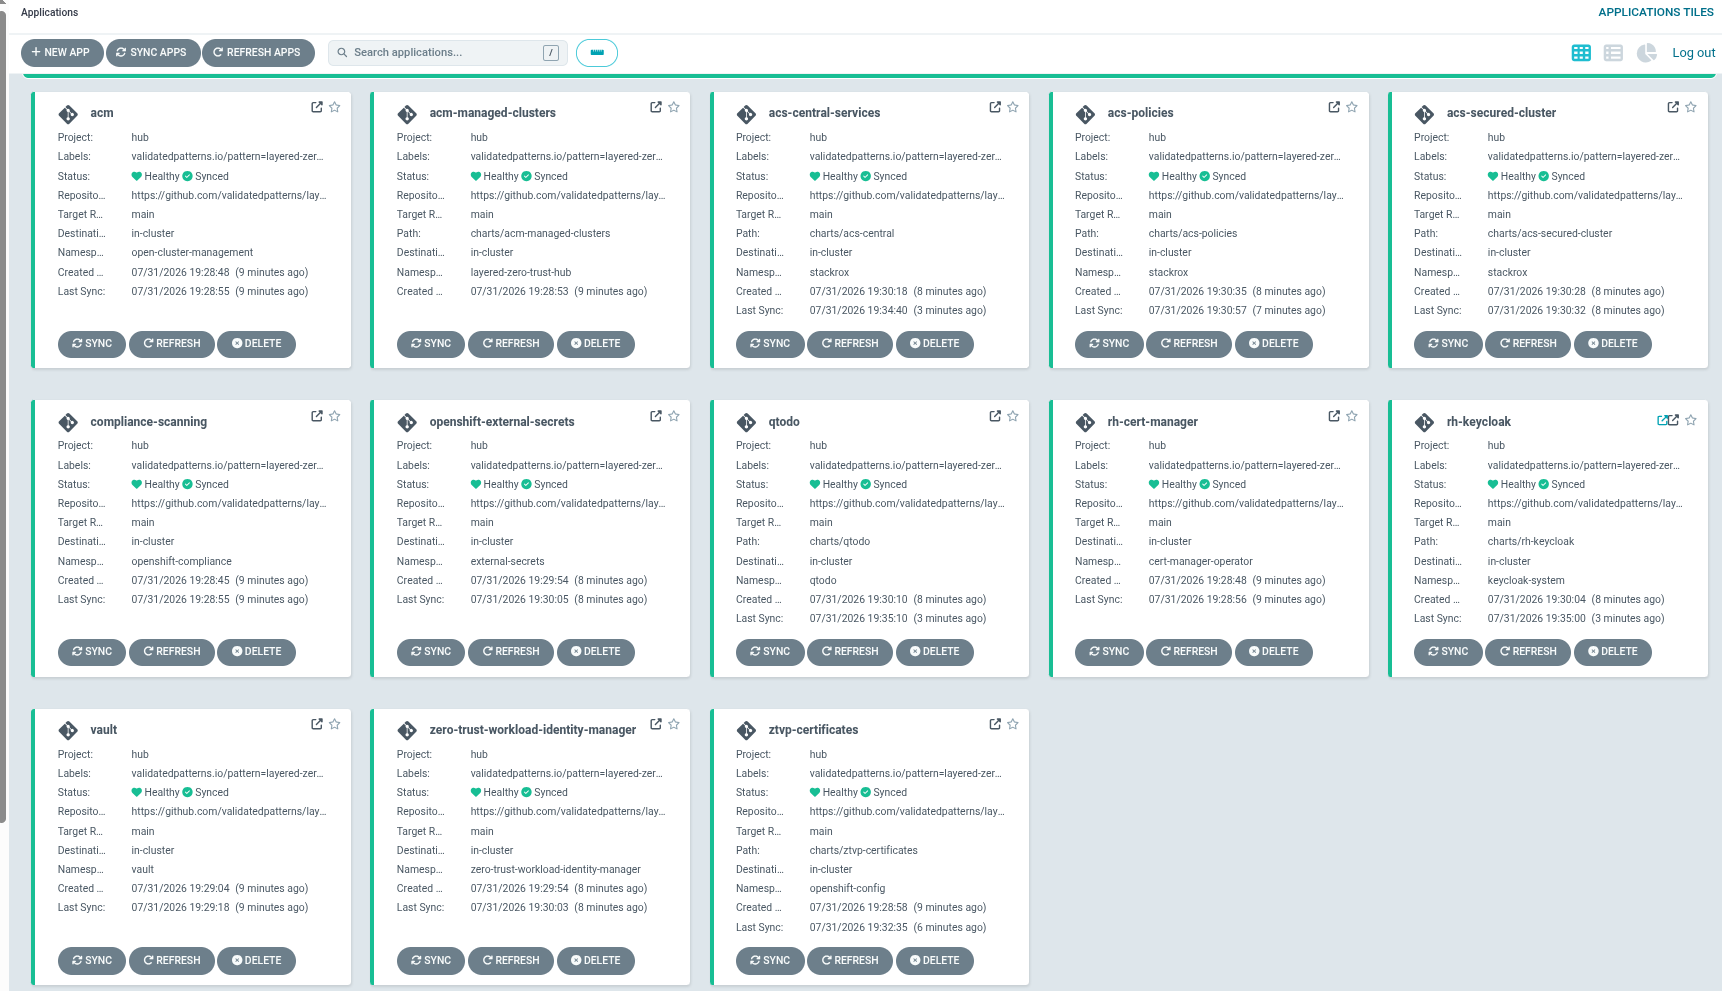
Step 6: Monitor deployment in Argo CD
Open the Argo CD console to monitor the deployment. Navigate to the proper Argo CD instance using the Application Selector (the icon with nine small squares) in the top navigation bar.
The Layered Zero Trust pattern installs two Argo CD instances on your Hub cluster:
Cluster Argo CD: Manages the
layered-zero-trust-hubApp-of-Apps application. This deploys the pattern’s components in the correct order.Hub Argo CD: Manages the Cluster Argo CD instance itself and the individual component applications.
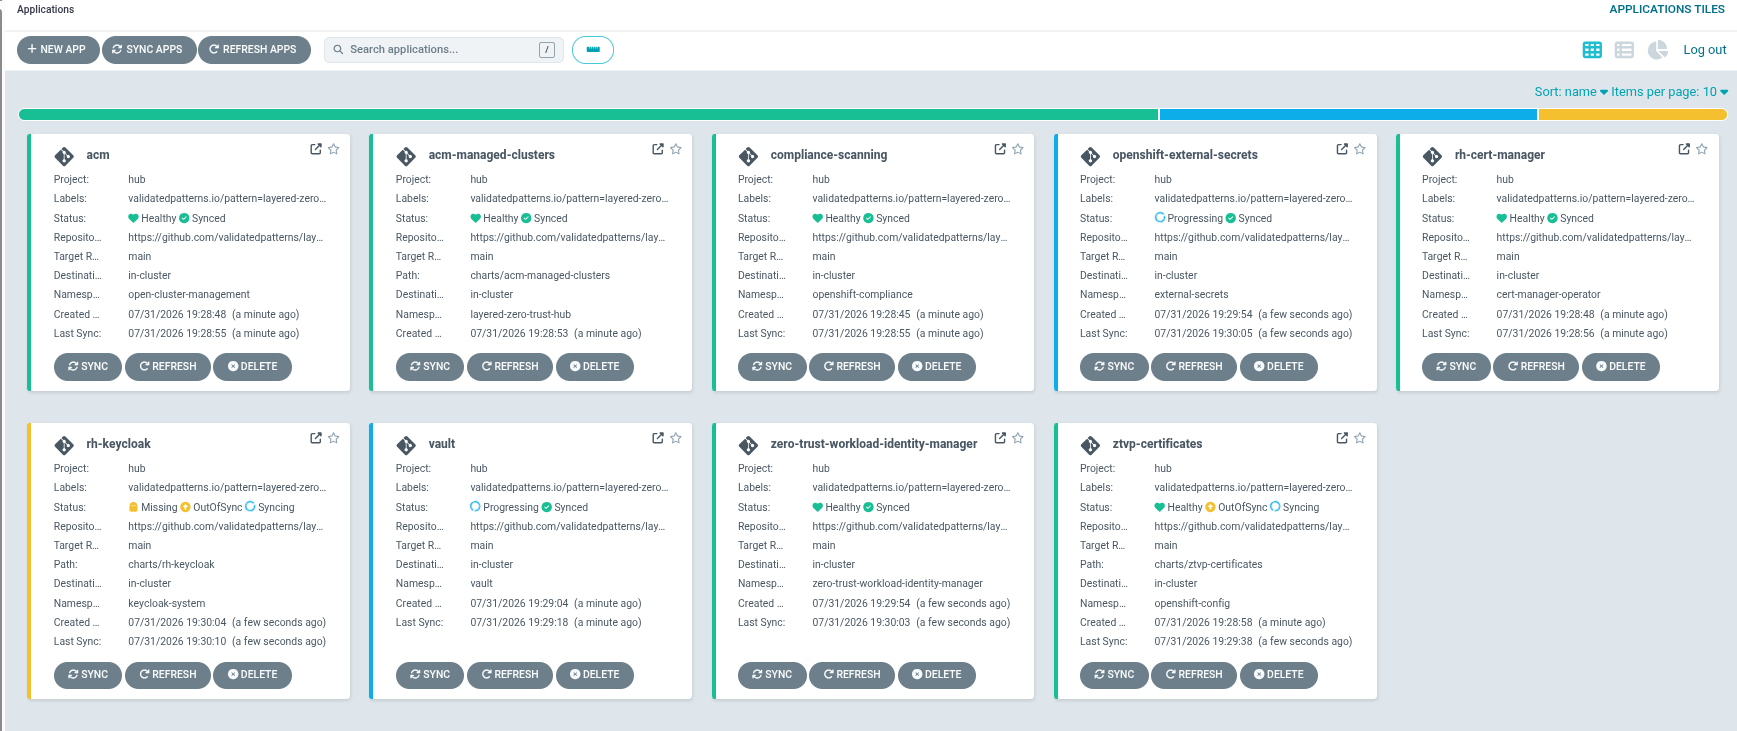
Navigate to the Cluster Argo CD instance to monitor the deployment progress. Components deploy in a specific order (sync waves). The deployment time varies depending on your cluster size and resources.
Advanced installation (CLI)
For advanced feature sets, customization, or when using your own fork, use the CLI-based installation with the pattern.sh script. This method provides full control over the deployment configuration.
Additional prerequisites
A GitHub account and a token with repository permissions, to read from and write to your forks.
Access to Podman (or Docker) for execution of the container images used by the
pattern.shscript for provisioning.
Repository setup
Fork the layered-zero-trust repository from GitHub. You must fork the repository because your fork is updated as part of the GitOps and DevOps processes.
Clone your forked repository.
$ git clone git@github.com:<your_username>/layered-zero-trust.gitGo to your repository:
$ cd </path_to_your_repository>Set up the upstream remote repository:
$ git remote add -f upstream git@github.com/validatedpatterns/layered-zero-trust.gitVerify the setup of your remote repositories:
$ git remote -vExample output:
origin  git@github.com:<your_username>/layered-zero-trust.git (fetch)
origin  git@github.com:<your_username>/layered-zero-trust.git (push)
upstream    https://github.com/validatedpatterns/layered-zero-trust.git (fetch)
upstream    https://github.com/validatedpatterns/layered-zero-trust.git (push)
Create a local copy of the secret values file:
$ cp values-secret.yaml.template ~/values-secret-layered-zero-trust.yamlTo prevent pushing secrets to your Git repository, the command places the
values-secret.yamlfile in your home directory.Create a new feature branch from the
mainbranch:$ git checkout -b my-branch main(Optional) Customize the execution of the pattern by changing the Helm values files, then commit the changes.
$ git add <files_you_changed>
$ git commit -m "Pattern customization"
The following configuration files define the behavior and settings of the various components:
values-global.yaml: Global pattern configurationvalues-hub.yaml: Hub cluster specific configurationvalues-secret.yaml: Secret values (created from template)values-<environment>.yaml: Environment-specific overrides (AWS, Azure, GCP)
Push the changes from your local branch to your forked repository.
$ git push origin my-branch
Deploying the pattern
Log in to your OpenShift Container Platform cluster:
By using the
ocCLI:Get an API token by visiting
https://oauth-openshift.apps... /oauth/token/request Log in with the retrieved token:
$ oc login --token=<retrieved_token> --server=https://api.<your_cluster>.<domain>:6443
By using KUBECONFIG:
$ export KUBECONFIG=~/<path_to_kubeconfig>
Run the pattern deployment script:
$ ./pattern.sh make install
Verify the deployment
The Layered Zero Trust pattern provisions every component and manages them through OpenShift Container Platform GitOps. After you deploy the pattern, verify that all components are running correctly.
The Layered Zero Trust pattern installs the following two Argo CD instances on your Hub cluster. You can view these instances in the OpenShift Container Platform web console by using the Application Selector (the icon with nine small squares) in the top navigation bar.
Cluster Argo CD: Deploys an App-of-Apps application named
layered-zero-trust-hub. This application installs the pattern’s components.Hub Argo CD: Manages the Cluster Argo CD instance and the individual components that belong to the pattern on the hub OpenShift Container Platform instance.
If every Argo CD application reports a Healthy status, the pattern has been deployed successfully.
Accessing credentials
All sensitive credentials in this pattern are generated automatically and stored in HashiCorp Vault during deployment. There are no static default passwords. This section explains how to retrieve credentials for testing and exploration.
Retrieve the Vault root token
The Vault initialization data, including the root token, is stored in a Kubernetes Secret in the imperative namespace:
$ oc extract -n imperative secret/vaultkeys --to=- --keys=vault_data_json 2>/dev/null \
  | jq -r ".root_token"
Save this value — you will need it to authenticate to Vault.
Access the Vault Web UI
Get the Vault route URL and open it in a browser:
$ echo "https://$(oc get route -n vault vault -o jsonpath='{.spec.host}')"On the login screen, select Token as the authentication method and paste the root token retrieved above.
Access Vault via CLI
You can query Vault directly from inside the vault-0 pod without installing any local tooling. First export the token:
$ VAULT_TOKEN=$(oc extract -n imperative secret/vaultkeys --to=- --keys=vault_data_json 2>/dev/null \
  | jq -r ".root_token")
Then use oc exec to run Vault commands. For example, to list the top-level secret paths:
$ oc exec -n vault vault-0 -- env VAULT_TOKEN="$VAULT_TOKEN" vault kv list secret/To read a specific secret:
$ oc exec -n vault vault-0 -- env VAULT_TOKEN="$VAULT_TOKEN" \
  vault kv get secret/hub/infra/users/keycloak-users
Key secret paths
Secrets are organized by component under the secret/ KV mount. The table below lists the paths relevant to testing the default pattern deployment.
| Path | Contents |
|---|---|
|
|
|
|
|
|
|
|
|
|
|
|
|
|
|
|
Importing existing clusters
The pattern supports importing pre-existing OpenShift Container Platform clusters into the Hub cluster, converting them into Managed Clusters.
Do not use the Instead, use the |
Procedure
Copy the
kubeconfigfile of the cluster you want to import to your local system.In the
values-secret.yamlfile, define thekubeconfigsecret by providing the local file system path to thekubeconfigfile you copied in Step 1.- name: kubeconfig-spoke vaultPrefixes: - hub fields: - name: content path: ~/.kube/kubeconfig-ztvp-spokeIn the
values-hub.yamlfile, add a new entry in theclusterGroup.managedClusterGroupskey.managedClusterGroups: exampleRegion: name: group-one acmlabels: - name: clusterGroup value: group-one helmOverrides: - name: clusterGroup.isHubCluster value: falseAlso in the
values-hub.yamlfile, add your cluster definition in theacmManagedClusters.clusterskey.acmManagedClusters: clusters: - name: ztvp-spoke-1 clusterGroup: group-one labels: cloud: auto-detect vendor: auto-detect kubeconfigVaultPath: secret/data/hub/kubeconfig-spokeDeploy the pattern.
