git clone git@github.com:your-username/qat-accelerated-istio.gitDeploying the Intel QAT accelerated Multicloud GitOps pattern
Prerequisites
An OpenShift Container Platform cluster
To create an OpenShift Container Platform cluster, go to the Red Hat Hybrid Cloud console and select Services -> Containers -> Create cluster.
The cluster must have a dynamic
StorageClassto provisionPersistentVolumes. It was tested with ODF (OpenShift Data Foundation) or LVM Storage solutions. CephFS should be set as a default Storage Class - Setup GuideCluster sizing requirements.
OpenShift Container Platform Cluster must have Image Registry - Setup Guide
BIOS should be configured according to official instructions. Please consult your platform guide on how to do this. Configuration options should be similar to these:
Socket configuration > IIO configuration > Intel VT-d Enabled
Platform Configuration > Miscellaneous Configuration > SR-IOV Support Enabled
Socket Configuration > IIO Configuration > IOAT Configuration > Sck<n> > IOAT Configuration Enabled
Optional: A second OpenShift Container Platform cluster for multicloud demonstration.
The use of this pattern depends on having at least one running Red Hat OpenShift Container Platform cluster. However, consider creating a cluster for deploying the GitOps management hub assets and a separate cluster for the managed cluster.
If you do not have a running Red Hat OpenShift Container Platform cluster, you can start one on a public or private cloud by using Red Hat Hybrid Cloud Console.
Procedure
Fork the multicloud-gitops-qat repository on GitHub.
Clone the forked copy of this repository.
Create a local copy of the secret values file that can safely include credentials for the config-demo application and edit it if you want to customize the secret. If not, the framework generates a random password.
cp values-secret.yaml.template ~/values-secret-multicloud-gitops.yamlDo not commit this file. You do not want to push personal credentials to GitHub.
(Optional) You may customize the deployment for your cluster depending on your needs by editing values-global.yaml and values-hub.yaml. To do this run the following commands:
git checkout -b my-branchvi values-global.yamlgit add values-global.yamlgit commit values-global.yamlgit push origin my-branchDeploy the pattern by running
./pattern.sh make installor by using the Validated Patterns Operator - both methods are described below.
Deploying the cluster by using the pattern.sh file
This is preferred way of installation, as it does not require from user to manually generate and put certificates in Hashicorp Vault.
To deploy the cluster by using the pattern.sh file, complete the following steps:
Login to your cluster by running the following command:
oc loginOptional: Set the
KUBECONFIGvariable for thekubeconfigfile path:export KUBECONFIG=~/<path_to_kubeconfig>Deploy the pattern to your cluster. Script will automatically generate certificates and keys in
/HOME/certsdirectory. Run the following command:./pattern.sh make install(Optional) If cluster is behind proxy extra settings might be needed for unsealing Vault. Please run the following command (put your proxy information in place of angle braced <PLACEHOLDERS>):
oc -n imperative patch cj imperative-cronjob -p '{"spec":{"jobTemplate":{"spec":{"template":{"spec":{"initContainers":[{"name": "git-init", "env": [{"name":"HOME","value":"/git/home"},{"name":"HTTP_PROXY", "value":"<PUT_YOUR_HTTP_PROXY_HERE>"},{"name":"HTTPS_PROXY","value":"<PUT_YOUR_HTTPS_PROXY_HERE>"},{"name":"NO_PROXY","value":"<PUT_YOUR_NOPROXY_HERE>"},{"name":"http_proxy", "value":"<PUT_YOUR_HTTP_PROXY_HERE>"},{"name":"https_proxy","value":"<PUT_YOUR_HTTPS_PROXY_HERE>"},{"name":"no_proxy","value":"<PUT_YOUR_NOPROXY_HERE>"}]}]}}}}}}'

oc -n imperative patch cj unsealvault-cronjob -p '{"spec":{"jobTemplate":{"spec":{"template":{"spec":{"initContainers":[{"name": "git-init", "env": [{"name":"HOME","value":"/git/home"},{"name":"HTTP_PROXY", "value":"<PUT_YOUR_HTTP_PROXY_HERE>"},{"name":"HTTPS_PROXY","value":"<PUT_YOUR_HTTPS_PROXY_HERE>"},{"name":"NO_PROXY","value":"<PUT_YOUR_NOPROXY_HERE>"},{"name":"http_proxy", "value":"<PUT_YOUR_HTTP_PROXY_HERE>"},{"name":"https_proxy","value":"<PUT_YOUR_HTTPS_PROXY_HERE>"},{"name":"no_proxy","value":"<PUT_YOUR_NOPROXY_HERE>"}]}]}}}}}}'
After installation is done user must wait until all required Machine Configurations are applied to worker nodes. Depending on node specifications, rebooting and applying changes can take around 30 minutes. User can check progress by running command:
oc get mcpIf worker MachineConfigPool is marked as ready all applications will automatically continue deployment.
Verify that the Operators have been installed.
To verify, in the OpenShift Container Platform web console, navigate to Operators → Installed Operators page.
Check that the following Operators are installed with
Succeededstatus (Figure 1):Advanced Cluster Management for Kubernetes
multicluster engine for Kubernetes
Node Feature Discovery Operator
Red Hat Openshift GitOps
Validated Patterns Operator
Sail Operator
Intel Device Plugin Operator
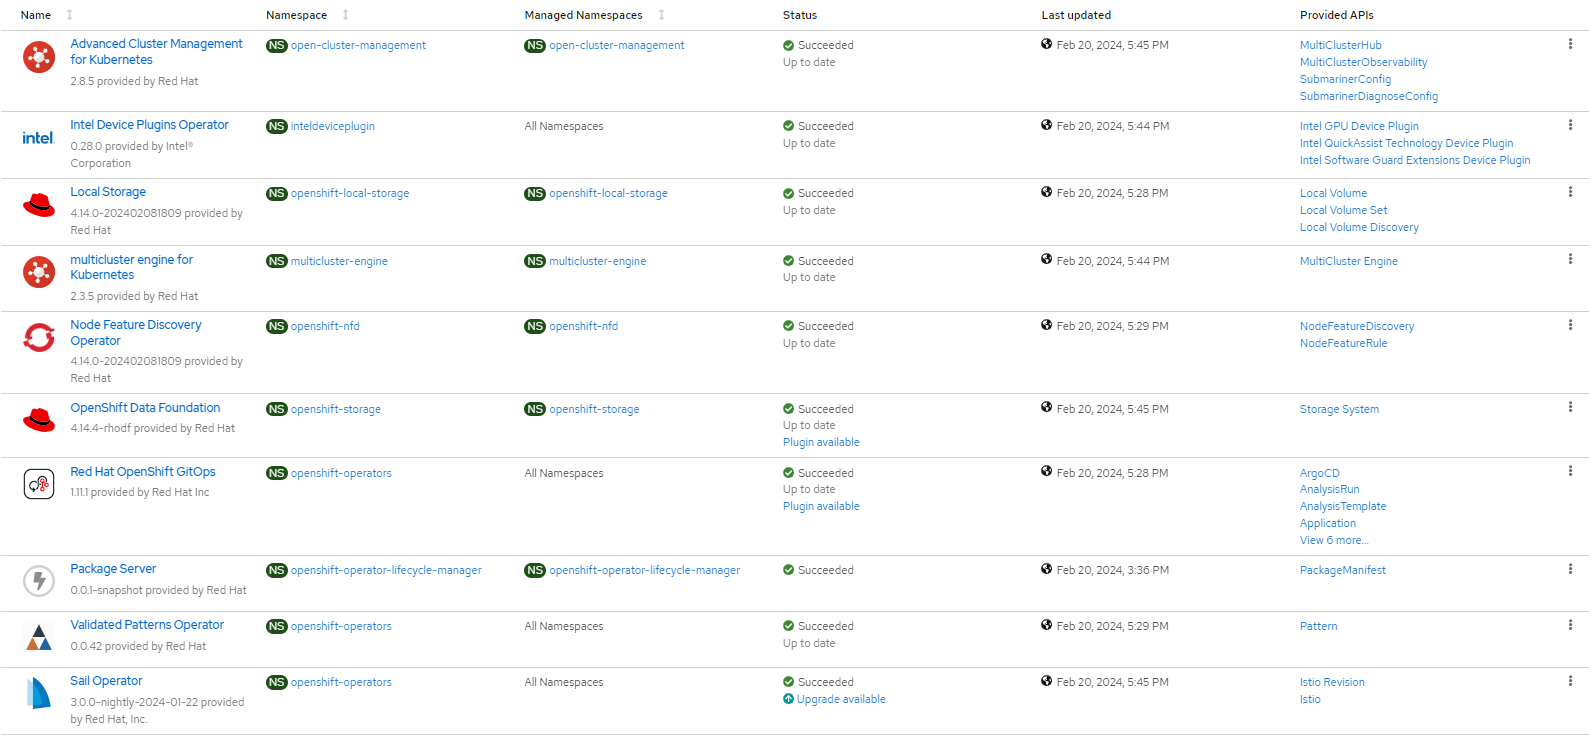 Figure 1. List of Installed Operators for Multicloud GitOps Validated Pattern with qat
Deploying the cluster by using the Validated Patterns Operator
To install the Validated Patterns Operator:
Log in to the OpenShift Container Platform web console and select Operators > OperatorHub.
Search for Validated Patterns Operator, open it and click Install.
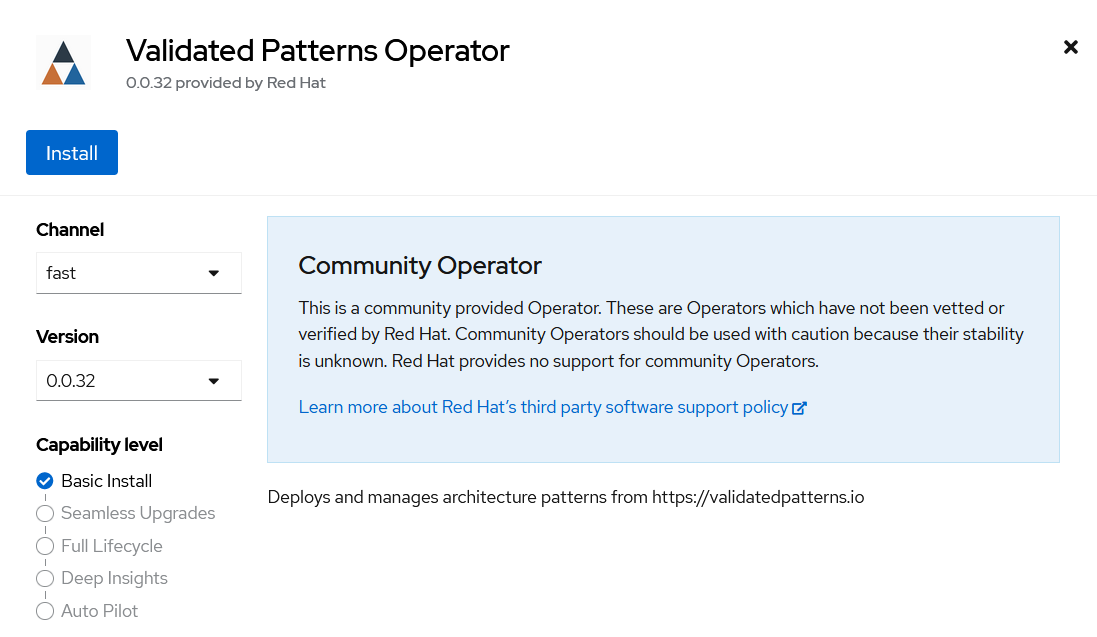 Figure 2. Install Validated Patterns Operator
Choose default settings for the installation mode, namespaces and update strategy and confirm it by clicking Install.
Select Operators > Installed Operators.
Ensure that Validated Patterns Operator is listed in the
openshift-operatorsproject with a statusSucceeded.
After succeeded installation open Validated Patterns Operator, go to Pattern tab and click Create Pattern.
Set the Name field to
multicloud-gitops-qat, and Cluster Group Namehub. Values must be the same as in values-global.yaml file (Figure 3).As a Git Config > Target Repo value, paste the link to your fork. Under Git Config > Target Revision write the name of your branch (Figure 3).
Click the Create button to create the pattern.
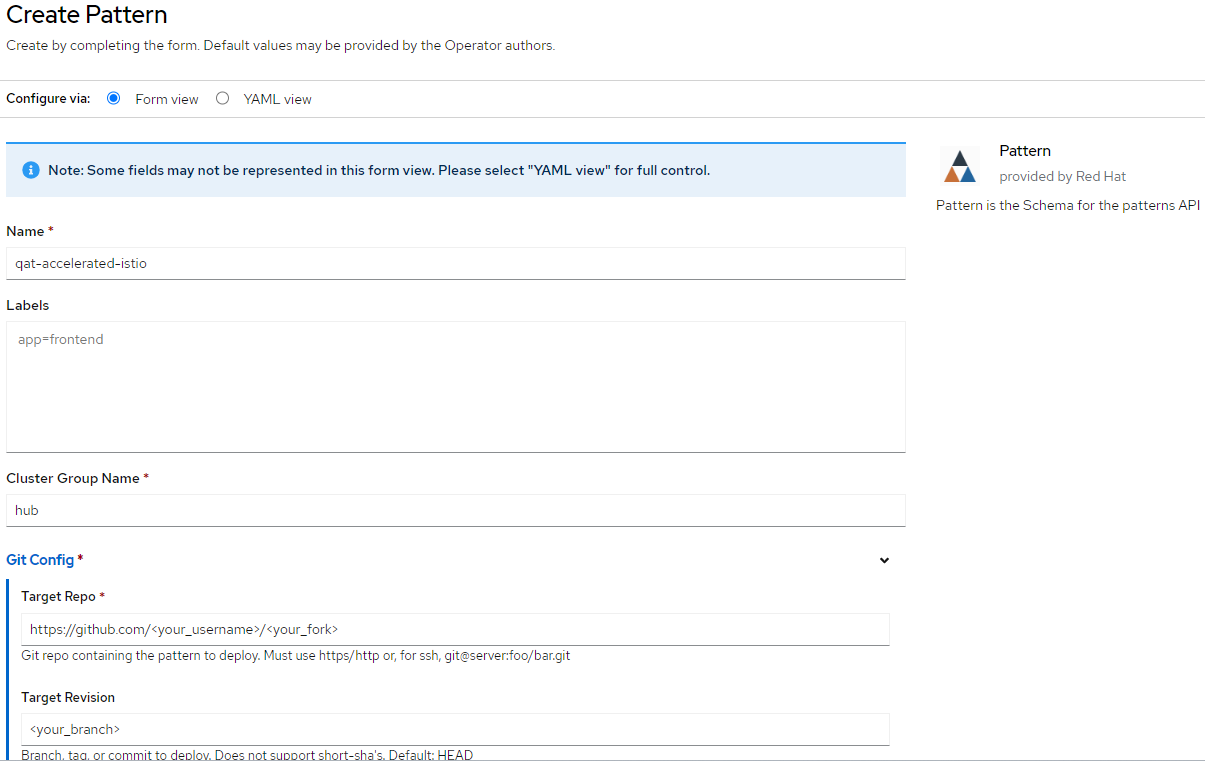 Figure 3. Create Pattern Form
Verify that the rest of Operators have been installed:
To verify, in the OpenShift Container Platform web console, navigate to Operators → Installed Operators page.
Check that the following Operators are installed with
Succeededstatus (Figure 1):Advanced Cluster Management for Kubernetes
multicluster engine for Kubernetes
Node Feature Discovery Operator
Red Hat Openshift GitOps
Sail Operator
Intel Device Plugin Operator
Generate client and server certificates. You can refer to Istio official guide: https://istio.io/latest/docs/tasks/traffic-management/ingress/secure-ingress/#generate-client-and-server-certificates-and-keys
After generating certificates, add them as secrets to Vault manually:
Go to the Vault service route. The URL can be found either:
by running following command:
oc -n vault get route vault -ojsonpath='{.spec.host}'or in the OpenShift Container Platform web console under Networking > Routes for
vaultproject.
Log into the Vault using root token. Root token can be found by executing command:
oc -n imperative get secrets vaultkeys -ojsonpath='{.data.vault_data_json}' | base64 -dAfter logging in, go to
secretcatalog and click the Create secret button. You should see form with inputs, which must be filled manually (Figure 4).Path for this secrets should be filled with one of the following strings:
global/certs/httpbin.example.com.crt,global/certs/example.com.crt,global/certs/httpbin.example.com.key.In the Secret data section add a new secret. In the left field (key) put the content string. On the right, paste your certificate.
Click the Add button, and then the Save button.
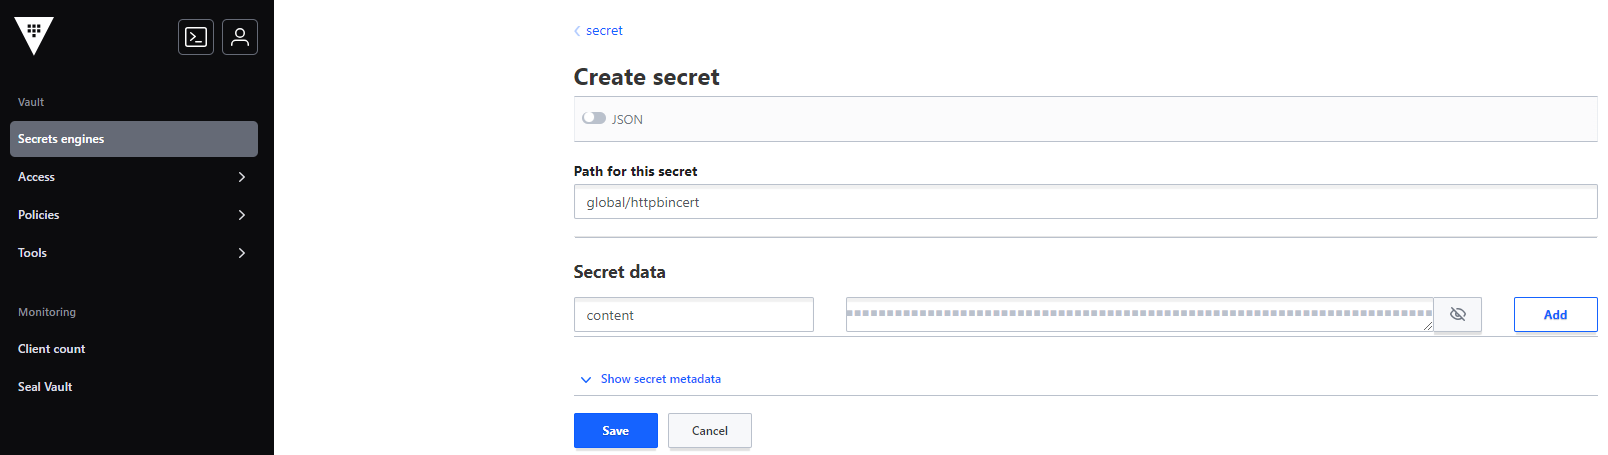 Figure 4. Create secret in the Vault
Verification
Go to the Hub ArgoCD and verify that all applications are synchronized. The URL can be found in OpenShift Container Platform web console under Networking > Routes for the project multicloud-gitops-qat-hub or use command:
oc -n multicloud-gitops-qat-hub get route hub-gitops-server -ojsonpath='{.spec.host}'All applications should be Healthy and Synced:
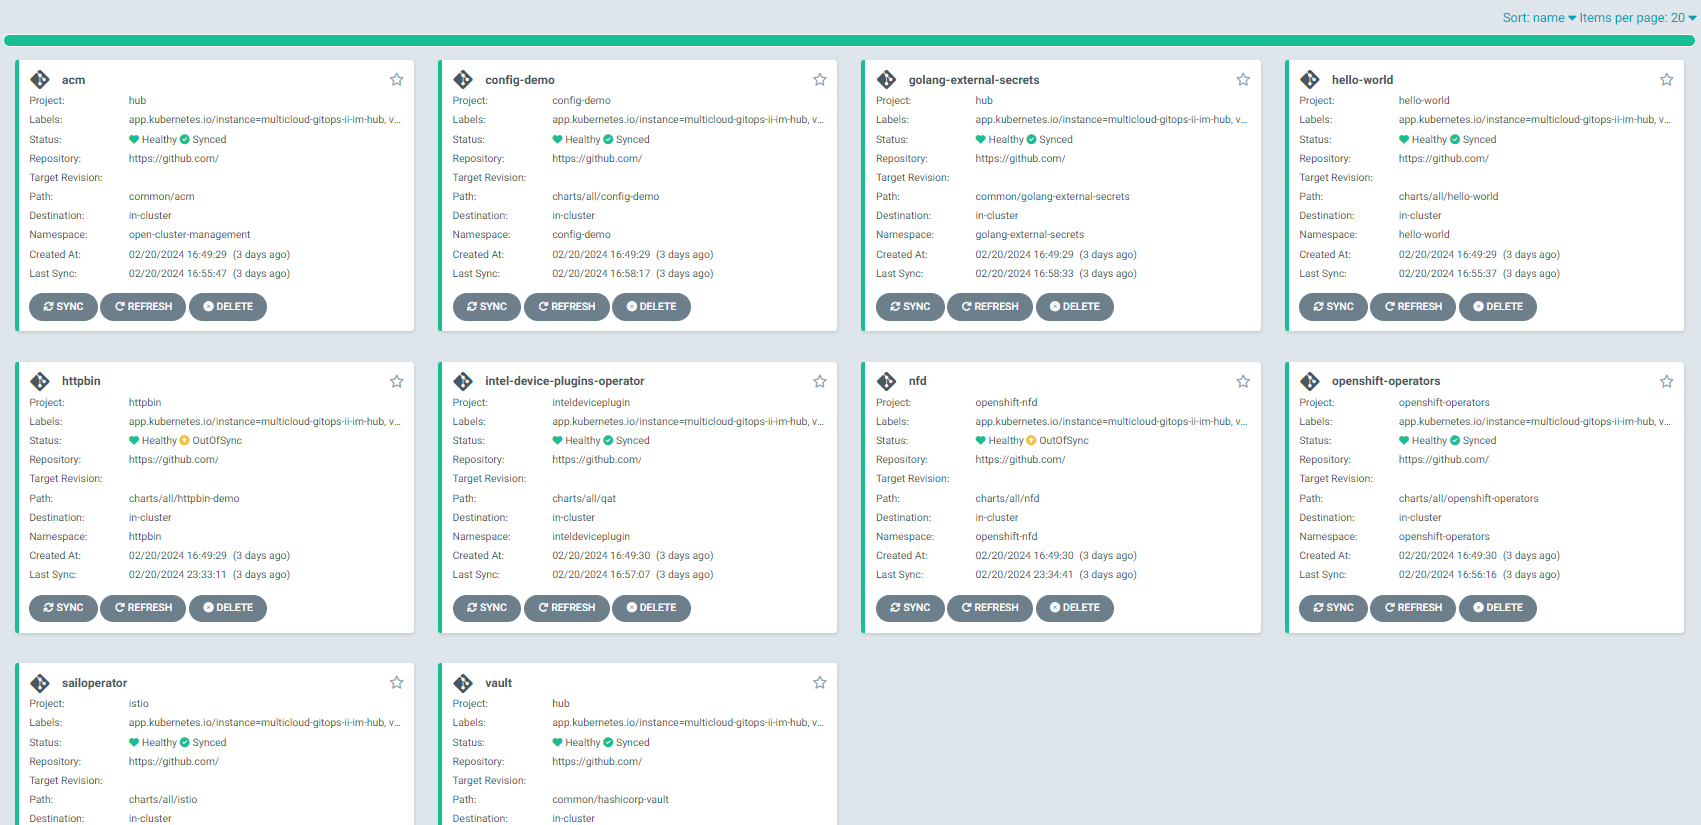
Figure 5. ArgoCD panel with
qat-appCheck the httpbin pod logs of an httpbin Deployment to verify if it uses Intel QAT. In the OpenShift Container Platform web console, navigate to Workloads > Pods. Change project to httpbin and open the Logs tab in the pod details. Go to container istio-proxy and check if there are no errors.
In case of Intel Device Plugin Operator not working correctly or if QAT is not available the error can look like this:
No devices found
No device found
Failed to start QAT device.
In case of wrong Security Context Constraints (SCC) the error can look like this:
Cannot open /dev/vfioVerify that all certificates and keys were correctly generated in path /HOME_PATH/certs. There should be 11 files: client.example.com.crt, client.example.com.key, example.com.key, helloworld.example.com.csr, httpbin.example.com.crt, httpbin.example.com.key, client.example.com.csr, example.com.crt, helloworld.example.com.crt, helloworld.example.com.key, httpbin.example.com.csr.
When everything is ready, you can check if Istio handles requests correctly by sending a request to the httpbin application. Note that <NODE_IP> value can be IP address of any worker node.
export INGRESS_HOST=<NODE_IP>
export INGRESS_NS=istio-system
export INGRESS_NAME=istio-ingressgateway
export SECURE_INGRESS_PORT=$(oc -n "${INGRESS_NS}" get service "${INGRESS_NAME}" -o jsonpath='{.spec.ports[?(@.name=="https")].nodePort}')

cd $HOME
curl --resolve "httpbin.example.com:${SECURE_INGRESS_PORT}:$INGRESS_HOST" --cacert certs/httpbin.example.com.crt "https://httpbin.example.com:${SECURE_INGRESS_PORT}/status/418"
User should get following response:
-=[ teapot ]=-

   _...._
 .'  _ _ `.
| ."` ^ `". _,
\_;`"---"`|//
  |       ;/
  \_     _/
	`"""`
As a part of this pattern, HashiCorp Vault has been installed. Refer to the section on Vault.
Next steps
After the management hub is set up and works correctly, attach one or more managed clusters to the architecture.
For instructions on deploying the edge, refer to Attach a managed cluster (edge) to the management hub.
