Prerequisites
- Podman is installed on your system.
- You have the OpenShift Container Platform installation program and the pull secret for your cluster. You can get these from Install OpenShift on AWS with installer-provisioned infrastructure.
- Red Hat Openshift cluster running in AWS.
It is also possible to deploy the RAG-LLM Gitops pattern to Azure. Since these docs focus mostly on the AWS deployment, it’s recommended that you reference RAG-LLM pattern on Microsoft Azure for more details about installing this pattern on Azure.
Procedure
Create the installation configuration file using the steps described in Creating the installation configuration file.
Note: Supported regions are
us-east-1us-east-2us-west-1us-west-2ca-central-1sa-east-1eu-west-1eu-west-2eu-west-3eu-central-1eu-north-1ap-northeast-1ap-northeast-2ap-northeast-3ap-southeast-1ap-southeast-2andap-south-1. For more information about installing on AWS see, Installation methods.Customize the generated
install-config.yamlcreating one control plane node with instance typem5.2xlargeand 3 worker nodes with instance typem5.2xlarge. A sample YAML file is shown here:additionalTrustBundlePolicy: Proxyonly apiVersion: v1 baseDomain: aws.validatedpatterns.io compute: - architecture: amd64 hyperthreading: Enabled name: worker platform: aws: type: m5.2xlarge replicas: 3 controlPlane: architecture: amd64 hyperthreading: Enabled name: master platform: aws: type: m5.2xlarge replicas: 1 metadata: creationTimestamp: null name: kevstestcluster networking: clusterNetwork: - cidr: 10.128.0.0/14 hostPrefix: 23 machineNetwork: - cidr: 10.0.0.0/16 networkType: OVNKubernetes serviceNetwork: - 172.30.0.0/16 platform: aws: region: us-east-1 publish: External pullSecret: "<pull-secret>" sshKey: | ssh-ed25519 <public-key> someuser@redhat.comFork the rag-llm-gitops git repository.
Clone the forked repository by running the following command:
$ git clone git@github.com:your-username/rag-llm-gitops.gitGo to your repository: Ensure you are in the root directory of your git repository by using the following command:
$ cd rag-llm-gitopsCreate a local copy of the secret values file by running the following command:
$ cp values-secret.yaml.template ~/values-secret-rag-llm-gitops.yamlNote: For this demo, editing this file is unnecessary as the default configuration works out of the box upon installation.
Add the remote upstream repository by running the following command:
$ git remote add -f upstream git@github.com:validatedpatterns/rag-llm-gitops.gitCreate a local branch by running the following command:
$ git checkout -b my-test-branch mainBy default the pattern deploys the EDB Postgres for Kubernetes as a vector database. To deploy Elasticsearch, change the
global.db.typeparameter to theELASTICvalue in your local branch invalues-global.yaml. For more information see, Deploying a different databases to change the vector database.By default instance types for the GPU nodes are
g5.2xlarge. Follow the Customize GPU provisioning nodes to change the GPU instance types.Run the following command to push
my-test-branch(including any changes) to the origin remote repository:$ git push origin my-test-branchEnsure you have logged in to the cluster at both command line and the console by using the login credentials presented to you when you installed the cluster. For example:
INFO Install complete!
INFO Run 'export KUBECONFIG=<your working directory>/auth/kubeconfig' to manage the cluster with 'oc', the OpenShift CLI.
INFO The cluster is ready when 'oc login -u kubeadmin -p <provided>' succeeds (wait a few minutes).
INFO Access the OpenShift web-console here: https://console-openshift-console.apps.demo1.openshift4-beta-abcorp.com
INFO Login to the console with user: kubeadmin, password: <provided>
Add GPU nodes to your existing cluster deployment by running the following command:
$ ./pattern.sh make create-gpu-machinesetNote: You may need to create a file
configin your home directory and populate it with the region name.- Run the following:
vi ~/.aws/config- Add the following:
[default]
region = us-east-1
Adding the GPU nodes should take about 5-10 minutes. You can verify the addition of these
g5.2xlargenodes in the OpenShift web console under Compute > Nodes.Install the pattern with the demo application by running the following command:
$ ./pattern.sh make installNote: This deploys everything you need to run the demo application including the Nividia GPU Operator and the Node Feature Discovery Operator used to determine your GPU nodes.
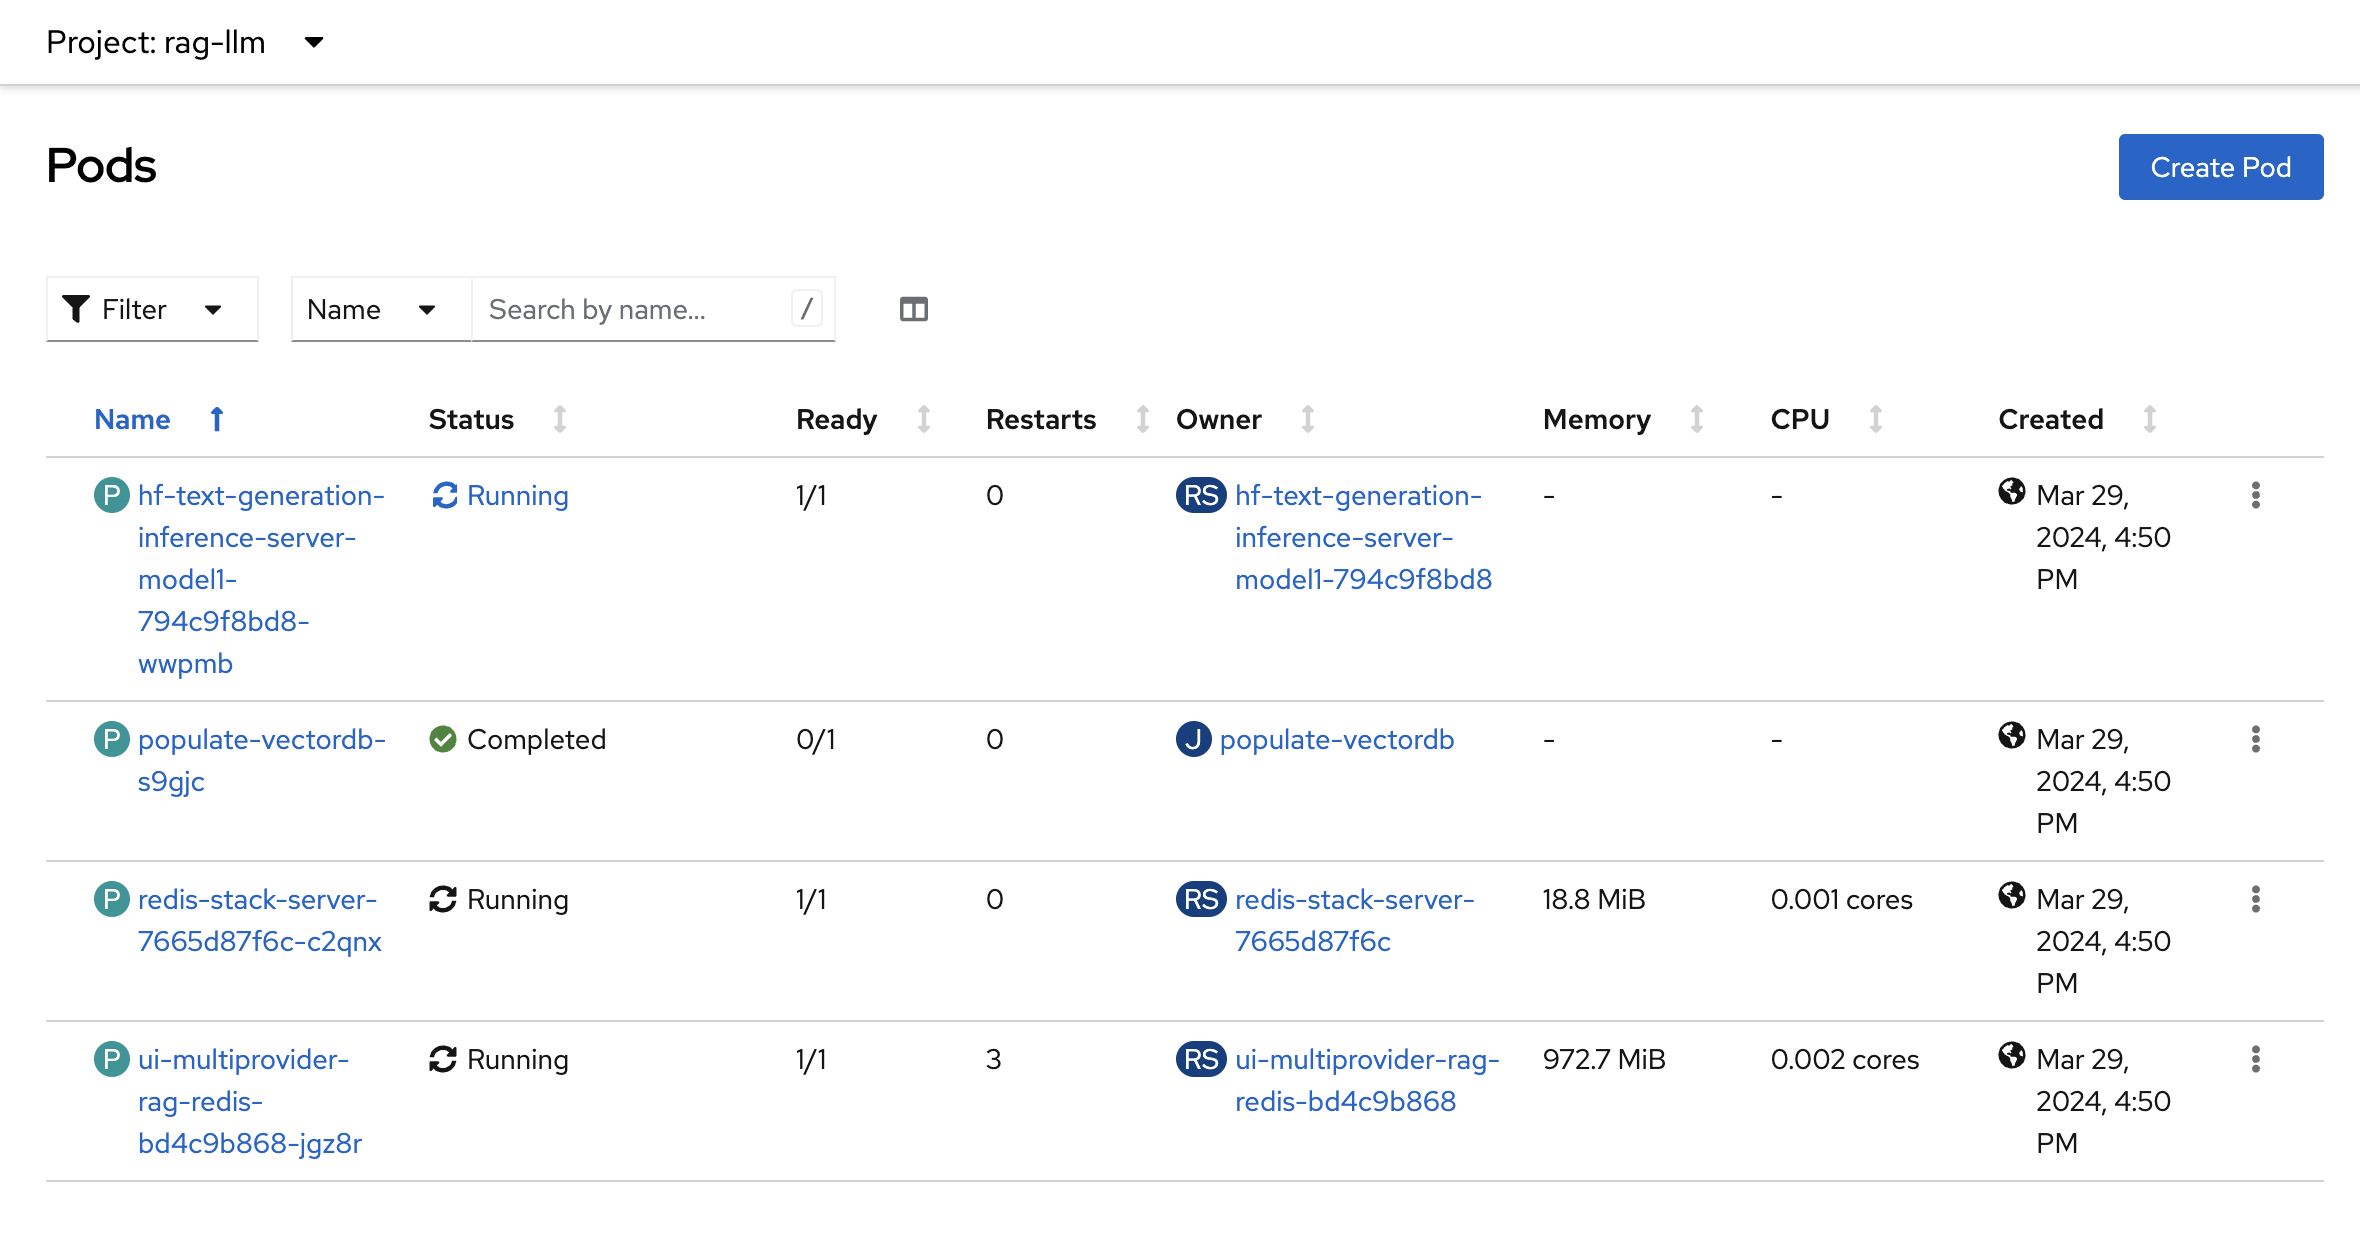
Verify the Installation
In the OpenShift web console go to the Workloads > Pods menu.
Select the
rag-llmproject from the drop down.Following pods should be up and running.
Launch the application
Click the
Application boxicon in the header, and selectRetrieval-Augmented-Generation (RAG) LLM Demonstration UI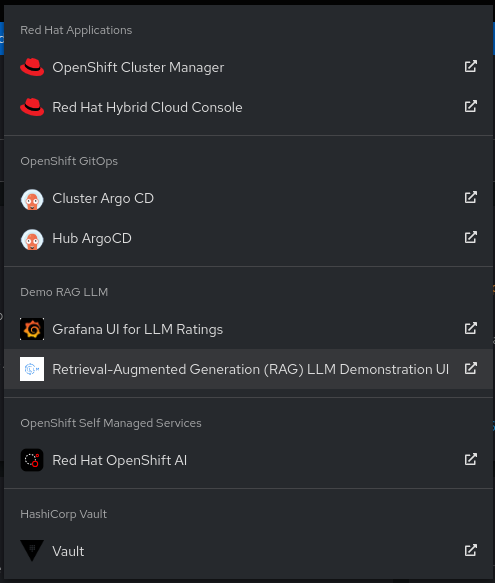
It should launch the application
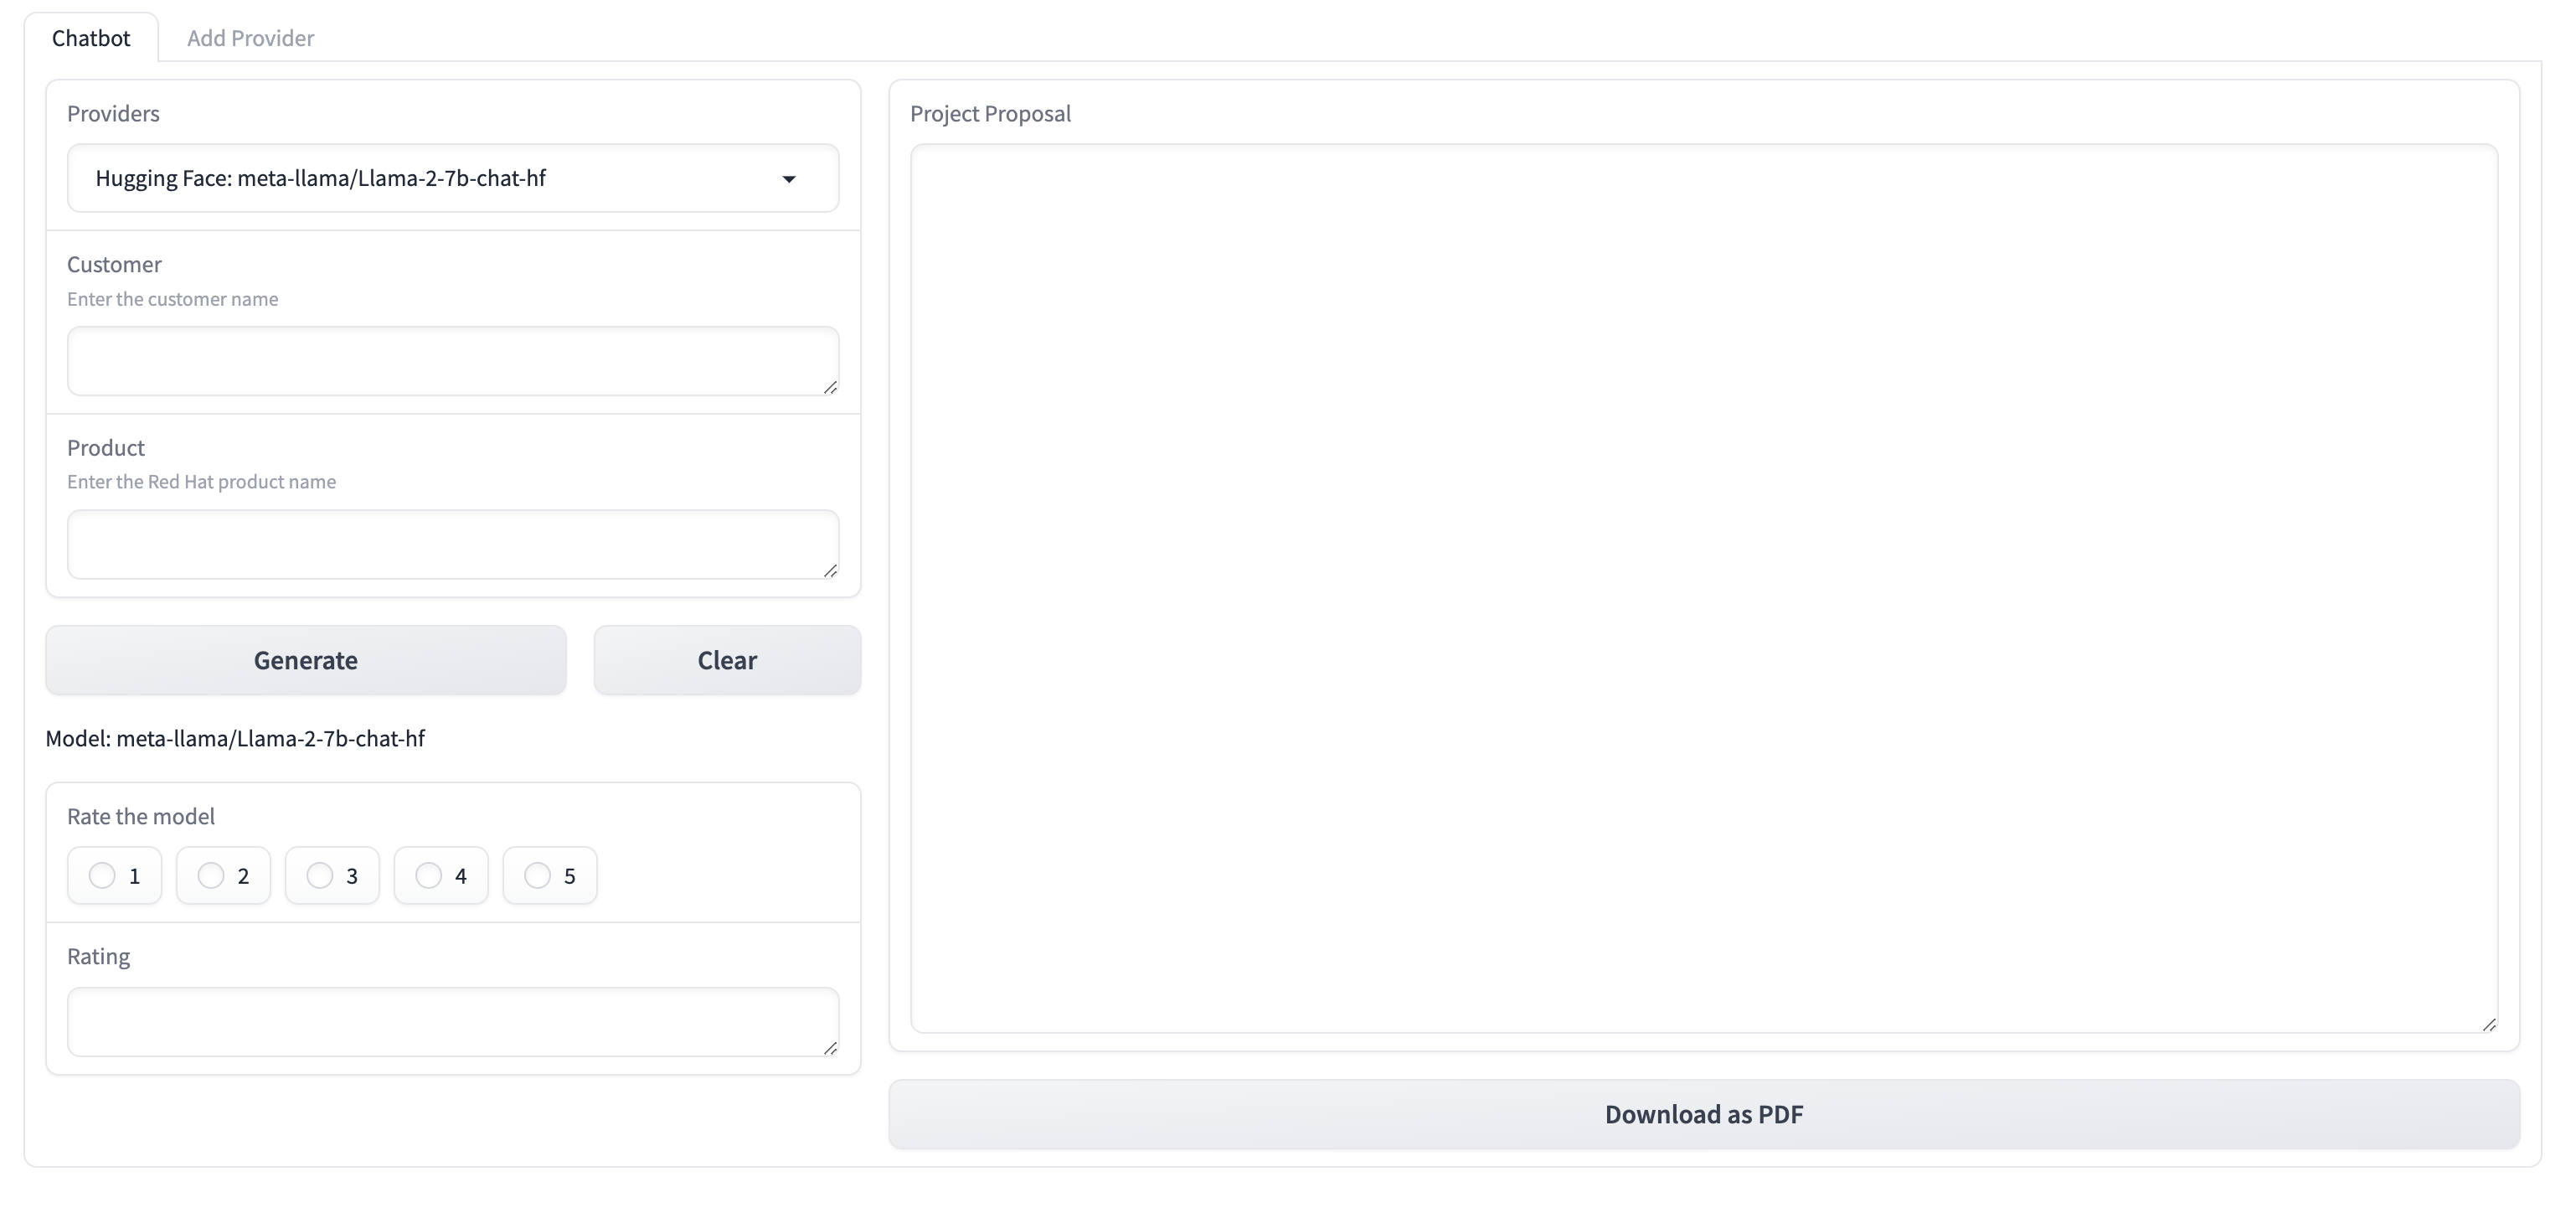
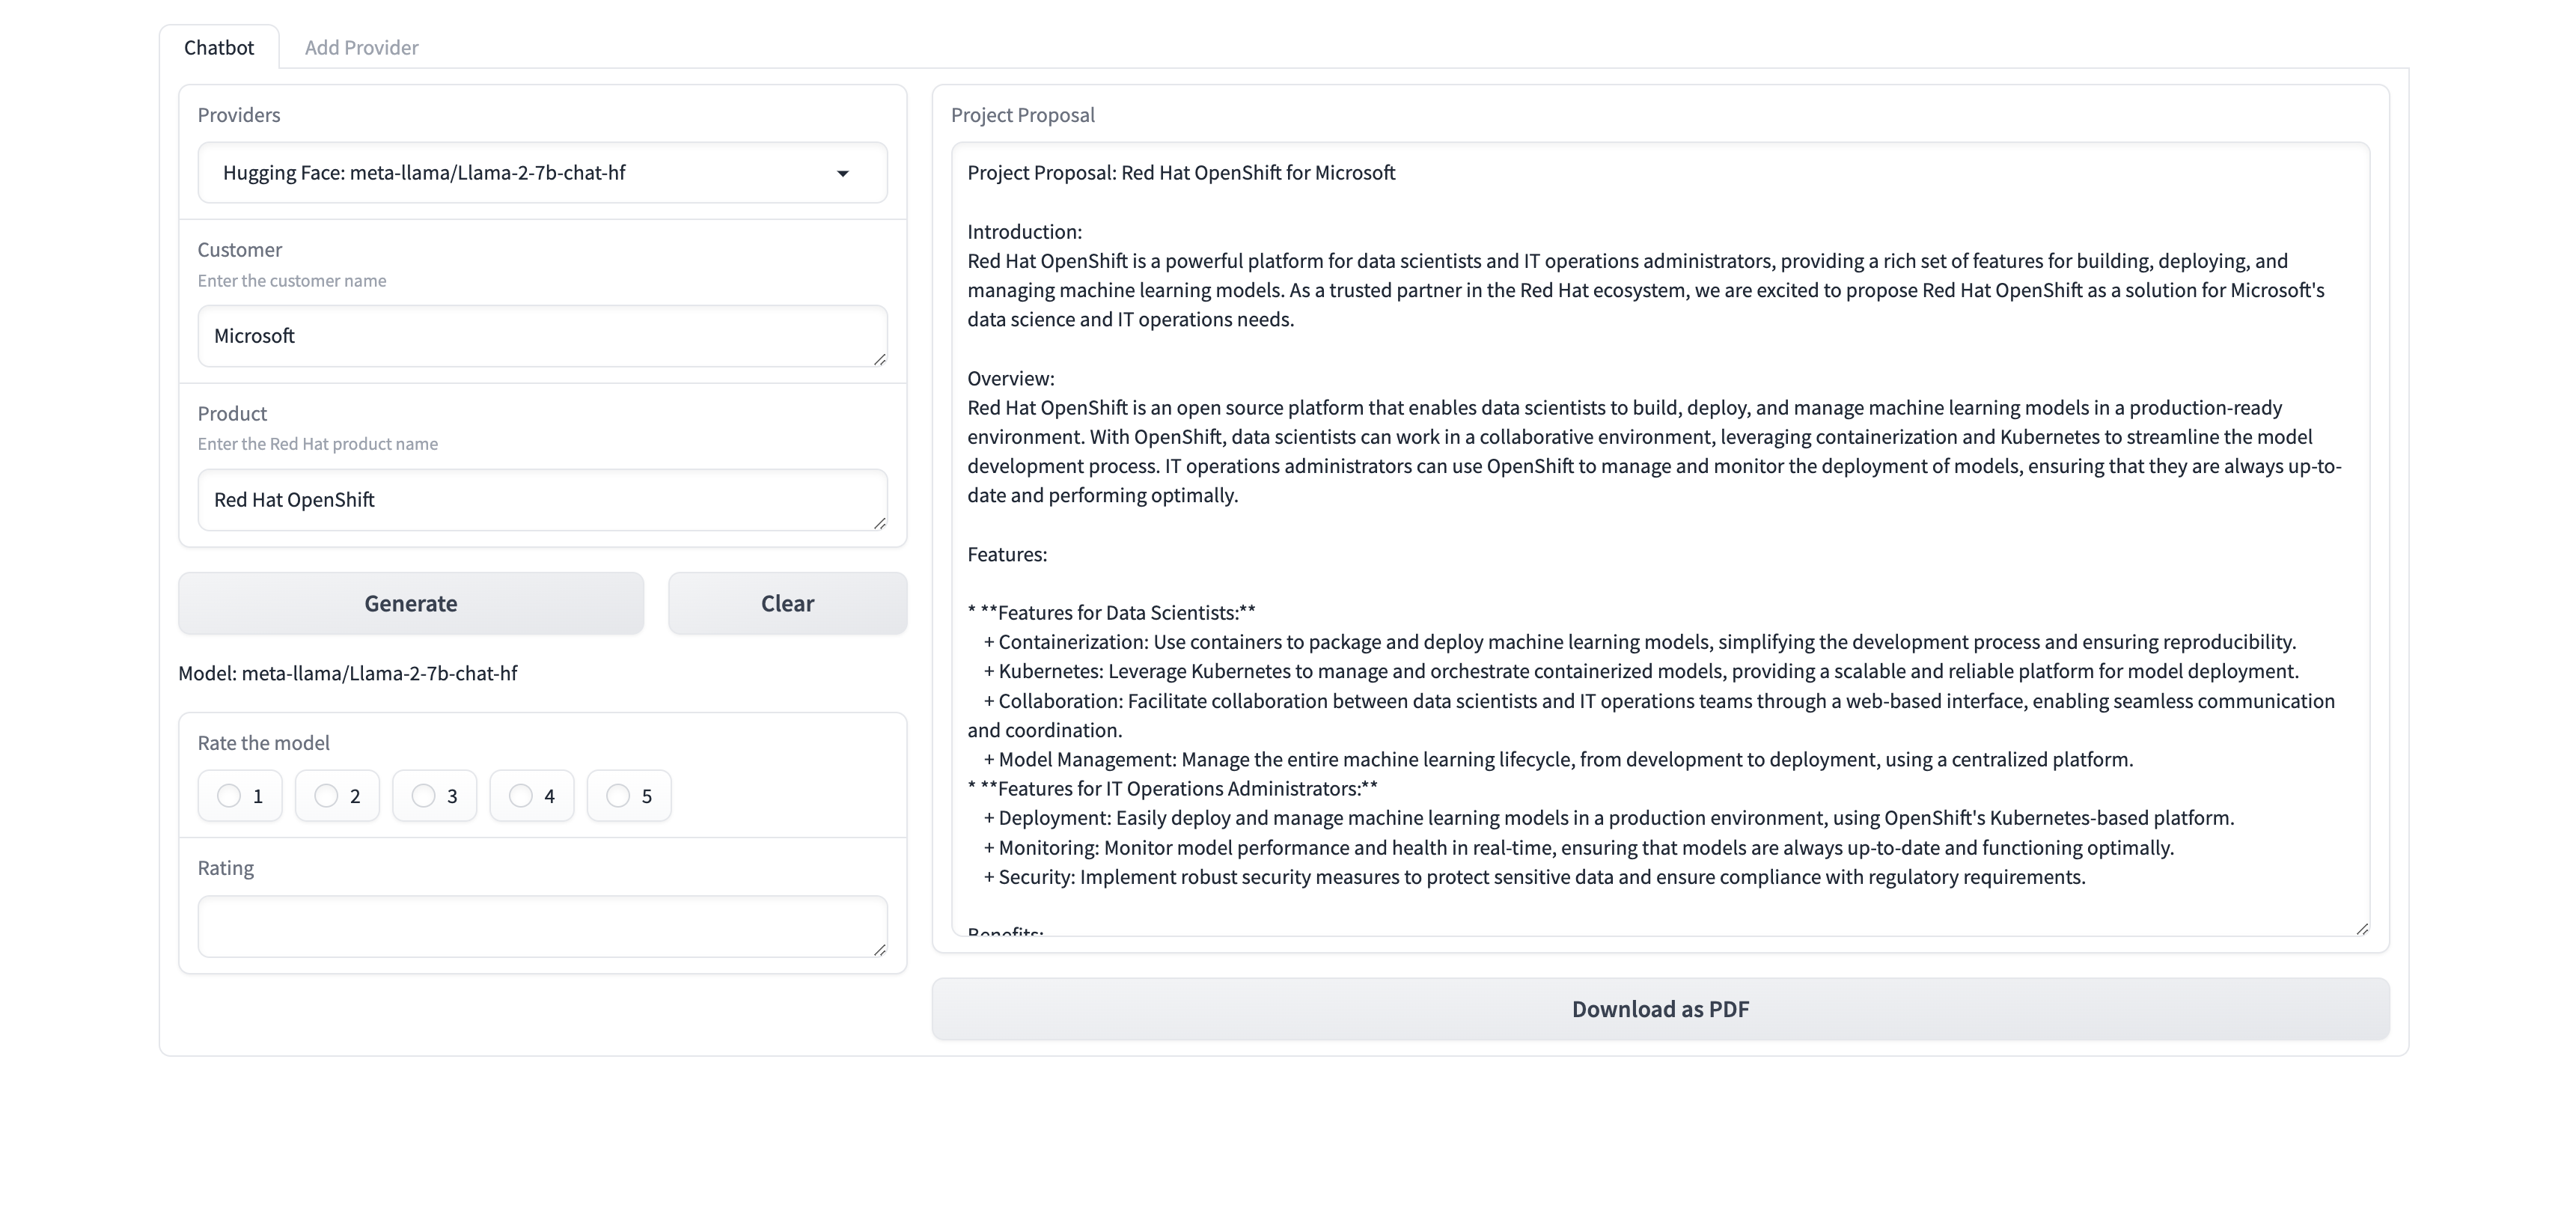
Generate the proposal document
The demo generates a proposal document using the default provider
Mistral-7B-Instruct; a model available on Hugging Face. It is a fine-tuned version of the baseMistral-7Bmodel.Enter any company name for example
Microsoft.Enter the product as
RedHat OpenShift AIClick the
Generatebutton, a project proposal should be generated. The project proposal also contains the reference of the RAG content. The project proposal document can be Downloaded in the form of a PDF document.