$ oc get storageclass -o custom-columns=NAME:.metadata.name,PROVISIONER:.provisioner,DEFAULT:.metadata.annotations."storageclass\.kubernetes\.io/is-default-class"Deploying the TravelOps pattern
Prerequisites
An OpenShift cluster
To create an OpenShift cluster, go to the Red Hat Hybrid Cloud console.
Select OpenShift -> Red Hat OpenShift Container Platform -> Create cluster.
The cluster must have a dynamic
StorageClassto provisionPersistentVolumes. Verify that a dynamicStorageClassexists before creating one by running the following command:Example outputNAME PROVISIONER DEFAULT gp2-csi ebs.csi.aws.com <none> gp3-csi ebs.csi.aws.com trueFor more information about creating a dynamic
StorageClass, see the Dynamic provisioning documentation.
Optional: A second OpenShift cluster for multicloud demonstration.
The use of this pattern depends on having at least one running Red Hat OpenShift cluster. However, consider creating a cluster for deploying the GitOps management hub assets and a separate cluster for the managed cluster.
If you do not have a running Red Hat OpenShift cluster, you can start one on a public or private cloud by using Red Hat Hybrid Cloud Console.
Procedure
Fork the travelops repository on GitHub.
Clone the forked copy of this repository.
$ git clone git@github.com:your-username/travelops.gitGo to your repository: Ensure you are in the root directory of your Git repository by using:
$ cd /path/to/your/repositoryRun the following command to set the upstream repository:
$ git remote add -f upstream git@github.com:validatedpatterns-sandbox/travelops.gitVerify the setup of your remote repositories by running the following command:
$ git remote -vExample outputorigin git@github.com:<your-username>/travelops.git (fetch) origin git@github.com:<your-username>/travelops.git (push) upstream https://github.com/validatedpatterns-sandbox/travelops.git (fetch) upstream https://github.com/validatedpatterns-sandbox/travelops.git (push)Create a local copy of the secret values file that can safely include credentials. Run the following commands:
$ cp values-secret.yaml.template ~/values-secret-travelops.yaml# A more formal description of this format can be found here: # https://github.com/validatedpatterns/rhvp.cluster_utils/tree/main/roles/vault_utils#values-secret-file-format version: "2.0" # Ideally you NEVER COMMIT THESE VALUES TO GIT (although if all passwords are # automatically generated inside the vault this should not really matter) secrets: - name: mysql-credentials vaultPrefixes: - global fields: - name: rootpasswd onMissingValue: generate vaultPolicy: validatedPatternDefaultPolicyDo not commit this file. Committing it may expose personal credentials to GitHub. If you do not want to customize the secrets, skip these steps. The framework generates a random password for the
config-demoapplication.Customize the deployment for your cluster by following these steps:
Create a new branch named my-branch and switch to it by running the following command:
$ git switch -c my-branchEdit the
values-hub.yamlfile to customize the deployment for your cluster by running the following command:$ vi values-hub.yamlStage the changes to the
values-hub.yamlfile by running the following commands:$ git add values-hub.yamlCommit the changes to the
values-hub.yamlfile by running the following commands:$ git commit -m "update deployment for my-branch"Push the changes to the
values-hub.yamlfile by running the following command:$ git push origin my-branch
Deploy the pattern by running
./pattern.sh make installor by using the Validated Patterns Operator.
Deploying the pattern by using the pattern.sh script
To deploy the pattern by using the pattern.sh script, complete the following steps:
Log in to your cluster by running the following:
Obtain an API token by visiting https://oauth-openshift.apps.<your-cluster>.<domain>/oauth/token/request
Log in with this retrieved token by running the following command:
$ oc login --token=<retrieved-token> --server=https://api.<your-cluster>.<domain>:6443
Alternatively log in by running the following command:
$ export KUBECONFIG=~/<path_to_kubeconfig>Deploy the pattern to your cluster by running the following command:
$ ./pattern.sh make install
Verify TravelOps Pattern installation
Verify that the Operators have been installed.
To verify, in the OpenShift Container Platform web console, navigate to Operators → Installed Operators page.
Set your project to
All Projectsand verify the operators are installed and have a status ofSucceeded.
Verify that all applications are synchronized. Under Networking → Routes with the project set to travelops-hub select the Location URL associated with the hub-gitops-server . All application are report status as
Synched.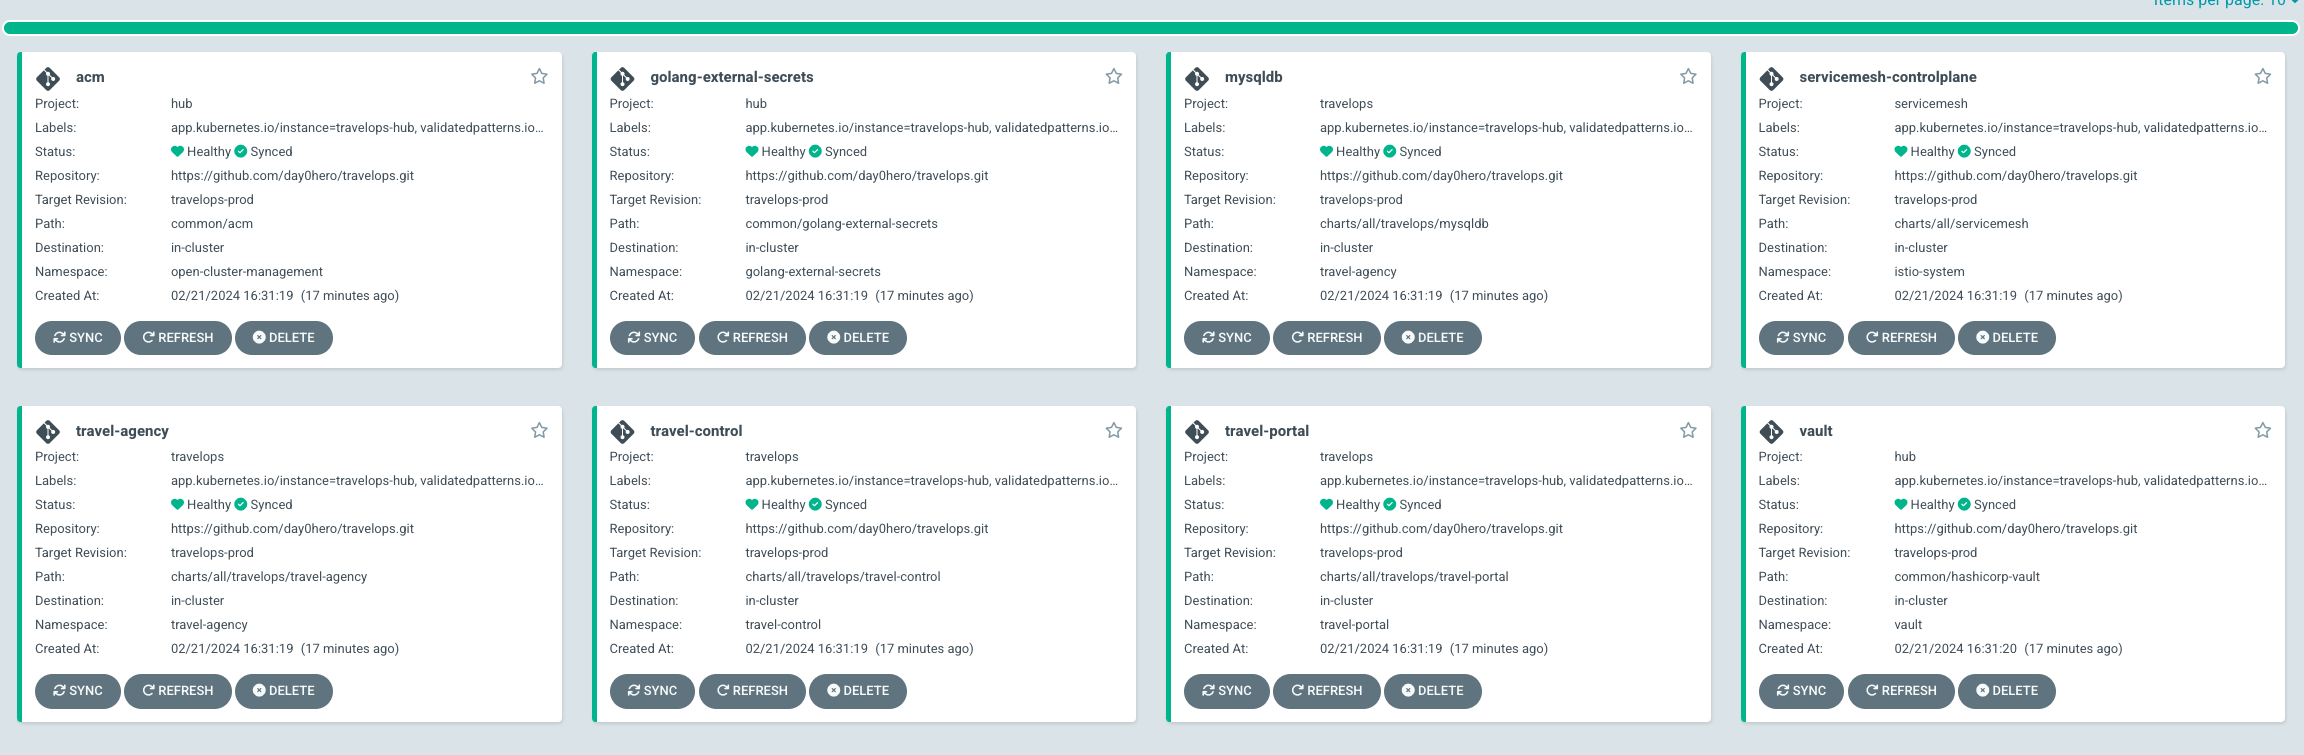
As part of this pattern, HashiCorp Vault has been installed. Refer to the section on Vault.

Verify installation by checking the TravelOps Dashboards
Access the Kiali control dashboards by running the following commands:
KIALI=https://$(oc get route -n istio-system kiali -o jsonpath='{.spec.host}')
echo ${KIALI}
Example outputhttps://kiali-istio-system.apps.<cluster_id>.<cluster_domain>Access the Travel Control dashboards by running the following commands:
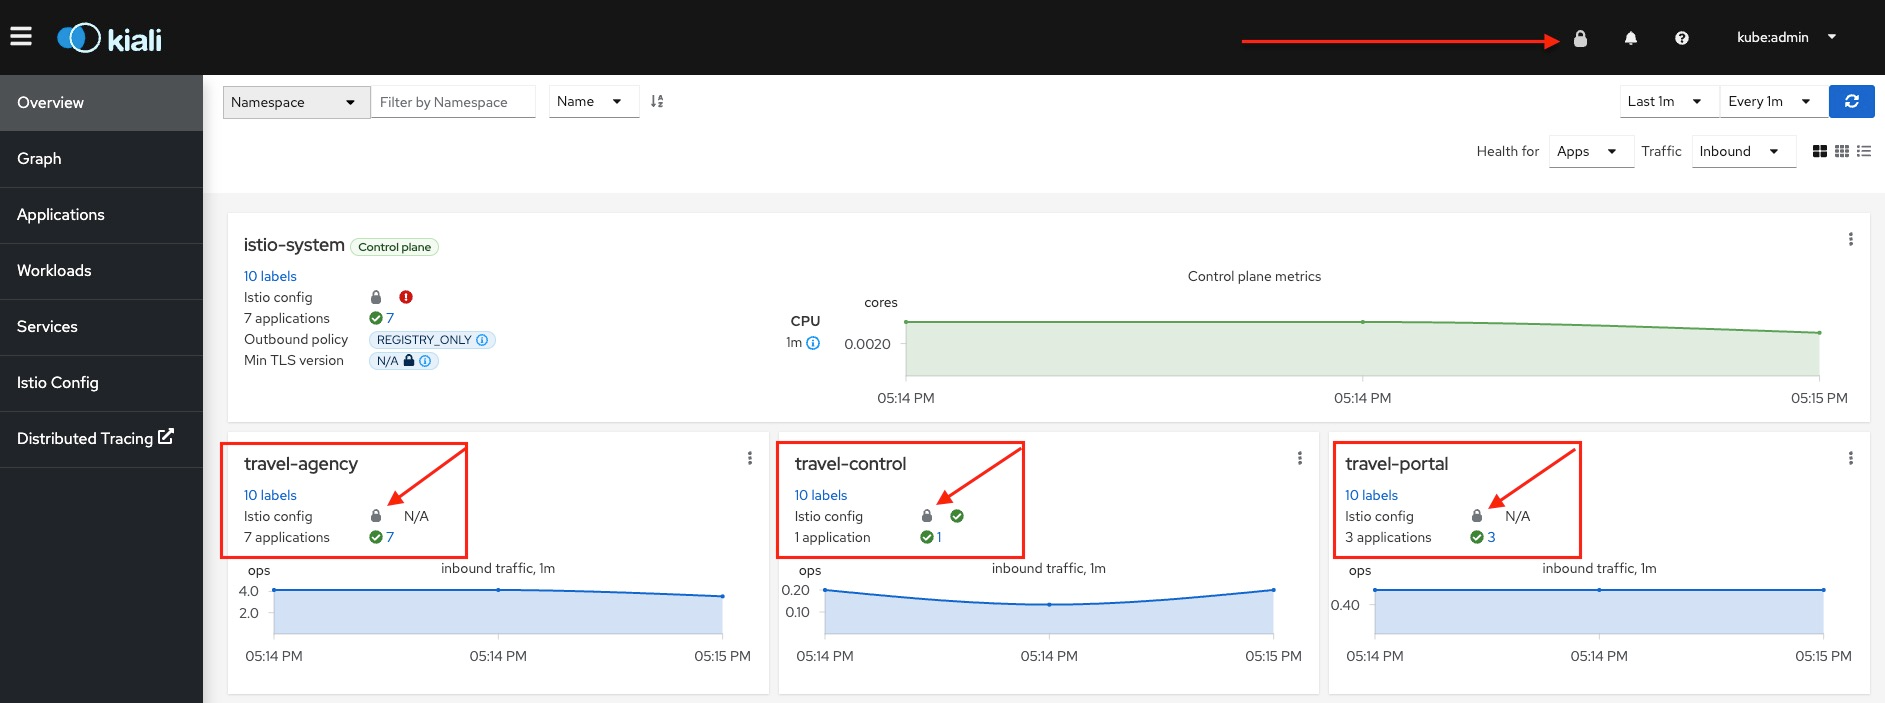
CONTROL=http://$(oc get route -n istio-system istio-ingressgateway -o jsonpath='{.spec.host}')
echo ${CONTROL}
When we see the 🔒 icon next to our applications and in the top right hand corner of the dashboard it confirms that mTLS is enabled and active in the mesh.
The "🔒" is present next to the logged in user in top right corner of the window.
7 applications in the
travel-agencytile with the "🔒" next toIstio config1 application in the
travel-controltile with the "🔒" next toIstio config3 applications in the
travel-portaltile with the "🔒" next toIstio config
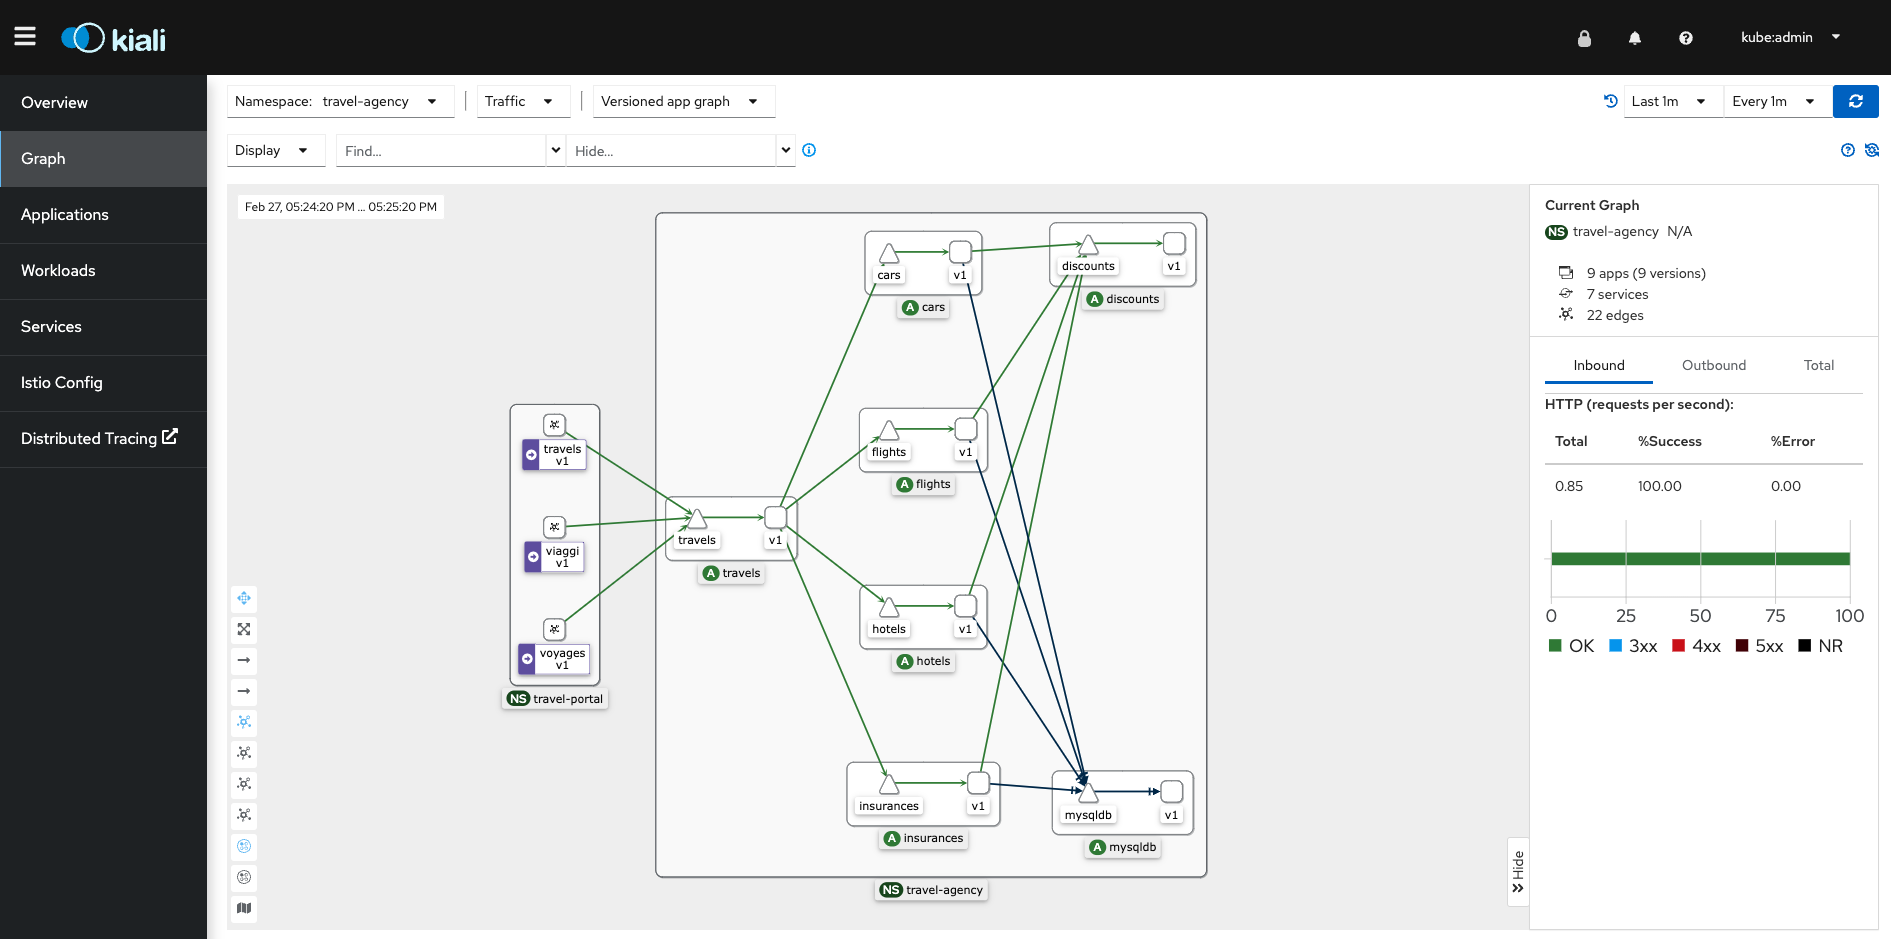
Review your Kiali dashboard

Review Travel Agency Application Graph
In the Kiali dashboard you can see how all of the various components interact with each other within the service mesh. Just to get a glimpse of what we are able to see let’s take a look at the applications and services in the travel-agency namespace.
In the left hand menu:
Cilck Graph.
In the
Namespacedropdown, selecttravel-agency.Exit the menu
You should see all of the deployments and services that make up the travel-agency application.
+
Next Steps
See Ways to customize the Mesh for some ideas on how to customize the pattern.
